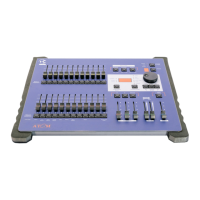
maXim Operator Manual Quick Start Tutorial
LSC Lighting Systems (Aust) Pty. Ltd. Page 16 of 66
at the same time. If you fully fade OUT before commencing your IN fade, then the stage will dip to
black between the two looks. The most pleasing crossfades are often accomplished by starting with
the IN fade, then commencing the OUT fade when the incoming look is just starting to become visible
on stage.
TIMED FADES BETWEEN BANKS
The fades that you have been performing on the Red and Yellow masters have been “manual”
fades. That is, they have directly followed the actual positions of the Red and Yellow masters. The
speed that you move the fader determines the time of the fade. This is because the IN and OUT
time faders were set to 0 seconds. You can accurately control the IN time and the OUT time of
these fades by using the IN and OUT time faders to set the required durations. By default, the IN
and OUT time faders control the fade times of the Bank masters. Fixed fade times may also be set
via the [select] button.
When a Master is moved in an upward direction, the fade will always progress toward the current
position of that Master at a rate determined by the IN time. When a Master is moved in a downward
direction, the fade will always progress toward the current position of that Master at a rate
determined by the OUT time. If the IN time is set to say 5 seconds, and a Master is quickly faded
from fully down to fully up, then the actual fade up will take 5 seconds. If you do not bring the
Master fully up, then the fade will only fade up to the level of the Master and then stop. If the Master
was only faded up half way, and the IN time was set to 5 seconds, then the fade up would reach
the Masters position and stop in 2.5 seconds.
The manual fades that you performed earlier were achieved by simply setting the IN and OUT time
faders to a time of 0 seconds. At 0 seconds, the fades will instantly follow the position of the Bank
masters.
When a Time fader is moved, the display automatically shows its setting.
Set the IN time fader to 3 seconds and the OUT time fader to 5 seconds.
Hint: To check the current time settings of the Time faders, press the [FUNCTION] button. When
pressed during normal operations, it causes the display to momentarily show the current time IN or
OUT settings of the time faders whilst it is held down. Subsequent presses will toggle between the
two time settings.
Quickly perform a crossfade between the Red and Yellow masters. The INcoming bank fades up in
3 seconds whilst the OUTgoing bank fades down in 5 seconds.
Notice that the LED's in the F/A buttons for the Red and Yellow masters flash whilst the crossfade
is occurring. The flashing indicates that a timed fade is in progress.
Note: Bank masters, Playbacks and the Grab master all flash their FLASH/ASSIGN buttons when they
have a timed fades in progress. This flashing is especially useful when a LONG fade time is being
executed, because the physical position of a master does not necessarily represent the actual level of
the masters output. If you have some unexplained output from the maXim, check to see if any
master's FLASH/ASSIGN button is flashing, indicating that a timed fade is in progress.
All of the “looks” that you have created have been made on a “one off” basis. That is, they have not
been recorded into the memory of the maXim. If you needed to re-use a look that you had
previously created, then you need to take a note all of the channels and their respective levels
together with the fade times (if any), and then manually setup the faders for the look and fade
times.
The maXim allows you to “RECORD”, (also known as “store” or “program” on other manufacturers
desks), any of the looks and fade times that you create. When you record a look it is known as a
Scene and it may be replayed from memory.
5.3 RECORDING A SCENE
Scenes are created on the maXim by establishing the lighting look that you require on the OUTPUT
and then recording this look into the memory in a selected bank (red or blue), page (1 to 9) and
scene number (1 to 12, 24, 36 ,48, 60).
Note; Recording a scene in a different page of memory is not covered in this “QUICKSTART
TUTORIAL”. See the “MEMORY STRUCTURE” and “SCENES” chapters for details.