Lighting Relay Panel
Controller User’s Guide
www.lumisys1.com
Due to continuous product improvement, Lumisys reserves the right to change product specications without notice.
Page 29
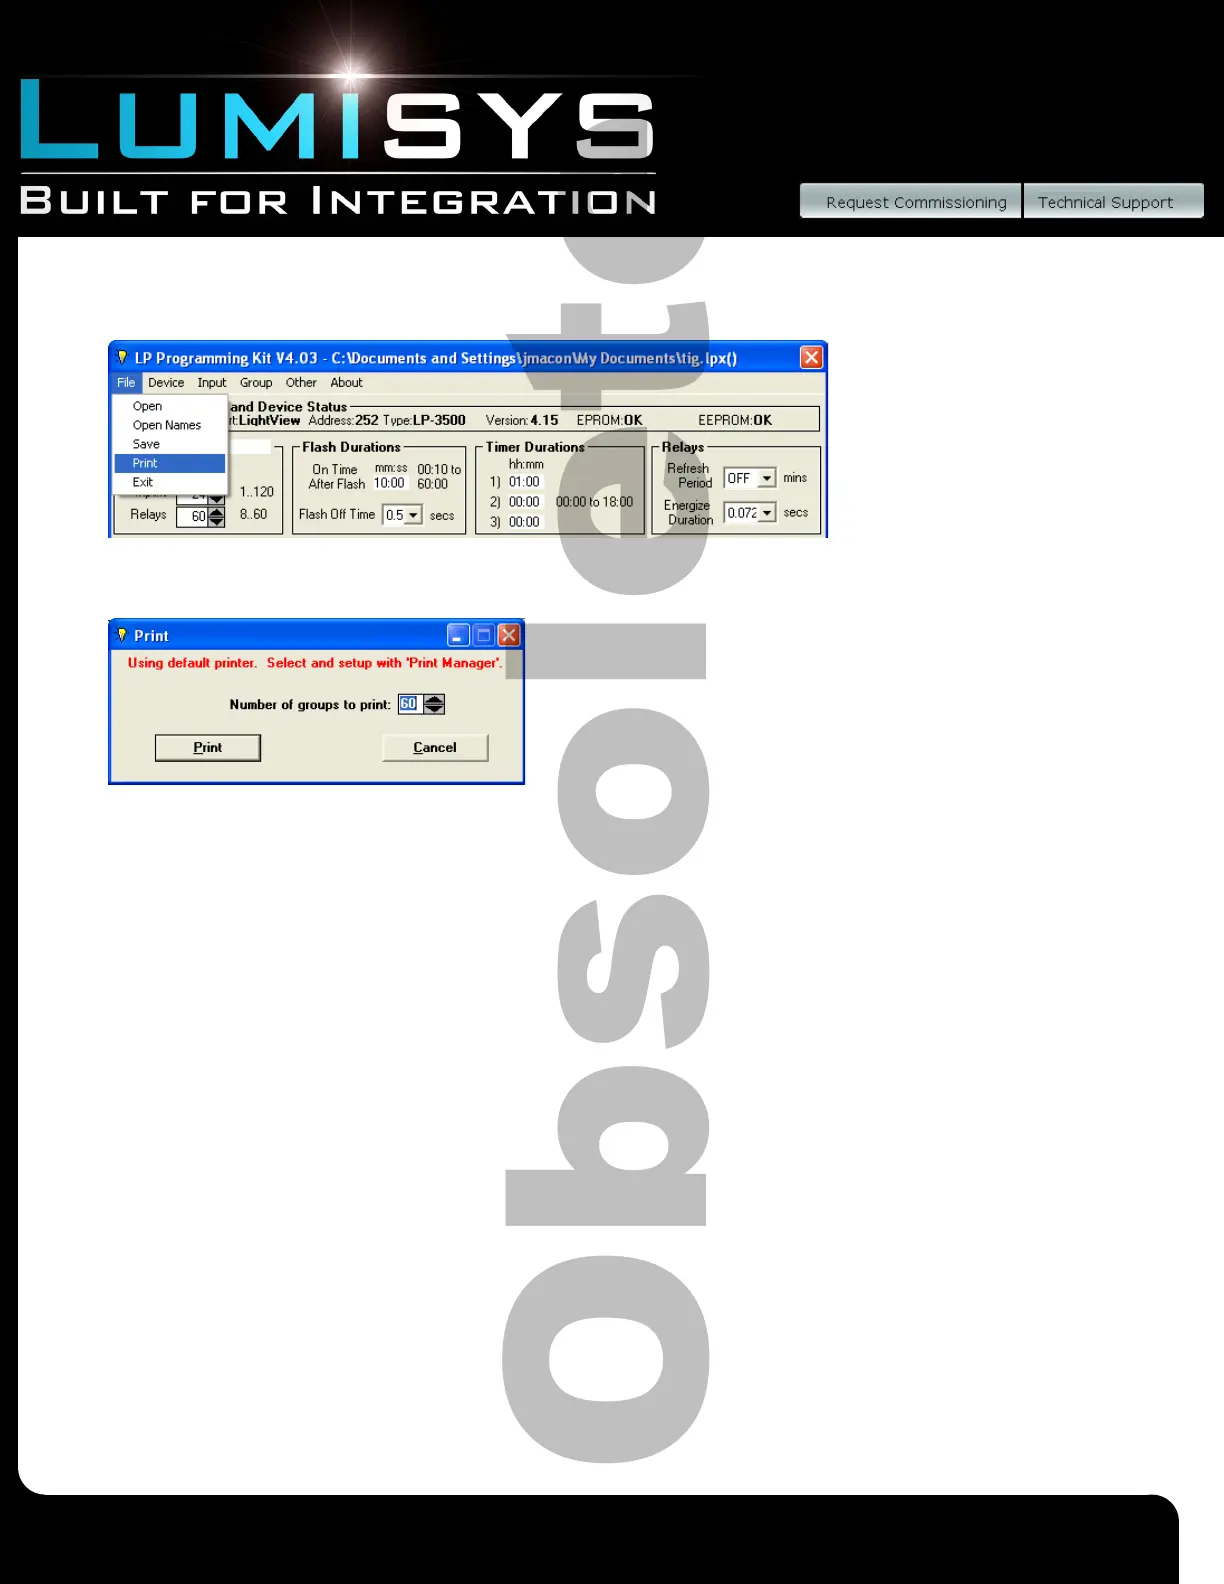
Print LRP Controller Database
1) Select “File” drop down menu “Print” to print LRP Controller database.
2) Select the desired number of lighting zones between 1 and 60 (older systems
only allow 30 zones), in increments of 1. You may type in the number or use the scrollbars for the desired number of
lighting zones. A lighting zone is defined as one or more relays and is set in “Zone Info”.
3) Select “Print” to print desired lighting zones.
4) Select “Cancel” to cancel print selection and return to the “Main Screen”.
*NOTE: We recommend you keep a print out of LRP Controller data for your les.
Troubleshooting the LRP Controller
Be sure to check LUMISYS’ web site www.LUMISYS1.com for latest troubleshooting support.
Outputs Will Not Turn On
• Verify power is connected to the LRP Controller. There should be LEDs illuminated.
• Verify there is at least 24 VAC present to the secondary of the transformer supplying power to the LRP Controller. Use
a voltmeter to check the power.
• Check to see if Maintained input priority for the group to that is not responding to control commands is not set to
Maintained Off Priority or Maintained On/Off Priority.
• Verify that the output ribbon cable connector is properly seated.
• Press the OVER (or CH) pushbutton to see if all the relays will turn on. If so, then the output portion of the
LRP Controller is operating properly.
• Verify that the connector to output (relay or Circuit breaker) is properly seated. Inputs don’t turn groups on
• Use LP-PK to verify that the LRP Controller sees the input change state. Use an alligator clip or shorting wire to test
the input terminal by shorting the input to “G”. An X should appear on the LP-PK View Input State screen.
• Verify the input jumpers are in the correct location.
• Verify the input device is operating properly.
 Loading...