Page 32
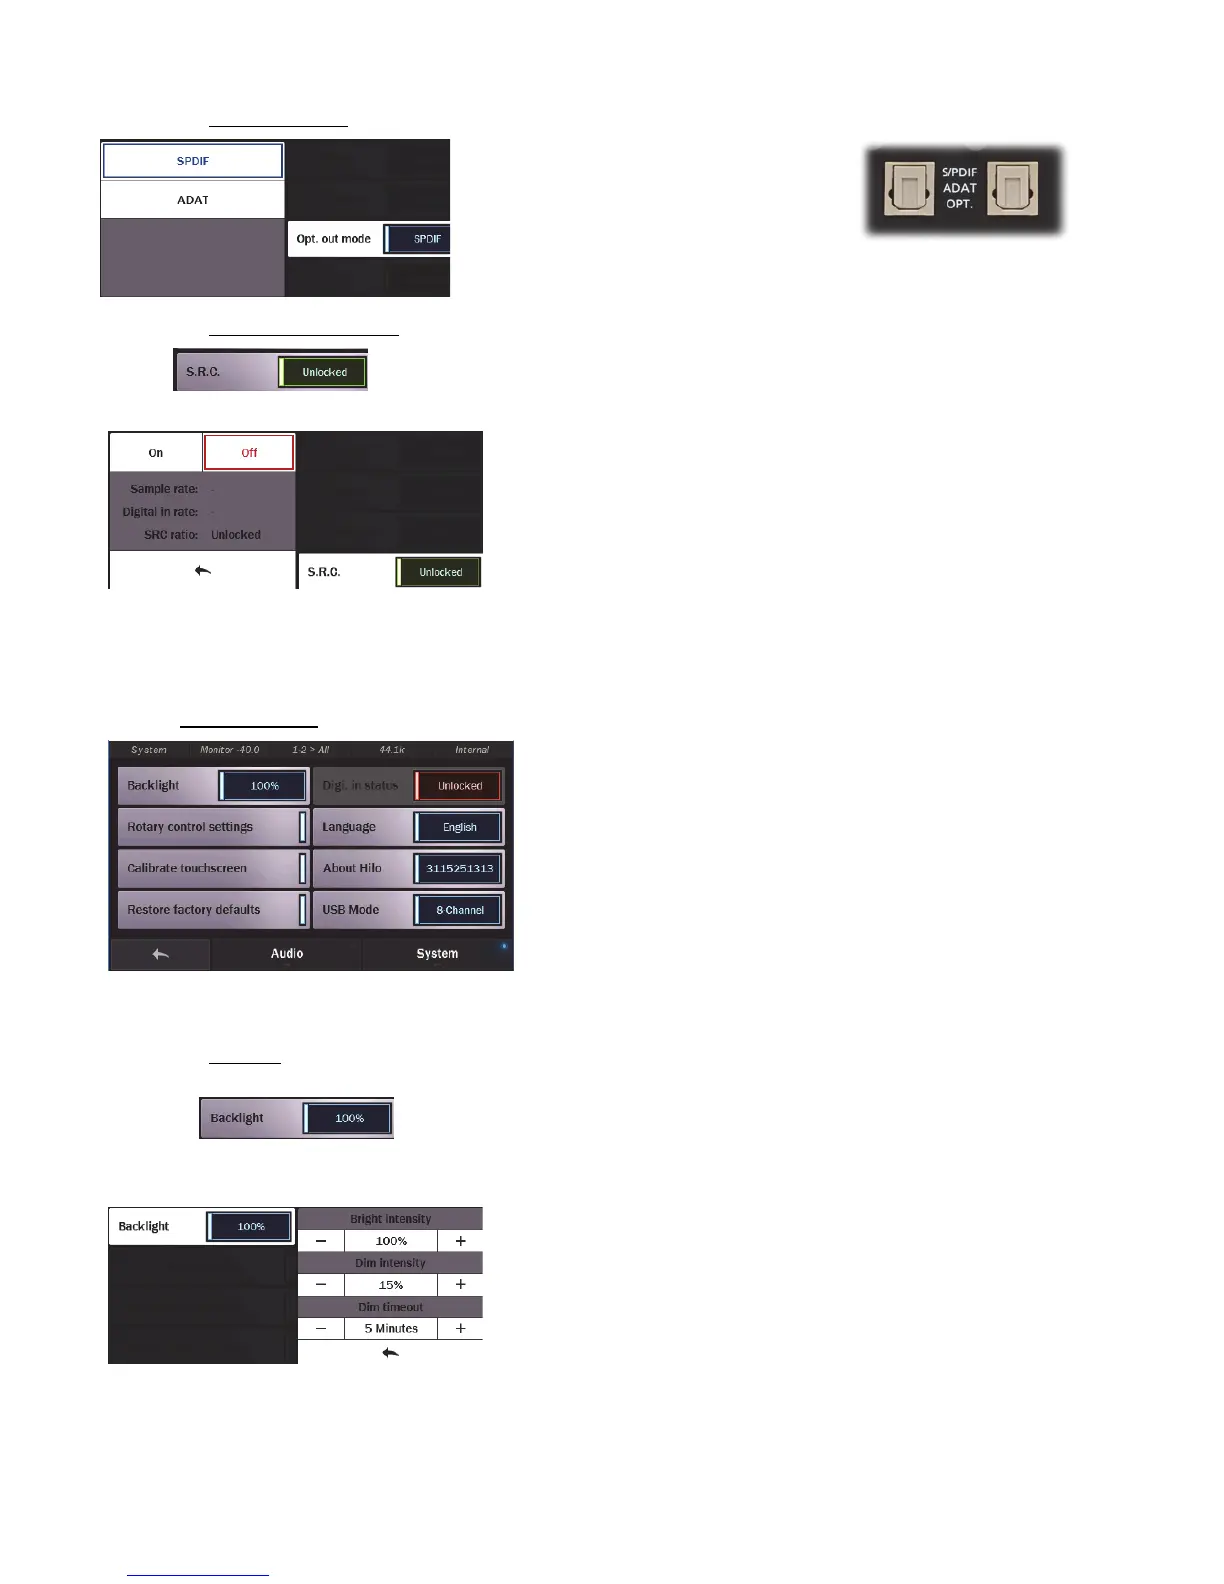
5.3.7.1.1 Optical Out Mode
Hilo’s Optical inputs and outputs can be used for
either stereo SPDIF operation, or 8 channel ADAT
operation (at 48 kHz). Hilo also supports the
S/MUX protocol for ADAT Light pipe operation at
higher sample rates. The ADAT Ports support 4-
channels at sample rates of 88.2/96 kHz. Sample
rates of 176.4/192kHz are not supported for ADAT
S/MUX.
Output on Right.
5.3.7.1.2 Sample Rate Conversion
Hilo features a powerful Sample Rate Converter for the AES and SPDIF Inputs.
When active, the onboard SRC processor can support conversion ratios up to 16:1
with 144 dB dynamic range and -140dB THD+N. The SRC will convert signals on
the active Digital Input up or down to the current Sample Rate.
When the Sample Rate Converter button is tapped, SRC can be
switched on or off, and information about the current sample rate,
digital in rate, and the ratio of conversion, will be displayed if
applicable.
Note: even if the Current Rate and Digital In rate are the same, sometimes it is useful to have SRC engaged so that the signal
streaming to the digital input can be re-clocked. This is a useful state for digital devices that do not have the option to be a clock slave.
The SRC Mode is OFF by default. When devices are connected to the Hilo digital inputs and valid clock synchronization is
established between them, then it is not necessary to turn SRC ON.
5.3.7.2 Settings: System
Here’s where the user can perform quite extensive customization of Hilo’s operational parameters. Things that really adapt the device
to your manner of working. As with the audio page, there are 8 selections here:
5.3.7.2.1 Backlight
The Backlight button allows the user to adjust Hilo’s appearance by using the
onscreen faders or Rotary control. The value displayed in the button, is the
percentage of brightness that the Hilo display is set to. Pressing the button
reveals the following options:
Bright intensity: Adjust Hilo’s brightness intensity in a range of 5% to
100% in 1% increments - ideal for adapting to a variety of ambient light
conditions.
Dim intensity: Hilo defaults to dimming its’ display after 5 minutes of
inactivity. You can adjust the percentage of dimming that will take
place when auto-dim kicks in, from completely black, to full brightness,
as well as:
Dim timeout: this determines how long of a period of inactivity before
Auto-Dim will be activated. Choose in increments between 15 seconds
and 5 minutes, or set to Never.
These parameters can be adjusted by using the onscreen increment/decrement
buttons, or the Rotary control.
When the screen dims, Hilo will return to the established Brightness Intensity by touching the screen, moving or pressing the Rotary
Control or pressing the front panel Power Switch.