Page 42
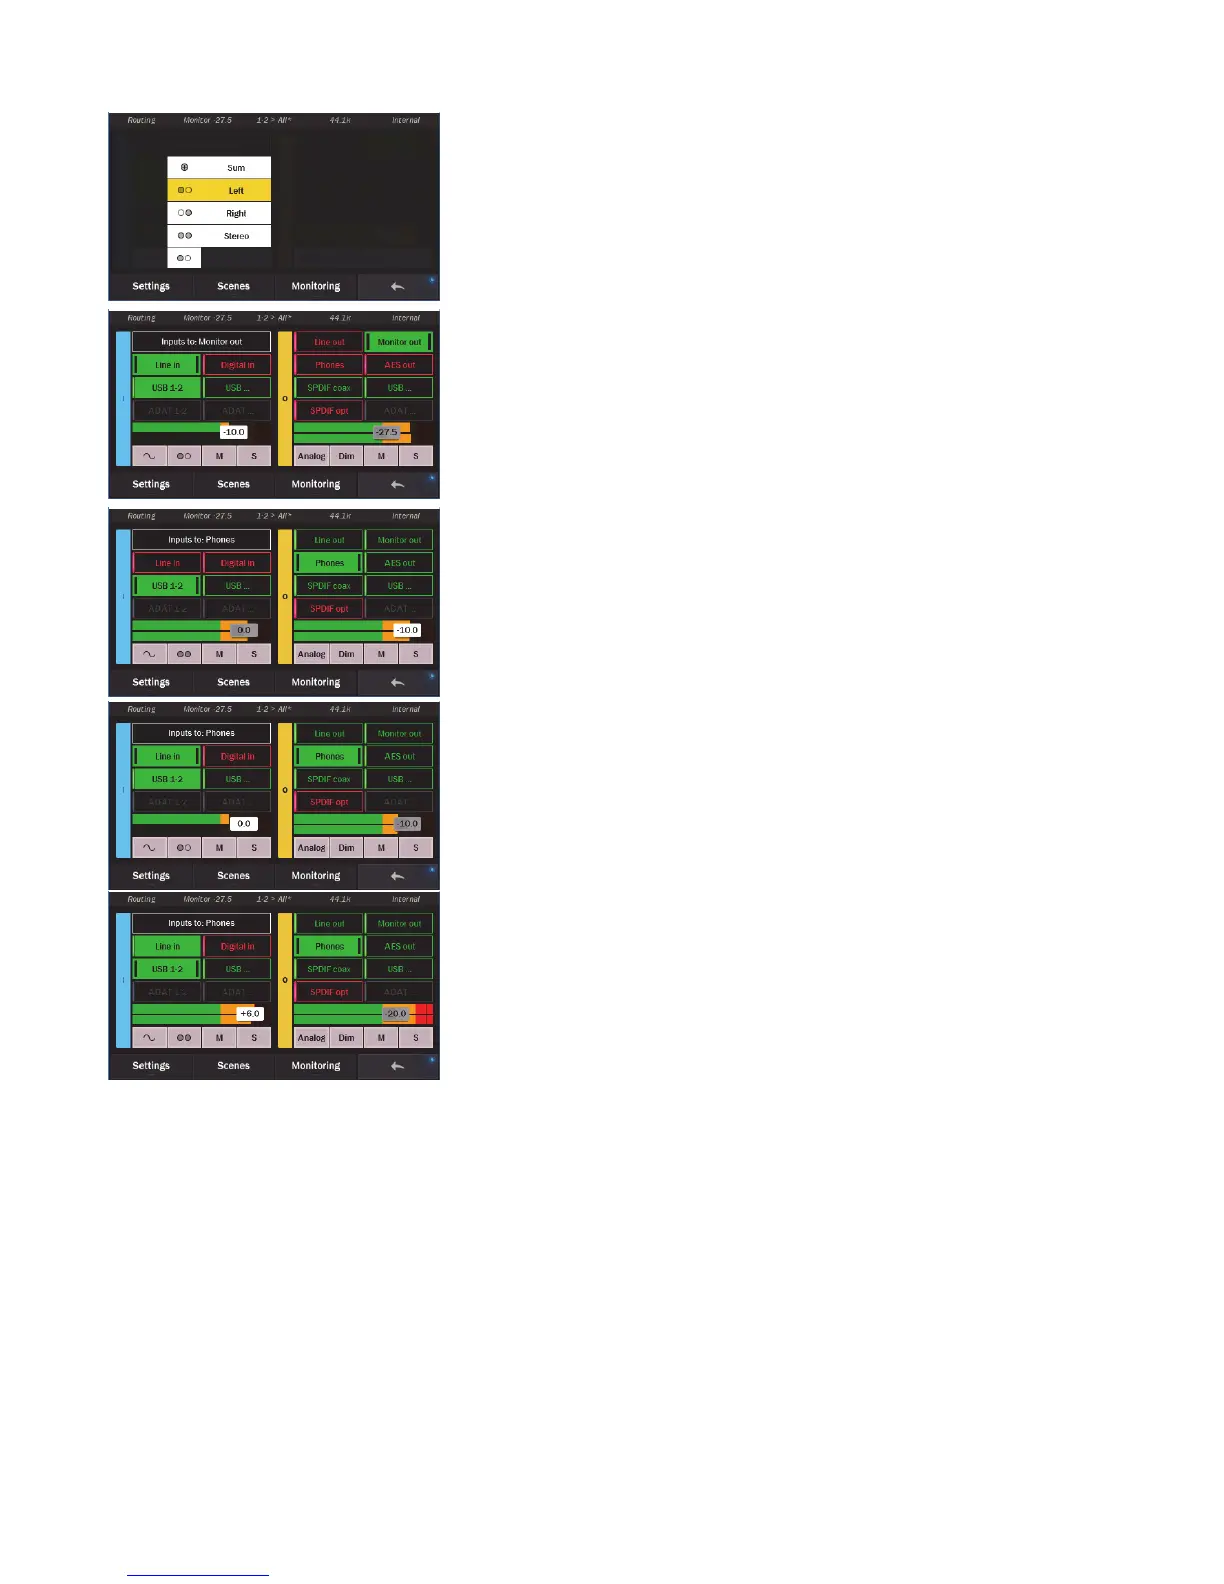
The engineer wishes to hear the guitar part in the center of the stereo field, rather
than hard left, so we click the MONITORING MODE button and choose “Left” -
since the signal is coming in from the left line input. Now the guitar sounds like it is
panned in the center.
The guitar level is a bit hot compared to the mix. Let’s attenuate the Line In signal
by 10dB.
Now let’s pull up the Phones Out to adjust the performer’s levels. Again, USB Play
1&2 is pre-assigned as a source. We’ll start with a Phones level of -10.
Now we’ll add Line In, so the performer can hear their input signal. Again, we’ll set
the Monitoring Mode to “left” so their input signal is panned center in the
headphones.
This performer likes the levels of the backing tracks louder, but the overall level
down a bit, so we’ll nudge the USB Play source signal up by 6dB, and attenuate the
Phones output by 10dB.
Now the performer and engineer each have their own monitor mix. We’re ready to record, keeping in mind that the signals from the
Line In will appear in the DAW software as Record 1.
As you can see, using variations on the sequence described above, one can easily integrate outboard processors, and other sound
sources into a recording session and maintain complete control over who hears what, and how loud each element will be.