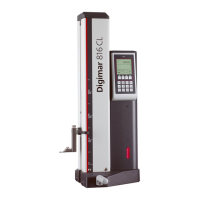
Mahr GmbH, Digimar 817 CLT
21
4.4 Zero point on the measuring plate
• Press the
button in the menu bar of the
user interface.
If other workpiece zero points have already
been set, the button of the current zero
point will appear in the menu bar. In this
case, press this button.
•
Press the button in the function key bar
of the user interface.
•
The probe automatically moves onto
the measuring plate and assumes the
contacted position as the zero point.
Any zero points previously set (01, 02
and03 as well as Preset) are automatically
deleted during this process.
4.5 Workpiece zero point
•
Contact the surface whose position is to be
used as the zero point.
• Press the
button in the menu bar of the
user interface.
If other workpiece zero points have already
been set, the button of the current zero
point will appear in the menu bar. In this
case, press this button.
•
Press the button for the zero point to be set
in the function key bar:
Zero point 01 workpiece
Zero point 02 workpiece
Zero point 03 workpiece
• Press the
button in the menu bar to set
the workpiece zero point.
4.6 Zero point offset
The measuring range of the height measuring
instrument can be extended with a zero point
offset. For example, the height 150.00mm
can be assigned to a position of 50,00mm
with a zero point offset of 100.00mm, i.e. the
measuring range shifts by 100mm.
• Press the
button in the menu bar of the
user interface.
If other workpiece zero points have already
been set, the button of the current zero
point will appear in the menu bar. In this
case, press this button.
•
Press the button in the function key bar
of the user interface.
•
The "PR" input box and a dialog box with
numerical keypad are displayed in the
information area of the user interface.
•
Enter the value of the zero point offset
using the numerical keypad and press the
button in the menu bar to accept the
entered value.
•
The measuring range is extended by the
entered value.
 Loading...