9
10
11
Removing and installing pistons with conrods
120
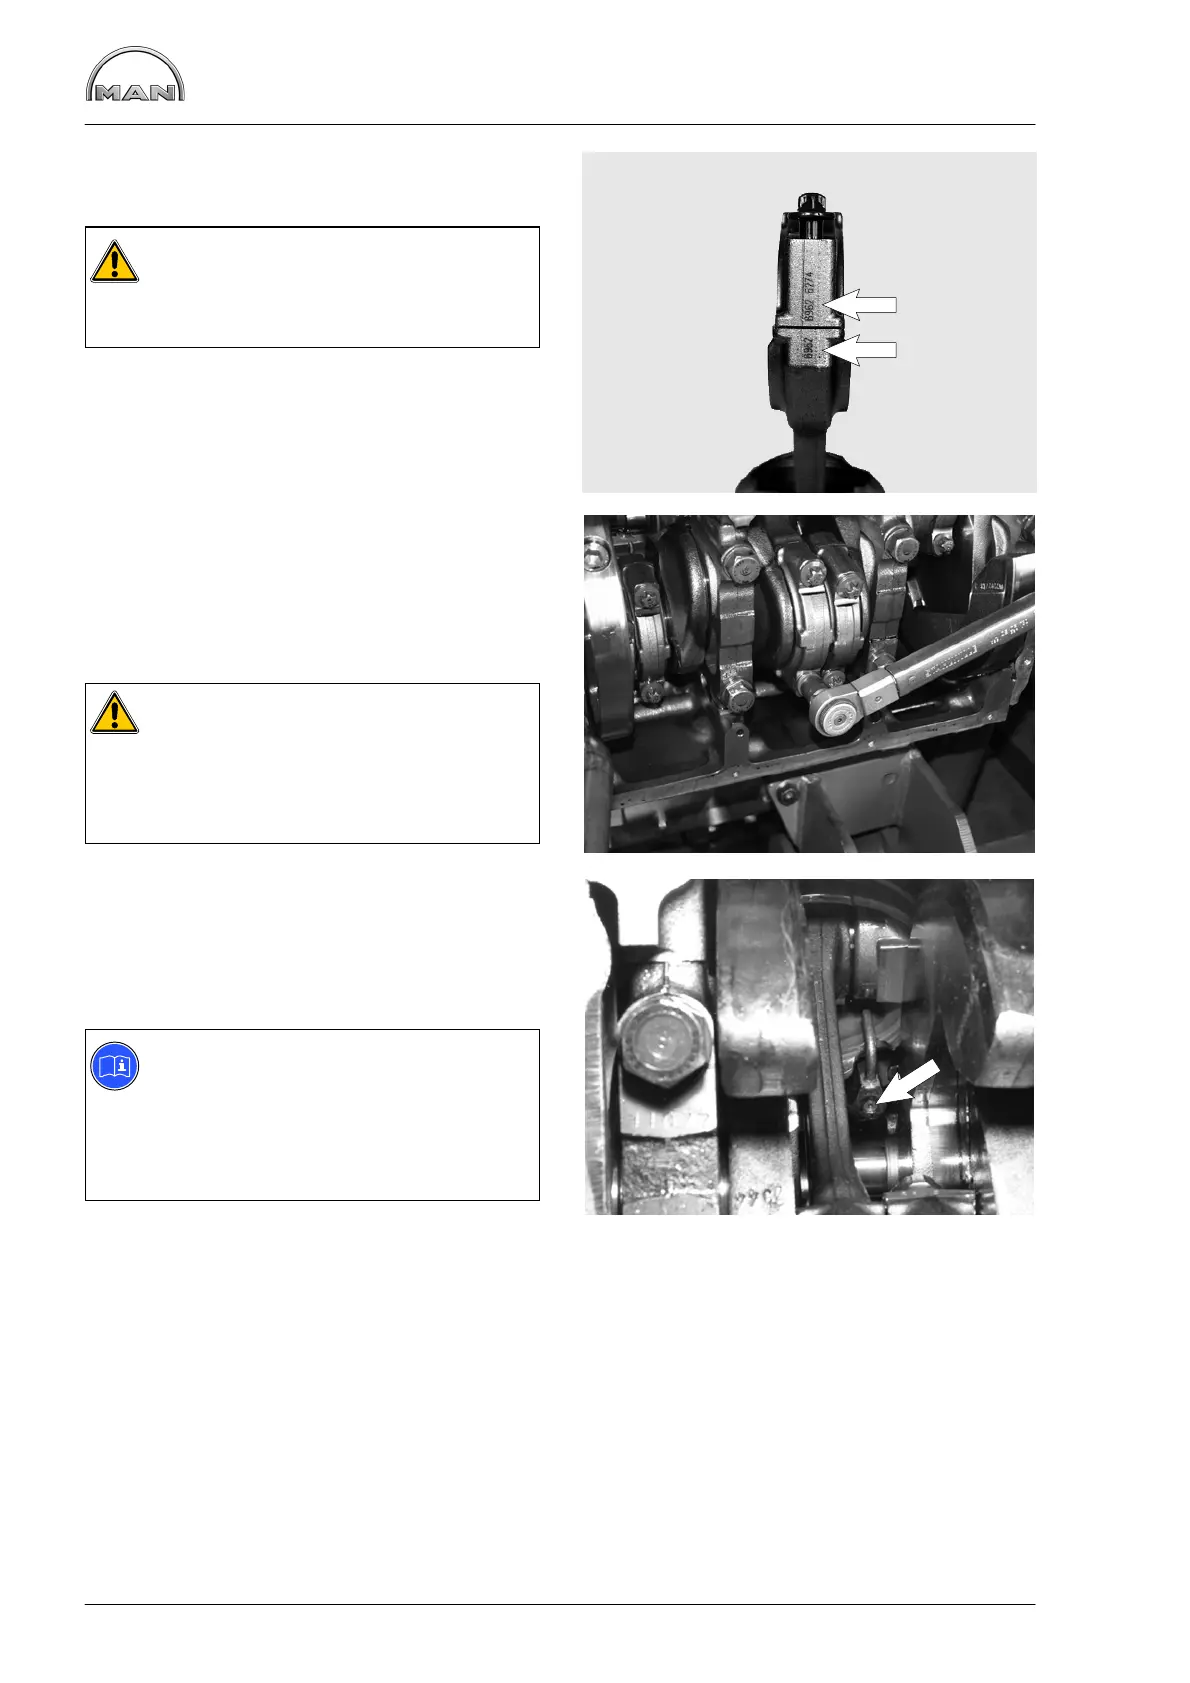
Fig. 9
Place the conrod bearing cover in position.
Caution:
The numbers on the connecting rod bear-
ing cap and connecting rod big end must
be on one side.
Fig. 10
Screw in the conrod bearing bolts and tighten them
in stages.
Pretightening: 100−110 Nm
Angle tightening: 90_
Caution:
Removed bolts must be replaced.
After inadvertent attachment of cracked
conrods and conrod bearing covers that do
not belong together, the parts must not be
reused!
Fig. 11
Turn the engine slowly.
The conrods and oil injection nozzles (arrow) must
not collide or scuff.
Note:
As far as possible turn engine only in
direction of rotation (anti−clockwise as
seen when looking at the flywheel) in order
to prevent the direction of rotation of the
sea water pump impeller being reversed.
Refit in reverse order to the removal procedure all
parts previously removed.
 Loading...