45
2.2 To change the fan speed:
a. Illuminate the display (blue button).
b. Press
234 (fan speed) button - the fan symbol will pulse.
c. Press the + or - (• or – ) button to select the 5 fan speeds
2/3/4/23/2 4 (see page 2), whilst pointing the
handset towards the unit, (unless the handset is wire connected). Each press of the + or - (•/– ) button will
increase/decrease the fan speed by 1 step and transmit the new setting to the unit. A single beep means the signal has been
accepted.
NOTES:
z In auto high and auto boost modes, the fan runs at low speed unless the room temperature is (2° or 3°) different from the
set temperature, in which case the fan runs at high or boost respectively.
z Auto high and auto boost functions cannot be accessed whilst 'FAN ONLY' is selected,
(FAN displayed, see 2.3).
2.3 To change the Cool/Heat/Fan Only Mode:
a. Illuminate the display (blue button).
b. Press
DF6 (Cool/Heat/Fan Only) - the mode symbols will pulse.
c. Press the + or - (• or – ) button to select the 4 Cool/Heat modes
D/F/DF/FAN (see page 2), whilst pointing the handset
towards the unit, (unless the handset is wire connected). Each press of the + or - (•/– ) button will increase/decrease the
mode by 1 step and transmit the new setting to the unit.
NOTES:
z Transmission of a heat or cool/heat command to a cool only unit will be accepted but the heat function will be ignored - the
unit will continue to operate in cooling only mode.
z Each press of the + (•) button will cycle through the options in the order
D/F/DF/FAN, whilst the - (– ) button will
cycle in the reverse order.
z Selecting
FAN (fan only) will display FAN and cause auto high and auto boost functions to default to low speed.
CLOCK/TIMER FUNCTIONS
(If the clock/timer functions are not required, ignore sections 3 to 7.)
z Clock and timer functions are accessed by repeatedly pressing the BLUE clock button (¤).
z The other buttons then assume functions shown in the blue stripe.
3 Clock Functions
3.1 To set the correct day and time:
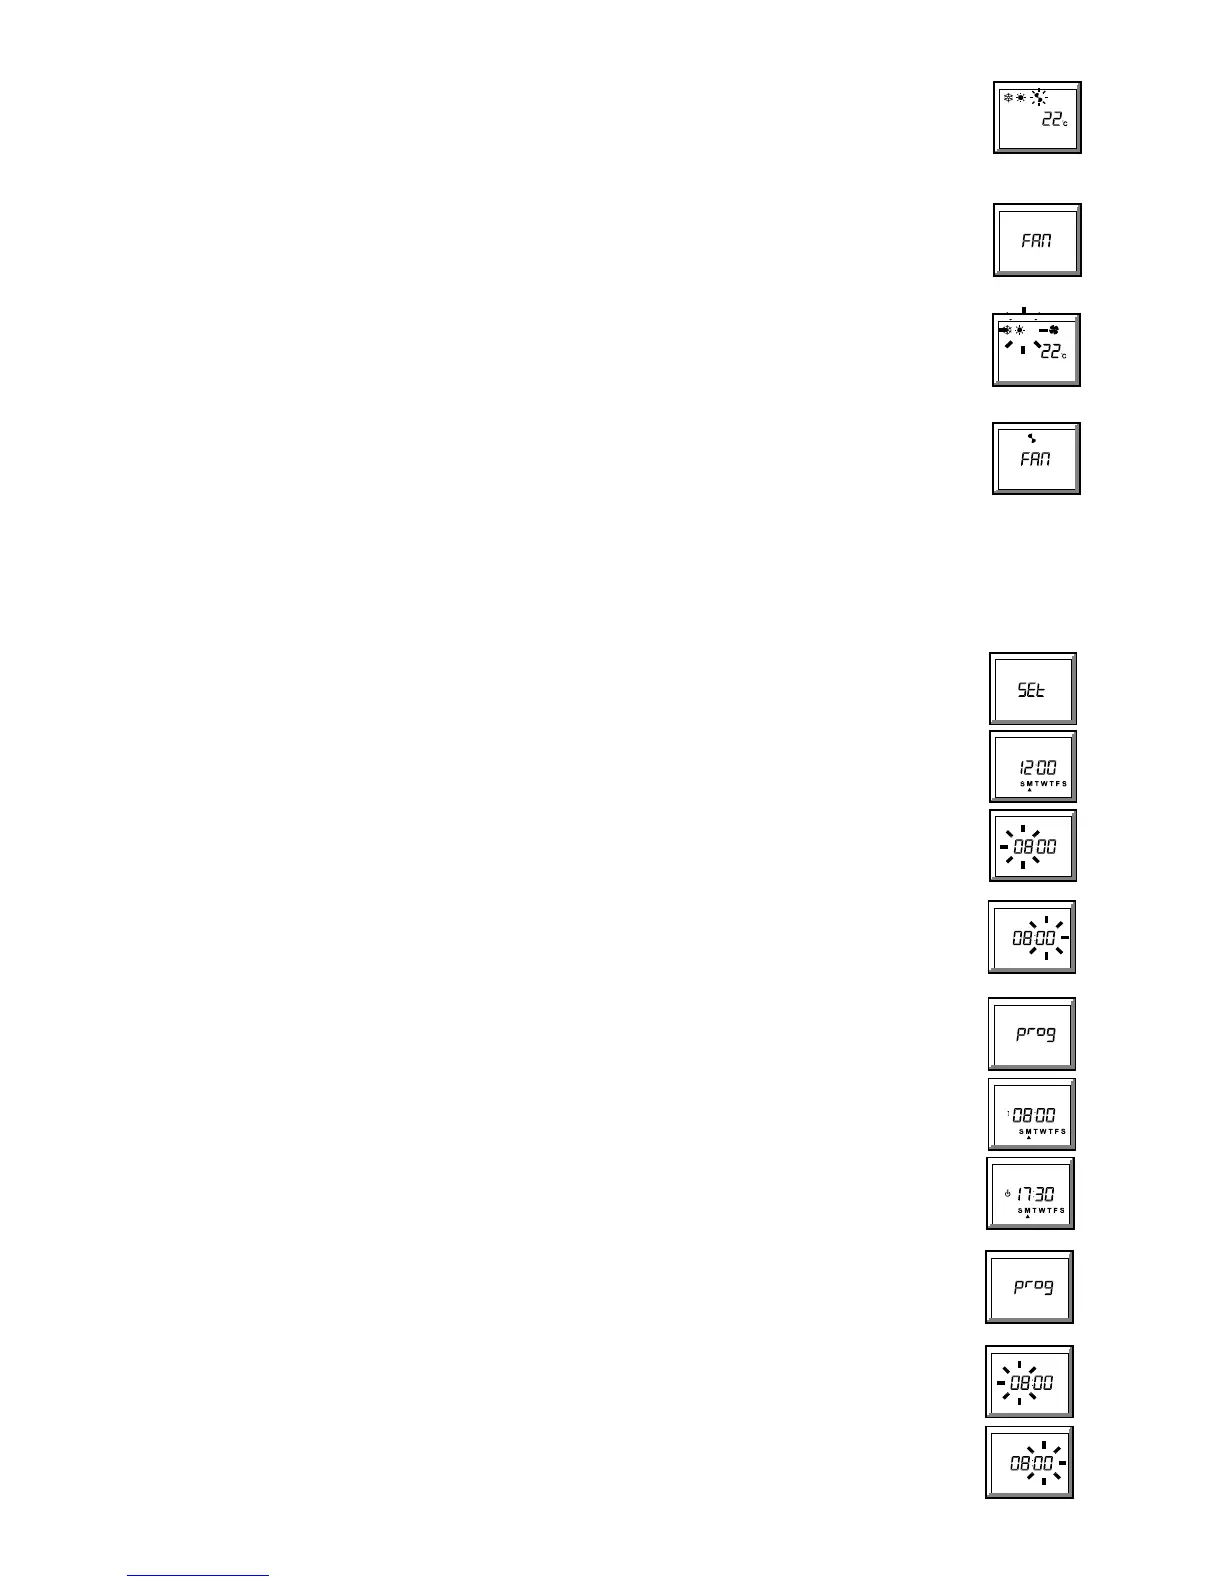
a. Press the blue button (¤) twice - the display shows SEt.
b. Press the DAY button - the display shows 12:00 and the days of the week, with a pulsing arrow (•) under M (Monday).
c. Press the + or - (• or – ) button until the arrow is under the correct day:
d. Press the HOUR button - the hours digits will pulse.
e. Press the + or - (• or – ) button until the correct hour is displayed: 24.00 hours is displayed as
00:00.
f. Press the MINUTE button - the minutes digits will pulse.
g. Press the + or - (• or – ) button until the correct minutes digits are displayed:
h. Transmit using the orange
A button. A single beep means the signal has been accepted.
NOTES:
z Days, hours and minutes are programmable in any order and may be revisited in any order before transmission.
z Once set, the day or time should only need resetting when the clocks go back or forward; if in any doubt, reset.
4 To view or change the 7 day timer programme
4.1 To view the programme:
a. Press the blue button (¤) three times - the display shows prog.
b. Press the DAY button - the screen will display S M T W T F S with an arrow (•) under M (Monday), the 'on' symbol (G)
and 08:00, (the preprogrammed Monday switch ON time).
c. Pressing the DAY button again will display the 'standby' symbol
(C) and 17:30, (the
preprogrammed Monday switch OFF time).
d. Further pressing of the DAY button will step through first the ON and then the OFF time for each of the 7 days and finally
back to Monday. The whole week's programme may be viewed, without modification, by this means.
NOTES:
z 08:00 and 17:30 are the preprogrammed times; any user changed times will be displayed instead, (see 4.2).
4.2 To change the ON or OFF time of any day or days:
(the timed programme will not operate correctly if the clock in the unit has not been set, see 3.1)
a. Press the blue button
(¤) three times - the display shows prog.
b. Press the DAY button - the screen will display S M T W T F S with an arrow (•) under M (Monday), the 'on' symbol (G)
and the programmed Monday switch ON time.
c. Repeatedly press the DAY Button until the desired day is indicated by an arrow together with the desired 'on' (
G) or
'standby' (C) symbol.
d. To change the Hour: Press the HOUR button - the hours digits will pulse. Press the + or - (• or – ) button until the
desired hour is displayed.
e. To change the Minutes: Press the MINUTE button - the minutes digits will pulse. Press the + or - (• or – ) button until
the desired minutes are displayed.
f. Press the DAY button to continue to the next ON or OFF time, and repeat until all required days have been re-programmed,
then transmit using the orange
A button. A single beep means the signal has been accepted.