49
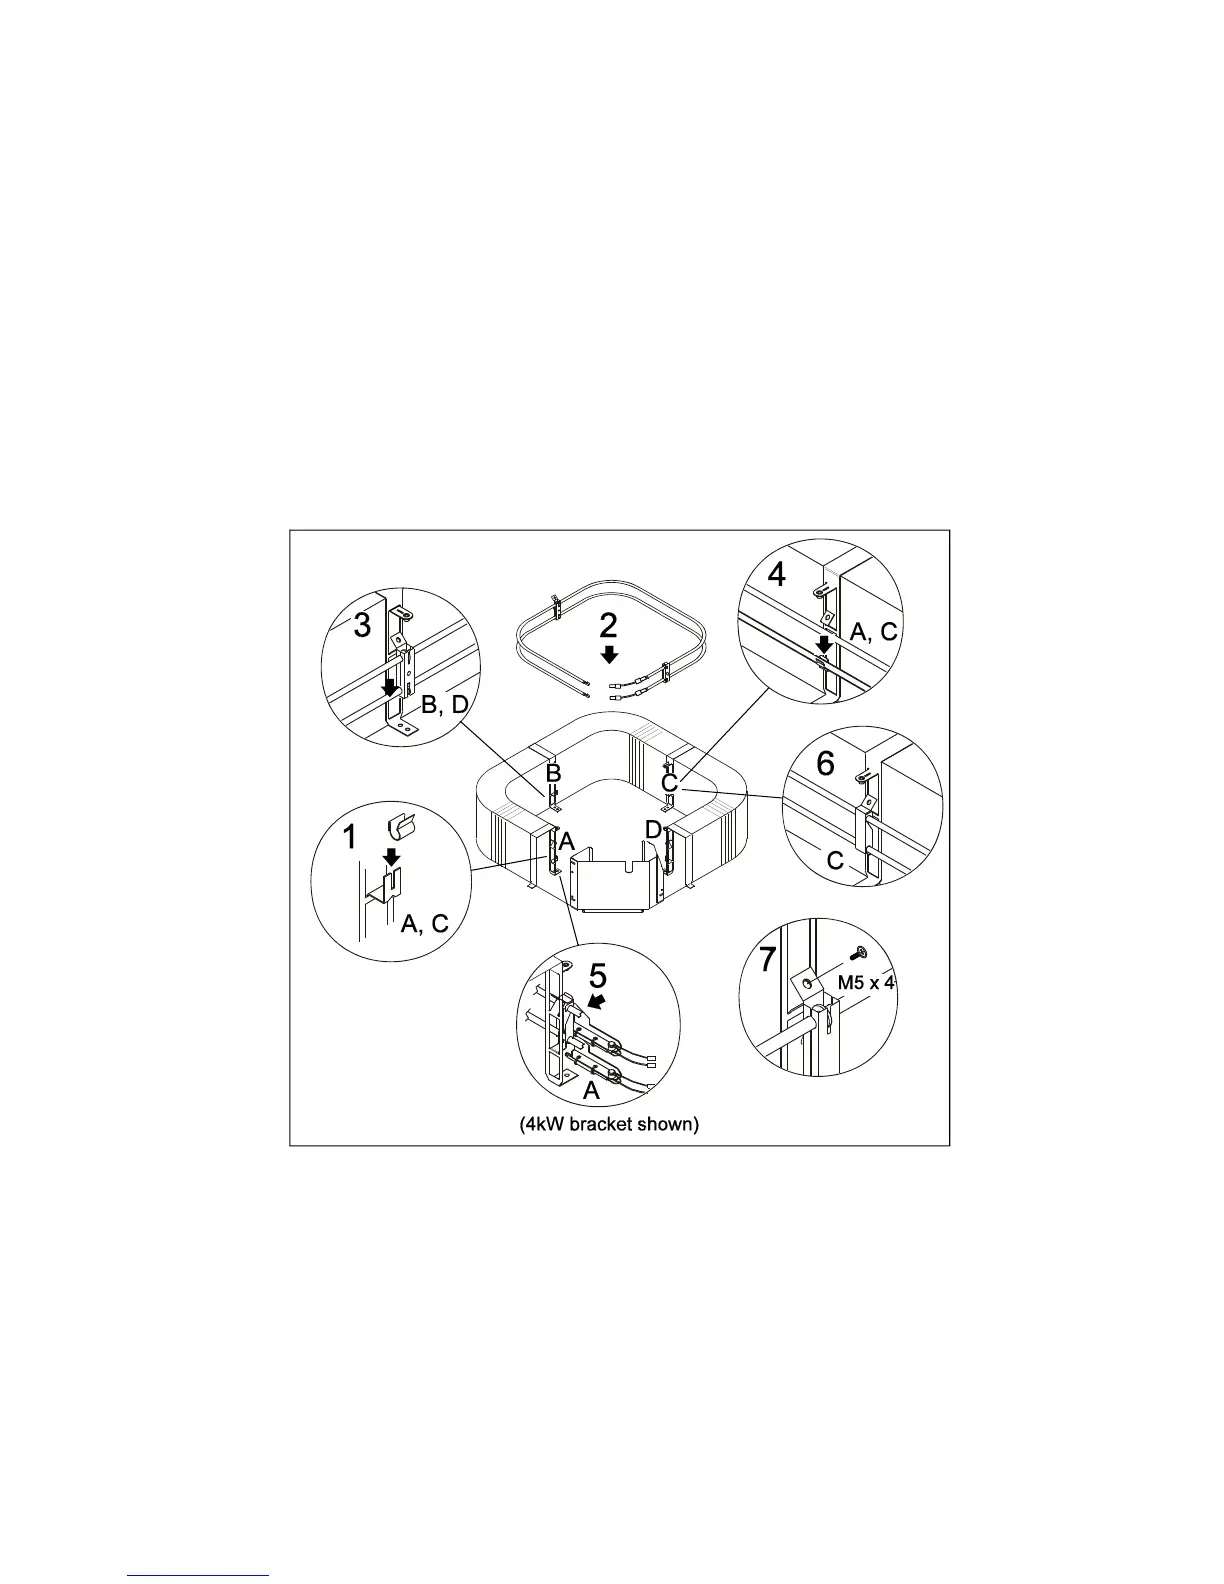
FITTING THE HEATER ELEMENTS (Numbers refer to the exploded view)
1. Fit two edge clips centrally on the bottom lugs of the coil support brackets A & C (#1)
2. Manipulate the heater assembly into the unit underneath the top fixing lugs on the coil brackets: angle the
element assembly to effect correct positioning (#2).
3. Fit the heater brackets over the lower lugs of coil brackets B & D (#3).
4. When positioned, push the bottom element into the edge clips on coil brackets A & C (#4). (This is primarily as
an aid to fitting the elements when the unit is installed in a ceiling).
Secure the heater brackets to the coil brackets B & D using 2 x M5 screws.
5. Fit the fuse assembly onto the element(s) at coil bracket A. (#5: 4kW assembly shown)
Secure the cut-out bracket to the coil bracket using 1 x M5 screw.
6. Fit the single retaining bracket to the element(s) on coil bracket C (#6). Secure the cut-out bracket to the coil
bracket using 1 x M5 screw.
7. Ensure all screws are tight. (#7)
EXPLODED VIEW (Fan, motor and part of coil omitted for clarity)