EasyManua.ls Logo

Master Image HORIZON3D - Lower Half Image Alignment

Master Image HORIZON3D
81 pages
Print Icon
To Next Page IconTo Next Page
To Previous Page IconTo Previous Page
Loading...
Installation & Operation Manual | HORIZON3D
© MASTERIMAGE 3D, Inc.
25
Lower Horizontal Alignment screw
Lower Vertical Alignment screw
Lower Half Image Alignment
To achieve the best 3D display, the Optical Head must be installed properly and aligned optimally.
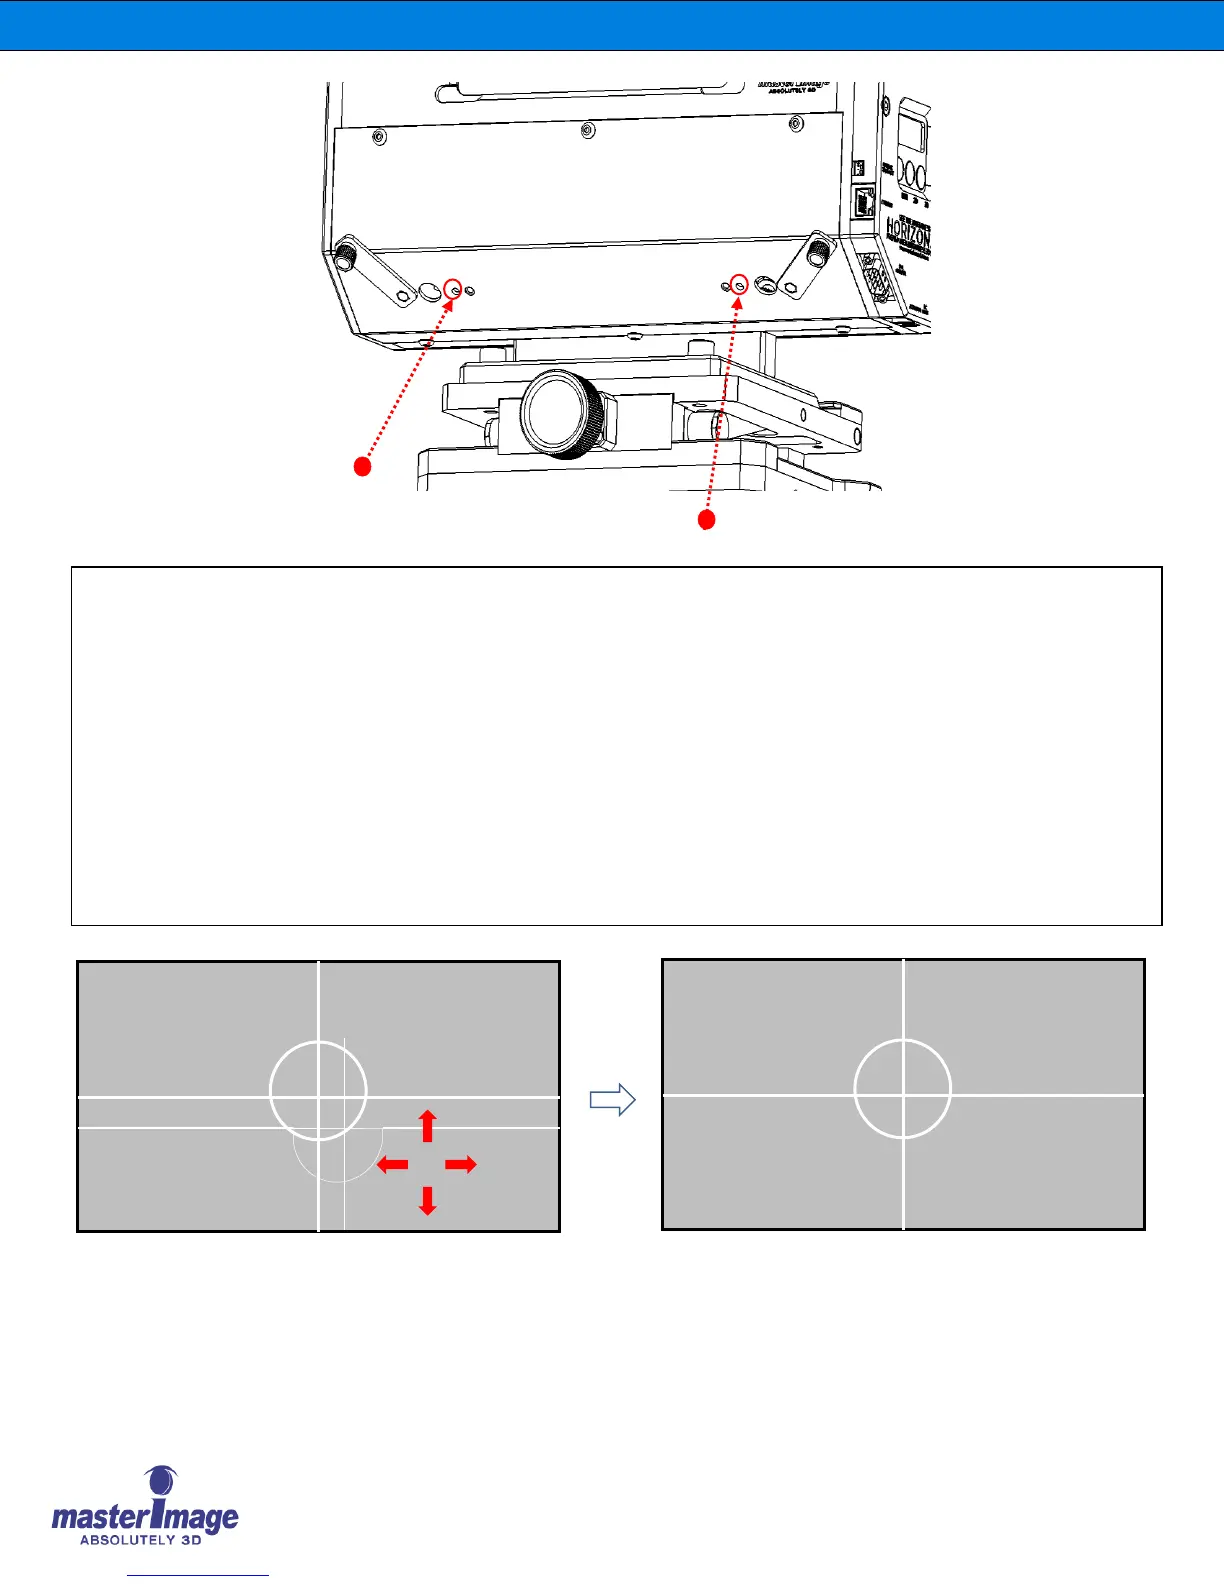
Tools Required: 2mm or 5/64” hex key wrench (Type: Small Right Angle)
7. Align the Lower image lines by turning the lower horizontal alignment screw.
(Clockwise: LEFT, Counter-Clockwise: RIGHT)
8. Align the Lower image lines by turning the lower vertical alignment screw.
(Clockwise: DOWN, Counter-Clockwise: UP)
9. Check if the Lower Half Image is aligned properly as below.
RIGHT
UP
DOWN
LEFT
Before alignment of Lower Half image
After alignment of Lower Half image

Table of Contents

Other manuals for Master Image HORIZON3D