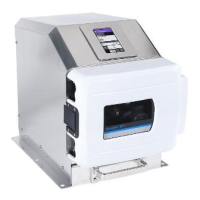
3-17 Masterflex SS B/T Washdown Digital Pump Drive with Advanced Connectivity
Section 3: Operation
Masterflex
MASTERFLEXLIVE™
e B/T Digital Pump Drive can be monitored through the Master exLive™ website using an Ethernet or
Wi-Fi connection. Master exLive™ can be accessed from any suitable digital device connected to the internet,
such as a laptop, tablet, smartphone or desktop computer. See
www.master ex.com for more information.
CUSTOM PROGRAM MODES
Custom programs allow users to create easily accessible programs for frequently used pump mode settings.
NOTE: If User Management is enabled only users with authorization can create and modify programs (for
further information see "
User Management" on page 2-8).
Adding a New Program: Continuous Mode
To add a new Continuous Mode program:
1. Tap NEW PROGRAM from the Mode Selection Screen. e New Program Screen will be displayed.
NOTE: If NEW PROGRAM is not displayed on the Mode Selection Screen tap SCROLL to view
additional pages.
2. Tap CONTINUOUS. e Continuous New Program Screen will be displayed.
3. Tap PROGRAM1. If required, delete the characters using the back arrow on the onscreen keypad and
then enter the desired program name (up to 8 characters).
4. Select the desired ow rate and ow units:
a. Tap FLOW RATE to access the Flow Rate Screen.
b. Tap UNITS to access the Flow Units Screen and select the desired ow unit from the available list.
c. Tap CONFIRM
to save or CANCEL to discard changes and return to the Flow Rate Screen.
d. Tap FLOW and enter the desired ow rate using the onscreen keypad.
e. Tap CONFIRM
to save or CANCEL to discard changes and return to the Continuous New
Program Screen.
5. Tap SIZE. e Tube Size Screen will be displayed.
a. Select the desired tube size from the list of available options.
b. Tap CONFIRM
to save or CANCEL to discard changes and return to the Continuous New
Program Screen.
6. Tap DIRECTION to select either clockwise
or counterclockwise ow direction.
7. Tap CONFIRM to save or DELETE to discard changes.
NOTE:
• Once saved, new programs are added in alphabetical order to the bottom of the Mode Selection Screen.
• If there are multiple programs tapping SCROLL
will display additional pages.
Adding a New Program: Time Mode
To add a new Time Mode program: