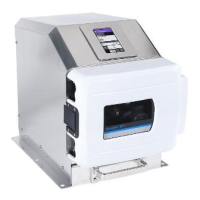
3-21 Masterflex SS B/T Washdown Digital Pump Drive with Advanced Connectivity
Section 3: Operation
Masterflex
Using Program Modes
Custom programs will appear in alphabetical order at the bottom of the Mode Selection Screen. If there are
multiple programs tapping SCROLL
will display additional pages.
General Preparation:
• Con rm the correct tubing has been selected and is properly loaded into the pump drive (for further
information see "
Loading Tubing" on page 2-10).
• Con rm all uids and containers are ready.
• Switch the drive on using the power switch located at the rear of the drive. NOTE: If User Management
is enabled you may be prompted for a username and password (For further information see "
User
Management
" on page 2-8). e touchscreen display will revert to the previously used operation mode.
• Con rm that the tubing has been calibrated by checking that Calibration Complete
is displayed on
the Program Information
Screen (for further information see "Tube Calibration" on page 2-13).
• If required, prime the pump before operation (for further information see "
Priming the Pump Drive" on
page 2-12).
To use a program:
1. Select the desired program from the Mode Selection Screen. e Program Run Screen will be displayed.
2. Tap START
to begin the pump drive operation using the displayed program settings.
3. If required, Tap PAUSE
or STOP during operation. NOTE: e pump cannot be paused during
Continuous Mode operation.
NOTE:
• Tap INFORMATION
to view the selected program's settings.
• Individual settings cannot be edited from the Program Run Screen.
Editing a Program
NOTE: If User Management is enabled only users with authorization can create and modify programs (for
further information see "
User Management" on page 2-8).
To edit a program:
1. Tap EDIT
located next to the desired program name on the Mode Selection Screen (NOTE: If there are
multiple programs, tap SCROLL
to display additional pages). e Program Edit Screen will be displayed.
2. Edit the settings for the selected mode as desired. For instructions on editing individual mode settings see:
• "
Adding a New Program: Continuous Mode" on page 3-17.
• "Adding a New Program: Time Mode" on page 3-17.
• "Adding a New Program: Volume Mode" on page 3-19.
• "
Adding a New Program: Analog Input Mode" on page 3-20.
• NOTE: Once the individual mode settings have been edited and saved the Program Edit Screen will
be displayed.
3. Tap CONFIRM
to save or CANCEL to discard changes and return to the Mode Selection Screen.