Page 38 of 54 5100054 BND01O03.docx
10.19. Installation of Canopy
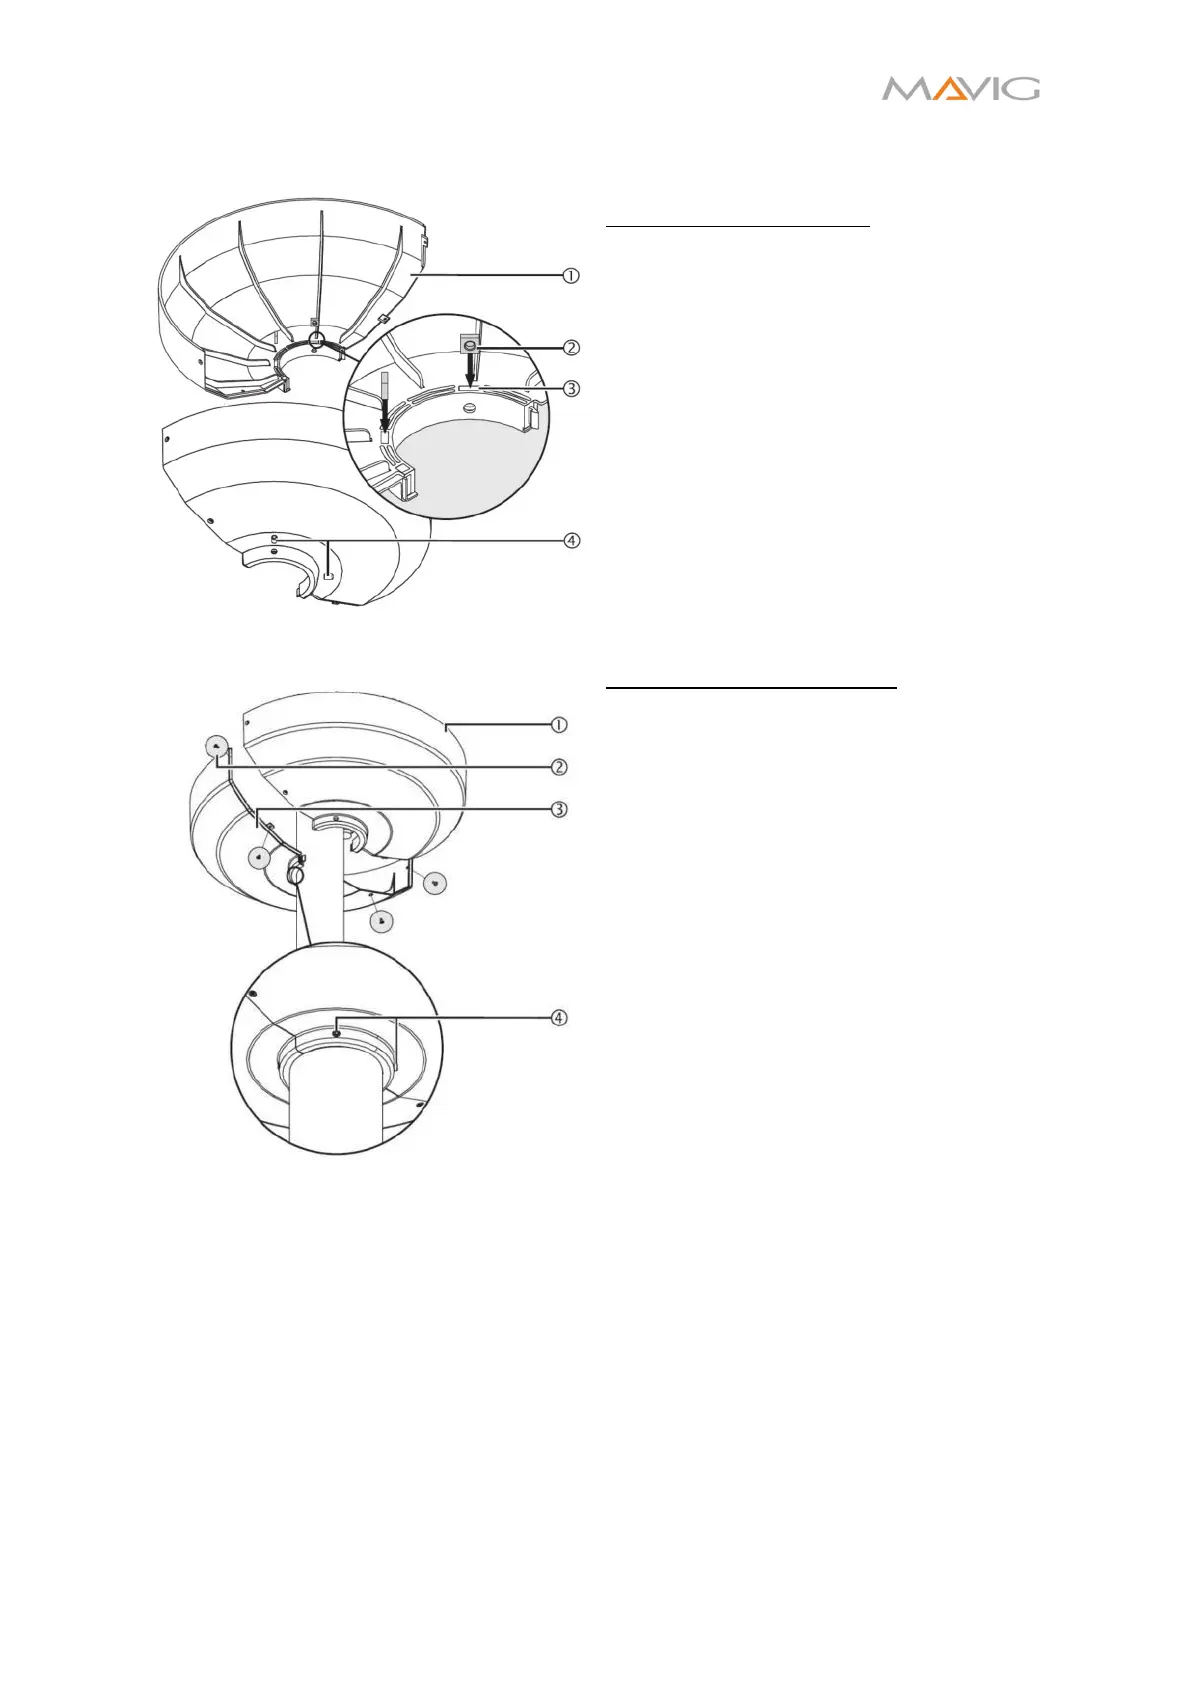
Figure 39 Preparing the canopy installation
Preparing the Installation:
1. From the inside of the canopy halves
① insert two square nuts DIN 562 -
M6 ② into the holes ③.
2. From the outside of the canopy halves
① slightly screw in two setscrews DIN
916 - M6x10 ④ for each halve.
Figure 40 Mounting the canopy halves
Mounting the canopy halves:
1. Place both canopy halves
/
around the ceiling tube and press
them tightly together.
• Apply pressure at the bottom part
and focus on one side first, if the
snap-in hooks are not engaging
properly.
2. Screw the canopy halves together with
4 PT screws 3x6 mm ②.
3. Push the canopy ①/③ upwards to the
false ceiling.
4. Tighten the four preinstalled setscrews
DIN 916 - M6x10 ④ to 0.2 Nm (Philips
screwdriver).
5. Check, that the canopy is securely in
place:
• The canopy halves must engage
tightly with each other.
• The canopy must be fully flush with
the false ceiling.
• The four PT screws 3x6 mm ② must
be tightened.
• The four setscrews DIN 916 -
M6x10
must be tightened to 0.2
Nm.