Page 43 of 54 5100054 BND01O03.docx
11.3. Checking the Securing Elements on the Spring Arm
Adjusting the height stop point
1. Set the spring arm 5 to its lowermost
horizontal position (0 degree) height
stop point as described in Section 10.13,
page 31.
2. Check that the spring arm is safely
locked in place. Once the spring arm has
been fixed in its lowermost horizontal
position, it must no longer be possible to
move the spring arm upwards.
WARNING – falling parts
Do not remove both Securing
elements simultaneously to
avoid the device crashing.
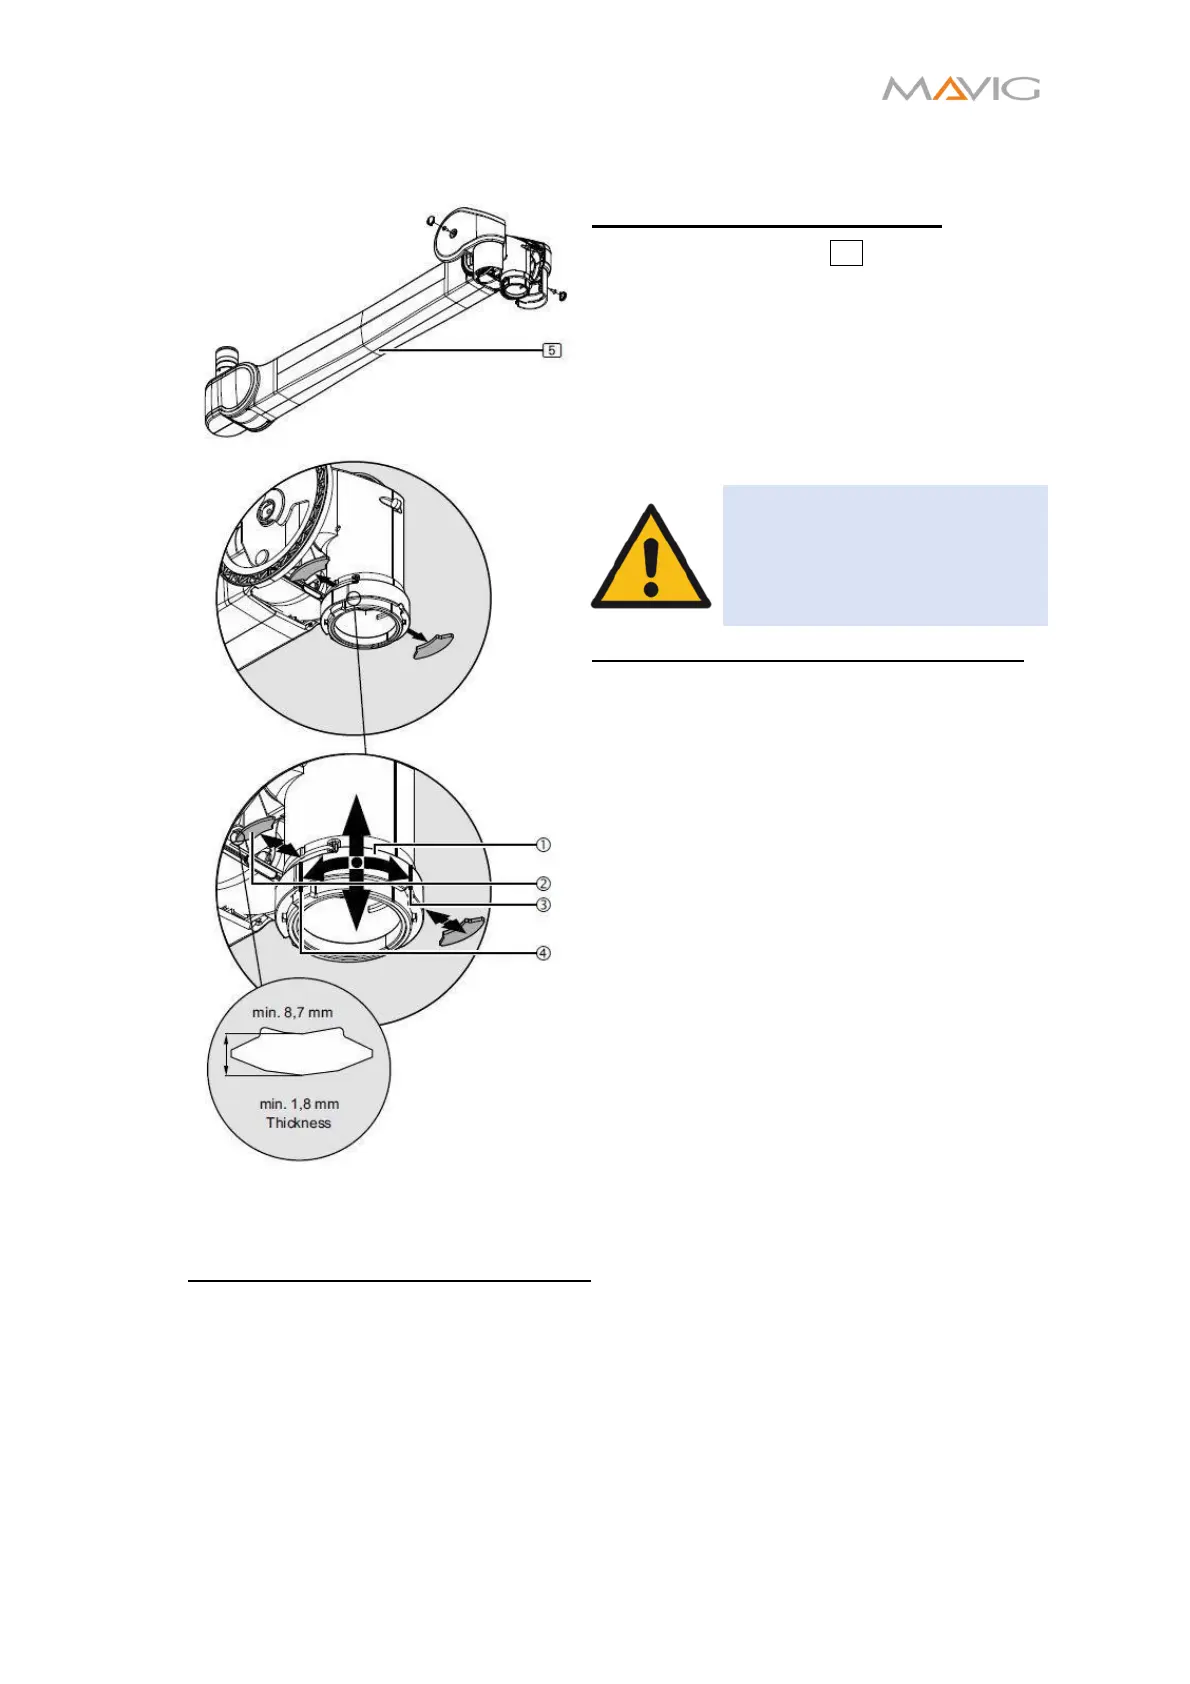
Dismantling the first securing element
3. Rotate the securing sleeve ①
approximately 90 degrees to the right,
route it slightly downwards and remove
the first securing element ②.
• While doing this cover the second
segment ② on the opposite side with
your hand in order to prevent it from
dropping out of the spring arm.
• To relief stress from the securing
element lift the injector up or try moving
the injector to the opposite side of the
securing element.
4. Route the securing sleeve back ①
upwards.
5. Check whether the securing element ②
achieves a minimum thickness of 1.8 mm
and a minimum length of 8.3 mm.
• Use a caliper gauge for measurement.
• Replace the securing element
if the
specified dimensions are not achieved.
Mounting the first securing element
6. Lubricate the securing element ② with Microgleit GP 360.
7. Route the securing sleeve ① slightly downwards
• While doing this cover the second segment ② on the opposite side with your
hand in order to prevent it from dropping out of the spring arm.
8. Lubricate the spindle of the injector column with Microgleit GP 360 through the
fitting aperture of the securing element.
9. Place the securing element ② and route the securing sleeve ① towards the top
and then rotate it approximately 90 degrees to the left: