Page 42 P/N 03521015 Rev Q
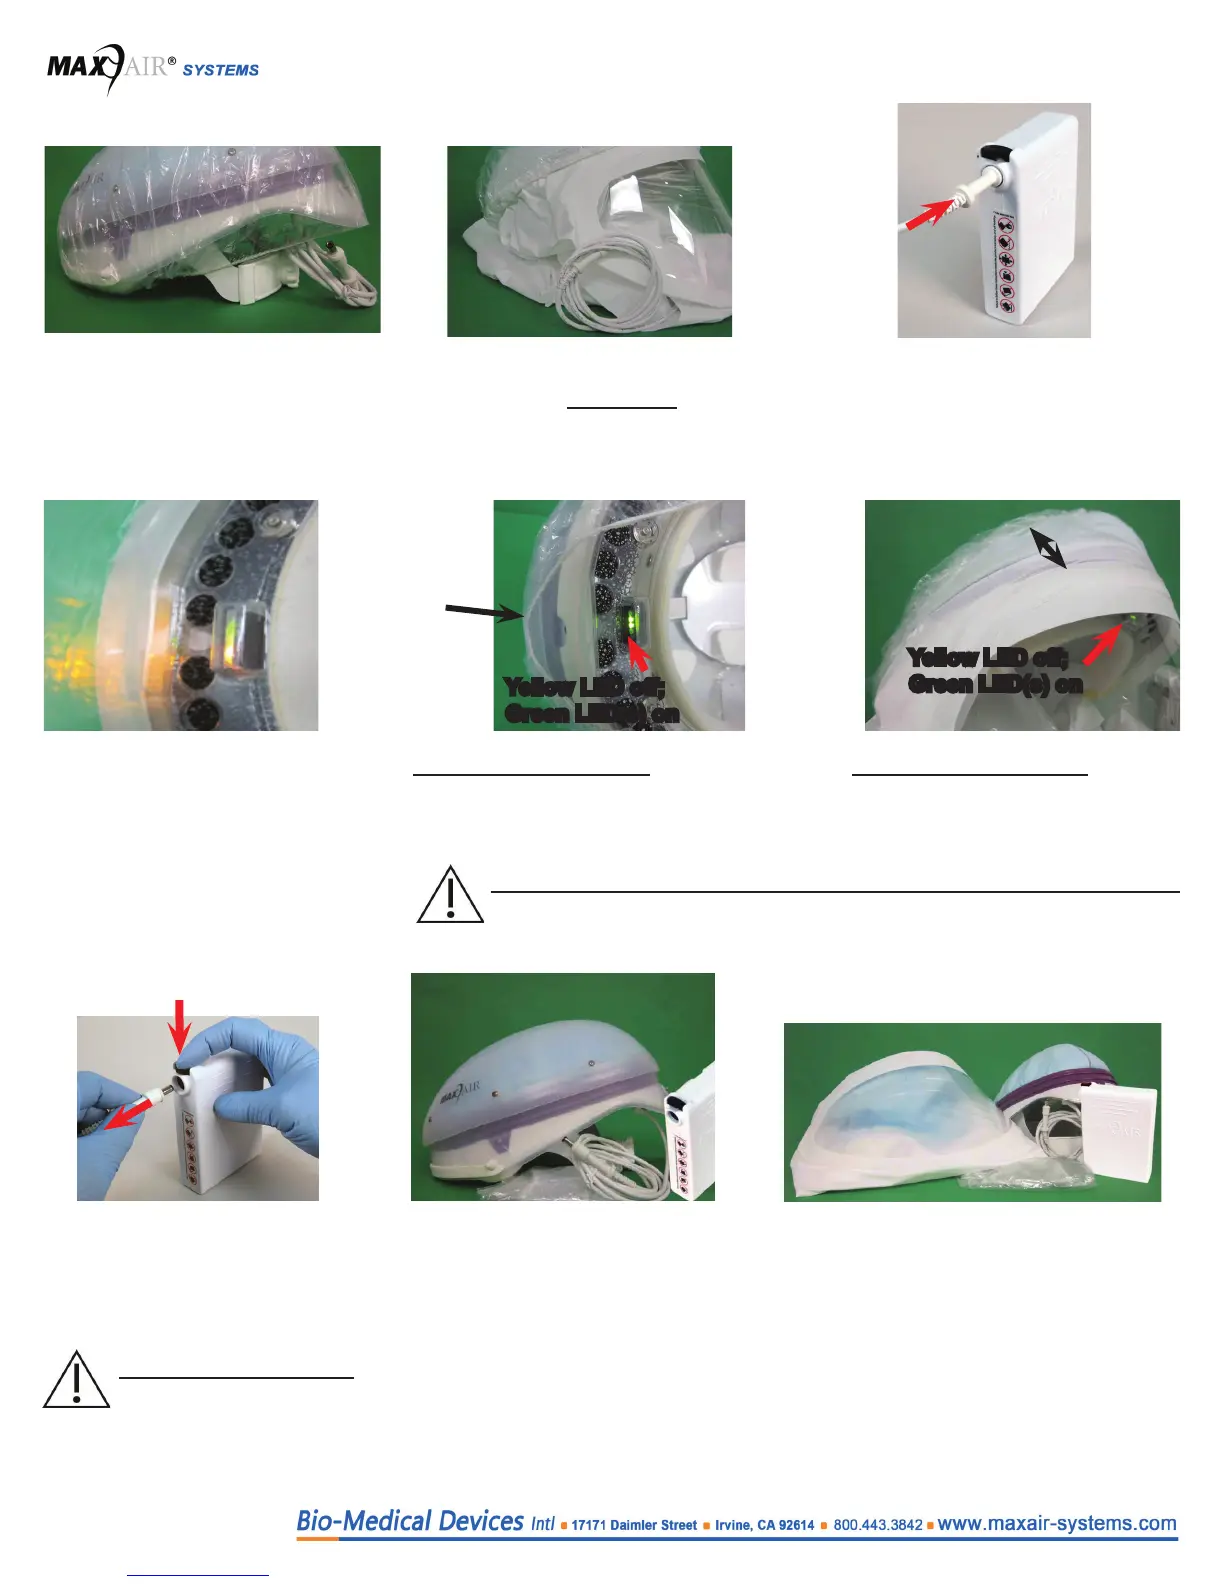
1a. Place the Bouant Cap over the
Helmet, all the way around, from
top to bottom.
1b. Place the Bouant Cap over the
Hood, all the way around, from top
to bottom of the Filter. Close all gaps
between Bouant Cap and Filter.
3. Allow the Helmet to
compensate until the Yellow
LED turns on (about 45
seconds with Air Flow set to
High, about 90 seconds with
Air Flow set to Low).
4a. As soon as the Yellow LED turns on -
in less than ve seconds - open the
Bouant Cap approximately 1” to 2”
(3cm to 5cm). Notice the Yellow LED
turns o. Close the Bouant Cap gap.
4b. As soon as the Yellow LED turns on
- in less than ve seconds - open
the Bouant Cap approximately 4”
to 5” (10cm to 12cm). Notice the
Yellow LED turns o. Close the gap of
Bouant Cap.
5. Disconnect the Helmet Power
Cord from the Battery - push
the Secure Connection Button
down, pull Cord Connector
out, release the Button.
6a. Remove the Bouant Cap from
the Helmet.
This concludes the test.
6b. Remove the Bouant Cap covering the
Hood.
This concludes the test.
1”-2”
gap
4”-5” gap
Yellow LED o;
Green LED(s) on
Yellow LED o;
Green LED(s) on
NOTE
Do not allow more than ten seconds to pass before performing this step.
CAUTION
Ensure the Power Cord
is disconnected from the
battery before performing
step 6.
2. Connect the Helmet Power Cord
to the Battery. Push the Power
Cord Connector into the Battery
Receptacle until the Secure
Connection audibly clicks.