Page 45 P/N 03521015 Rev Q
8. Slide your ngers between the
Cu and face from each temple
down and under your chin to pull
the DLC Flappers away from the
lens, and to properly position the
cu.
Condition 1: Ensure the DLC Flap-
pers are away from the Lens, posi-
tioned perpendicular to your temples,
and within ¼ inch of the temples on
each side of the head.
Condition 2: Ensure slight tension on
the cu is felt continuously while sliding
the index or rst nger between the cu
and the face all along the chin and up
to the temples, from the right side of the
face to the left.
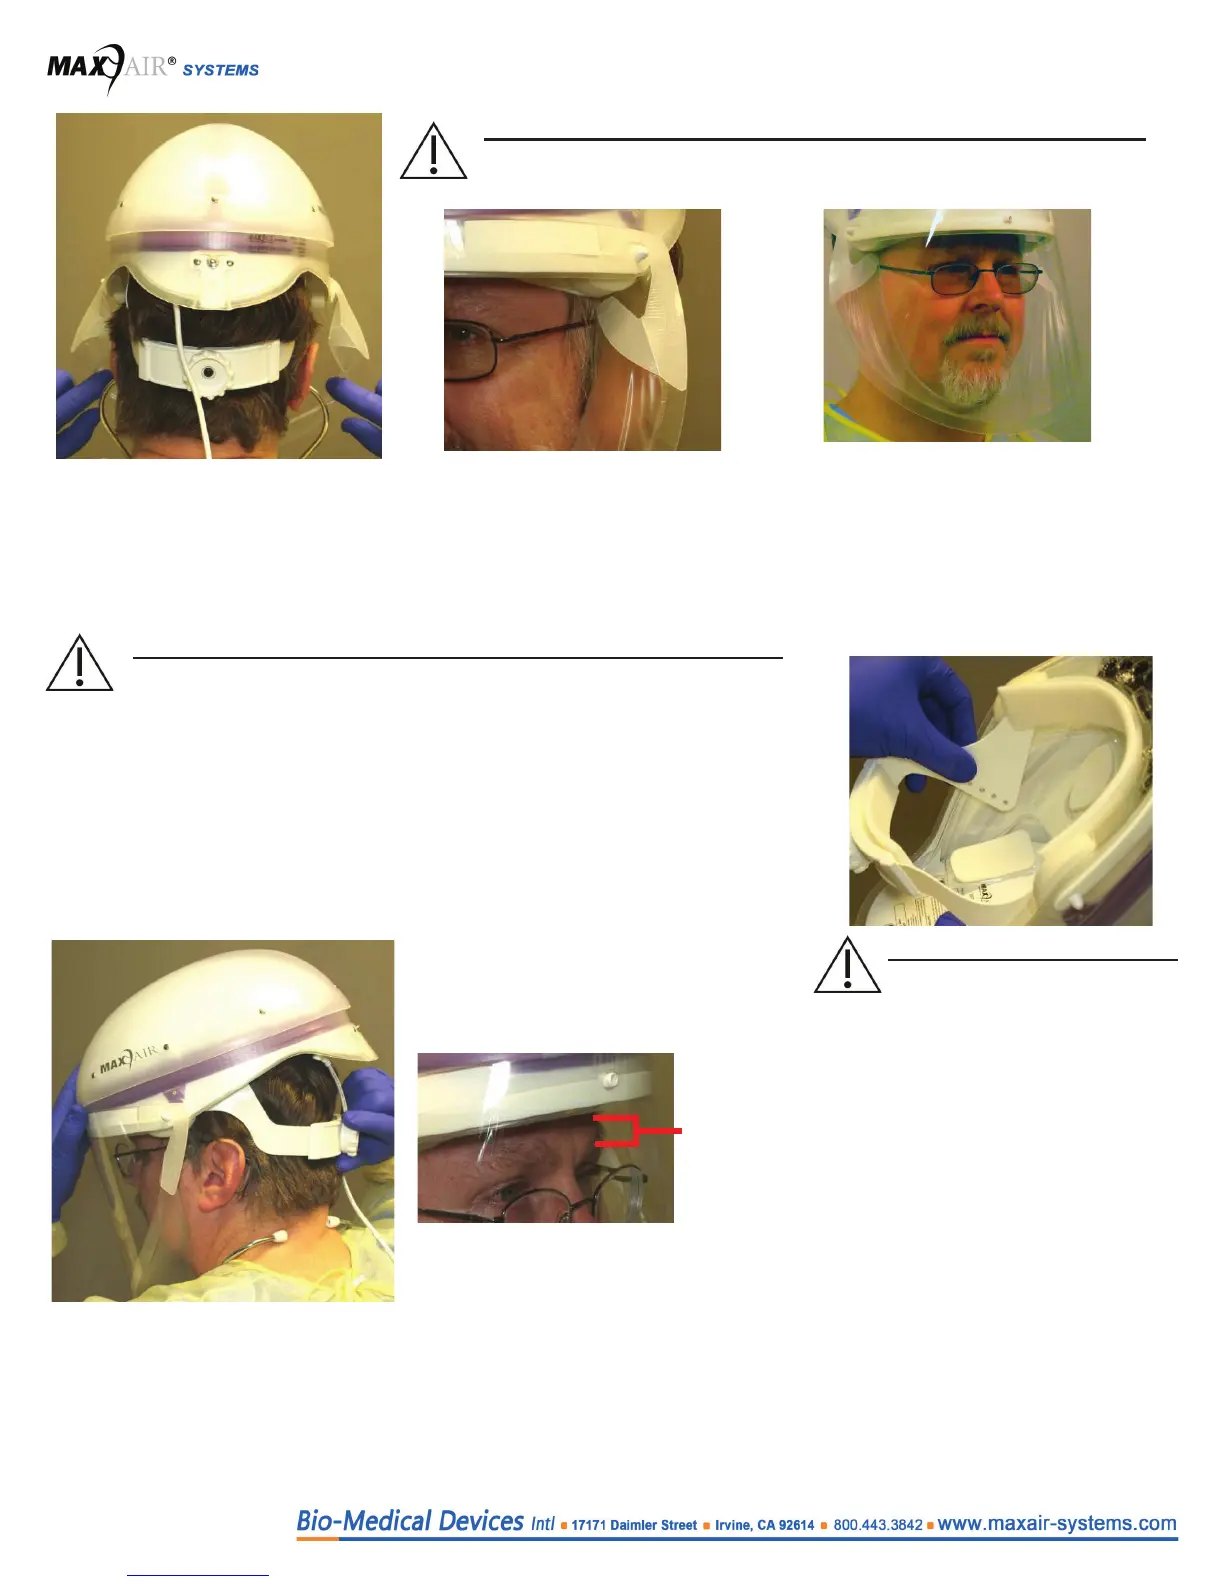
9. Position the Helmet so that the front headband is within ½ inch of the eyebrows and
the rear headband is resting under the occipital bone above the vertebrae on the neck,
and then tighten the Adjustment Knob clockwise to ensure the most secure t of the
Helmet on the head for all activities. Do not over tighten to cause discomfort.
≤ 1/2
Inch
(~1.25 cm)
WARNING
If conditions 1 and 2 below both are not achieved, switch to the other size
DLC before proceeding.
CAUTION
If the Helmet is not secure and comfortable on the head, it may be
necessary to change the Height Adjustment. The Height Adjustment
raises and lowers the rear headband and the angle of the helmet with
respect to the head, and properly positions the DLC Lens from the
chin. This optimizes a secure and comfortable t in conjunction with the
Adjustment Knob for optimizing the circumference of the Headband. It
also aids in proper positioning for easy visualization of the LED Safety
Status Indicators. If necessary, unsnap the Height Adjustment tabs on
each side of the Helmet Liner and reposition upward or downward, until
the optimum t for comfort and security is determined.
CAUTION
Optimum setting is achieved
when the helmet is secure on
the head for all movements re-
quired and the front headband is
within 1/2 inch of the eyebrows
to allow good visualization of the
LED Safety Status Indicators in
the upper peripheral vision. Be
sure to have both Height Adjust-
ment tabs in the same position.