11921 Slauson Ave. Santa Fe Springs, CA. 90670 (800) 227-4116 FAX (888) 771-7713
60
1”
STOP
ROLLER
HEX HEAD SCREW,
5/8” X 5” LG.
FLAT WASHER,
5/8”
LOCK NUT, 5/8”
SLIDER STOP
BRACKET
SLIDER STOP
BRACKET
6. Remove and unbolt stop roller from initial hole in
slider stop bracket (FIGS. 60-1 and 60-1A). Push
the platform toward the rear sill until approximate-
ly 5/8” clearance between the edge of the plat-
form and rear sill (FIG. 60-1). Bolt the stop roller
into the hole nearest the head of the adjustment
bolt (FIG. 60-1B). Tighten hex bolt, but keep 1/16”
gap on each side of roller.
FIG. 60-1B
FIG. 60-1A
HOLES
(7 PLACES)
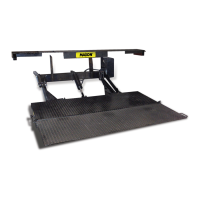
PLATFORM INITIAL IN/OUT ADJUSTMENT
FIG. 60-1
REAR SILL
PLATFORM
CAUTION
To prevent stop roller from binding, do not overtighten bolts on stop roller.
Allow 1/16” gap on each side of stop roller.
STEP 7 - PLATFORM ADJUSTMENT- Continued
 Loading...