47
How to Operate the MHT200, con’t
C. The DTS Display will illuminate when the input con-
tains DTS Encoded Signals.
D. The EXPAND Display will illuminate when the Sur-
round Mode Selector is turned to MUSIC 3 or the
MUSIC 4 Mode.
E. The EX Display will illuminate when the Surround
Mode Selector is turned to CINEMA 2 and a Dolby
Digital Multi-Channel Signal is present.
F. The NEO:6 Display will illuminate when the Sur-
round Mode Selector is turned to CINEMA 2 or MU-
SIC 2 and a 2-Channel Signal is present.
G. The DTS ES Display will illuminate when the Sur-
round Mode Selector is turned to CINEMA 2 and
DTS Multi-Channel Signal is present.
H. The STEREO 96kHz will illuminate when the Sur-
round Mode Selector is turned to STEREO and a 2-
Channel Analog Signal or 96kHz Digital Signal is
present.
Note: Please refer to “How to Operate the Surround
Mode” starting on page 52, for additional details.
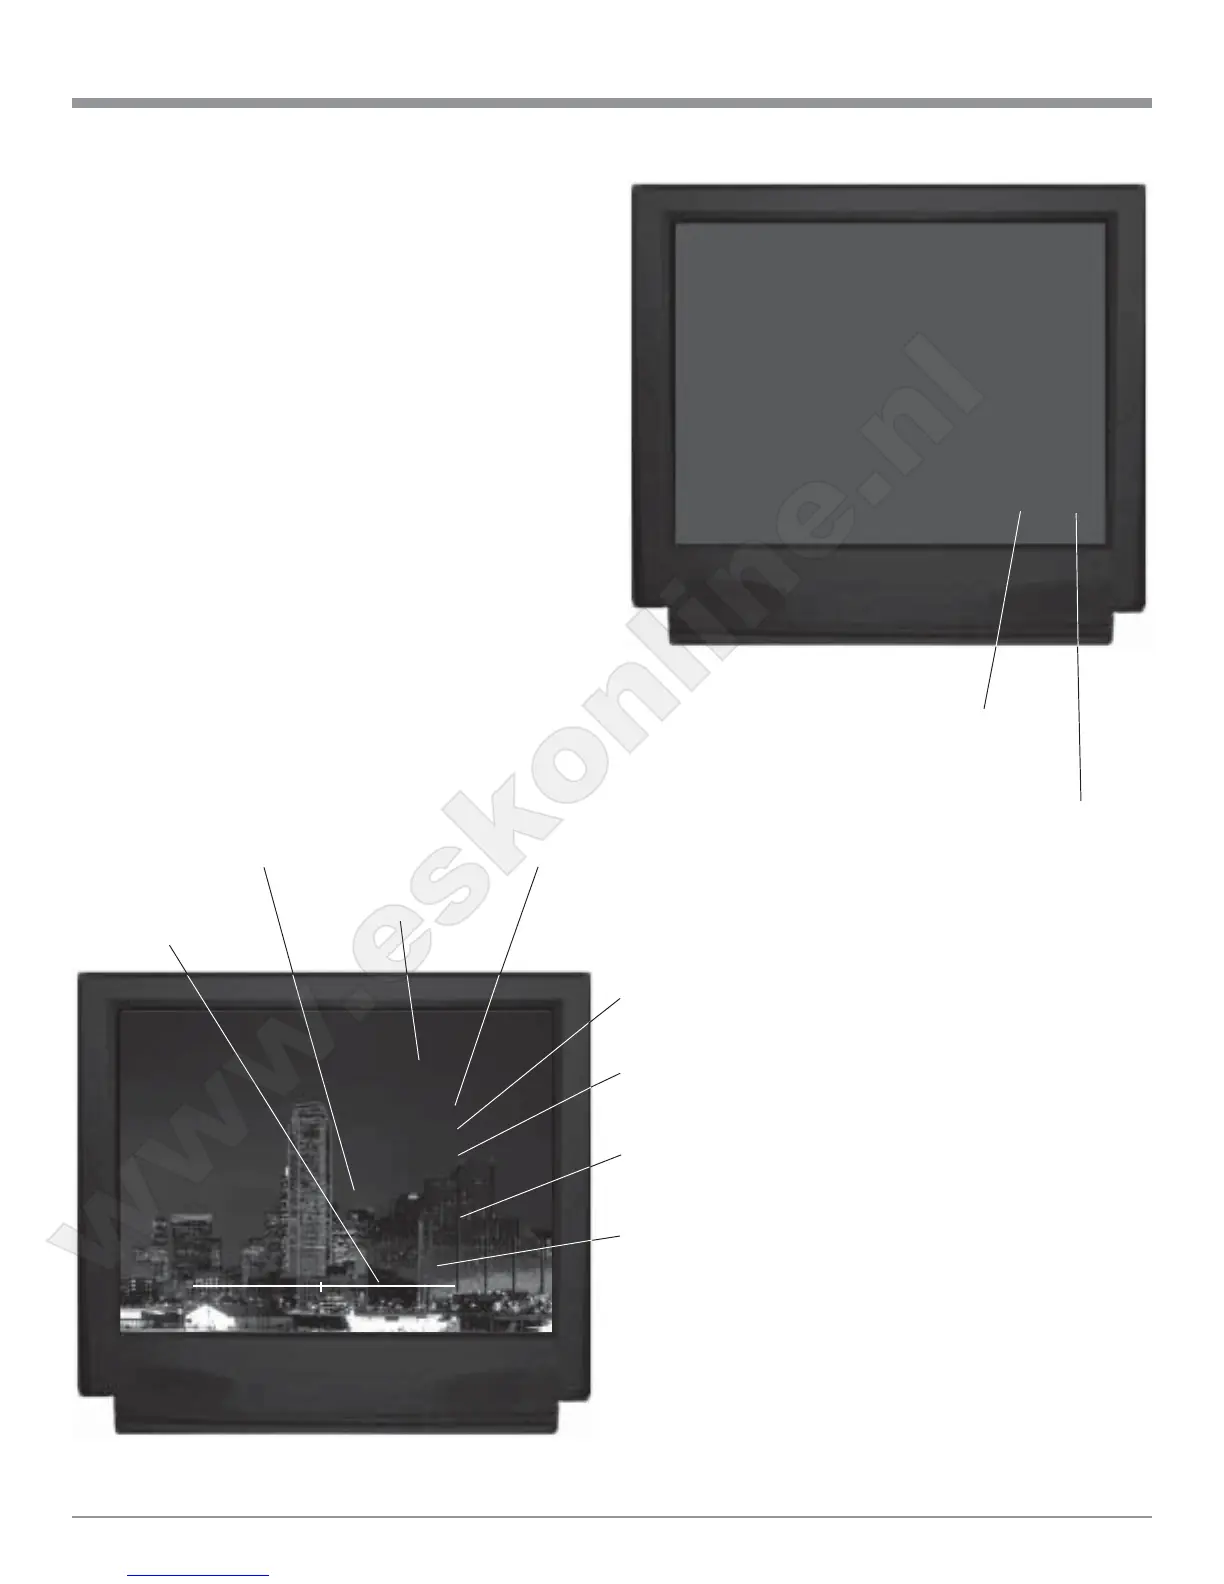
Figure 45
DVD
AUDIO
Signal Dolby D 3/2.1
Input Coaxial 5
Mode Cinema 1
VIDEO
Signal SVideo/NTSC
Input SVideo 5
54
Selected
Input
Audio Input
Signal is Dolby
Digital 5.1
Digital Input Selected
is Number 5/Letter E
Surround Mode is
set to Cinema 1
Video Input Signal is
S-Video and in the
NTSC Video Format
Video Input
Selected is
Number 5
Slide Bar to
display relative
volume setting
Indicates the current
volume setting
Figure 46
AM/FM Broadcast or
Preset Number
Station Frequency
or Preset Label
89.30 FM
On-Screen Display
The MHT200 has a Dynamic On-
Screen Display making it easy to
know the operating status without
refering to the Front Panel.
Press the current Source Selected
Input Push-button on the McIntosh
Remote Control and the On-Screen
Display will appear on the TV/
Monitor. It will also appear when
changing Source using the INPUT
Selector and when the Digital
Procesor changes modes. Figure 45
illustrates a typical Full On-Screen
Display, with the DVD Input Se-
lected and the Volume Level being
adjusted.
Note: In order for the On-Screen
Display to function the SYSTEM
SETUP TEMP DISPLAY must be
set to Full. Refer to the System
Setup on page 43.
www.eskonline.nl
 Loading...