2.4 Reagent Installation (continued)
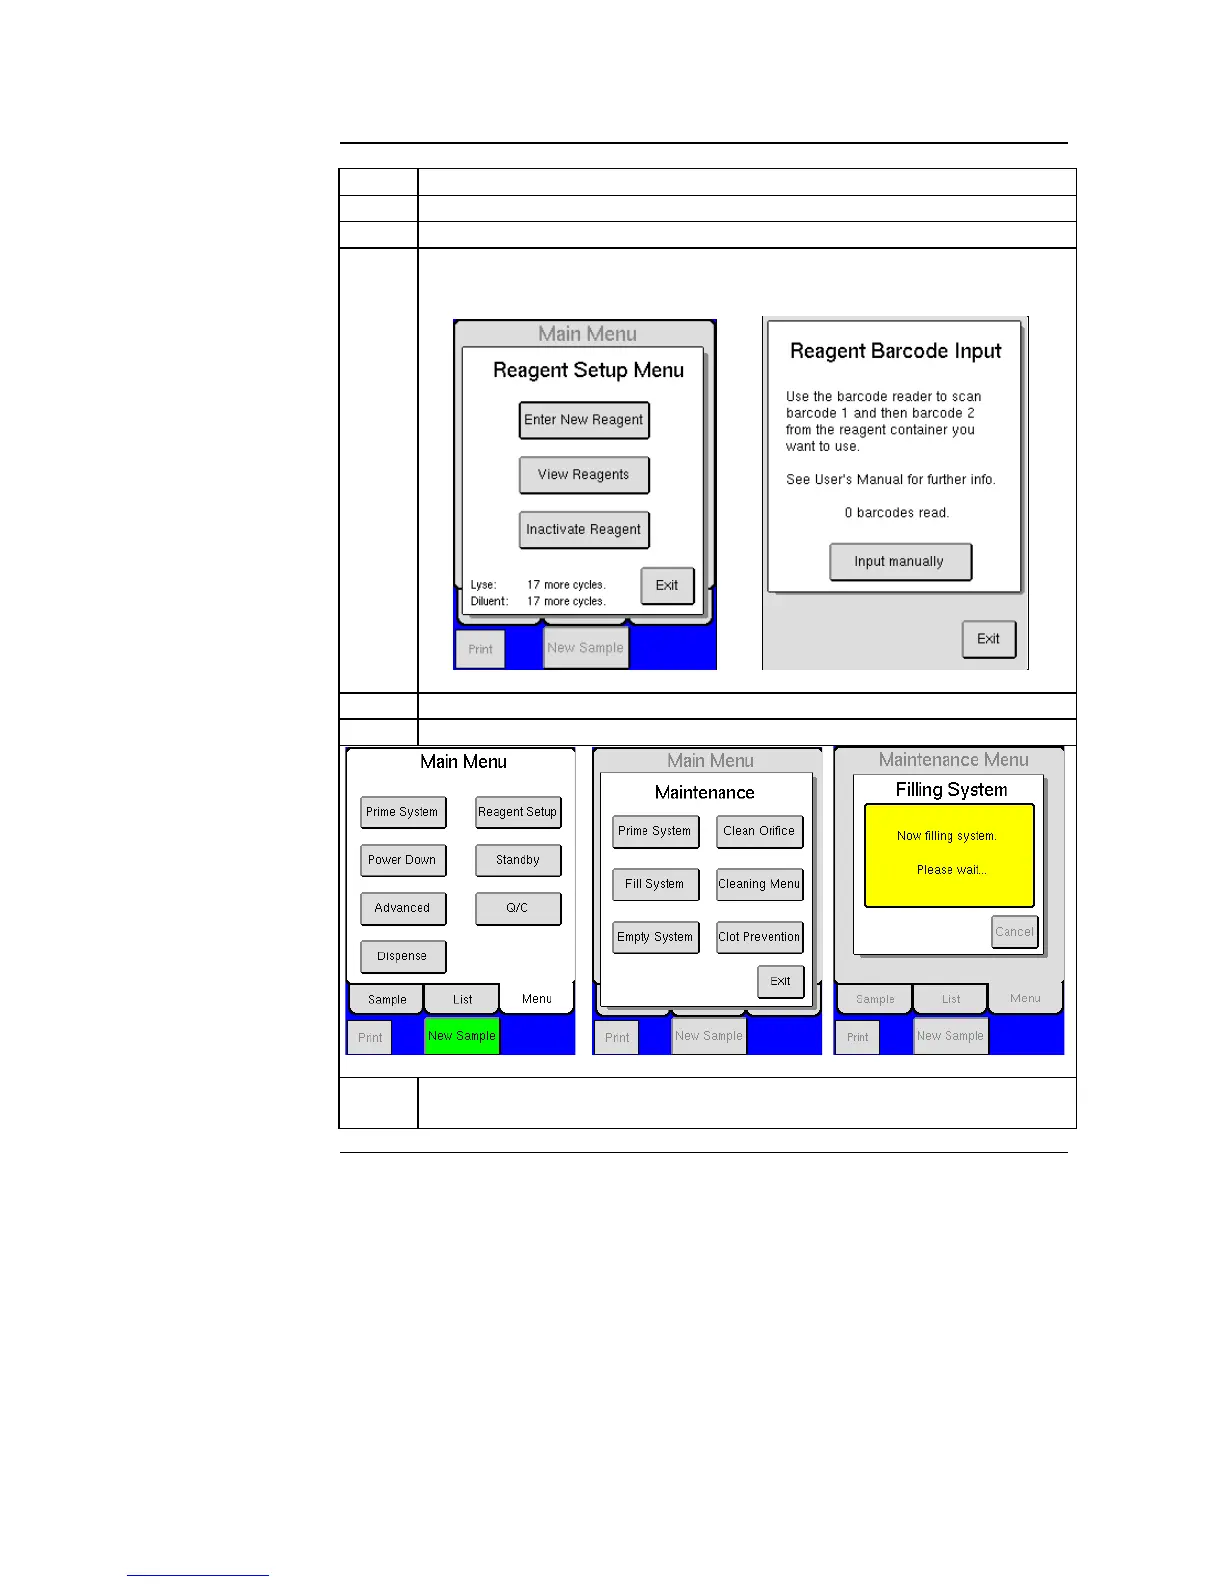
Press [REAGENT SETUP] and then press [ENTER NEW REAGENTS].
Scan in barcodes on reagent containers, when all barcodes are entered a
screen will display that reagent barcodes have been accepted.
Return to MAIN Menu and press [ADVANCED].
Press [MAINTENANCE] and then [FILL SYSTEM].
Figure 2.13 Figure 2.14 Figure 2.15
The system is now filling up with reagents. This cycle will last for
approximately 3 minutes.
After initial setup, it is recommended to print all analyzer settings and keep for
personal records. Select [ADVANCED] from Main Menu, then [SETUP], and
then [PRINT ALL SETTINGS].
All sample analysis modes (open tube, pre-dilute, MPA, cap piercer, sampling
device) are factory calibrated. However, calibration should always be checked
upon installation. See Section 7 for more details.