Input Calibrator
Assay Values
Follow the instruction in Section 6.1 Quality Control to access the QC menu
and to input Control/Calibrator Assay Values from the Assay sheet.
The following instructions calibrate Open Tube, Cap Piercer, and Sampling
Device modes. Follow the instructions below to calibrate:
Prior to calibration, prime instrument by aspirating 2 fresh blood
samples. Disregard results.
Follow directions on Assay Sheet to scan in calibrator assay values.
Choose either List, Sample, or Main menu to begin calibrator analysis.
Using installed barcode reader, scan the Calibrator ID from the
calibrator vial label.
To perform calibration, it is recommended that five calibration analyses
be performed in consecutive order through the open tube mode.
DO NOT use Cap Piercer or Autoloader mode to aspirate calibrator.
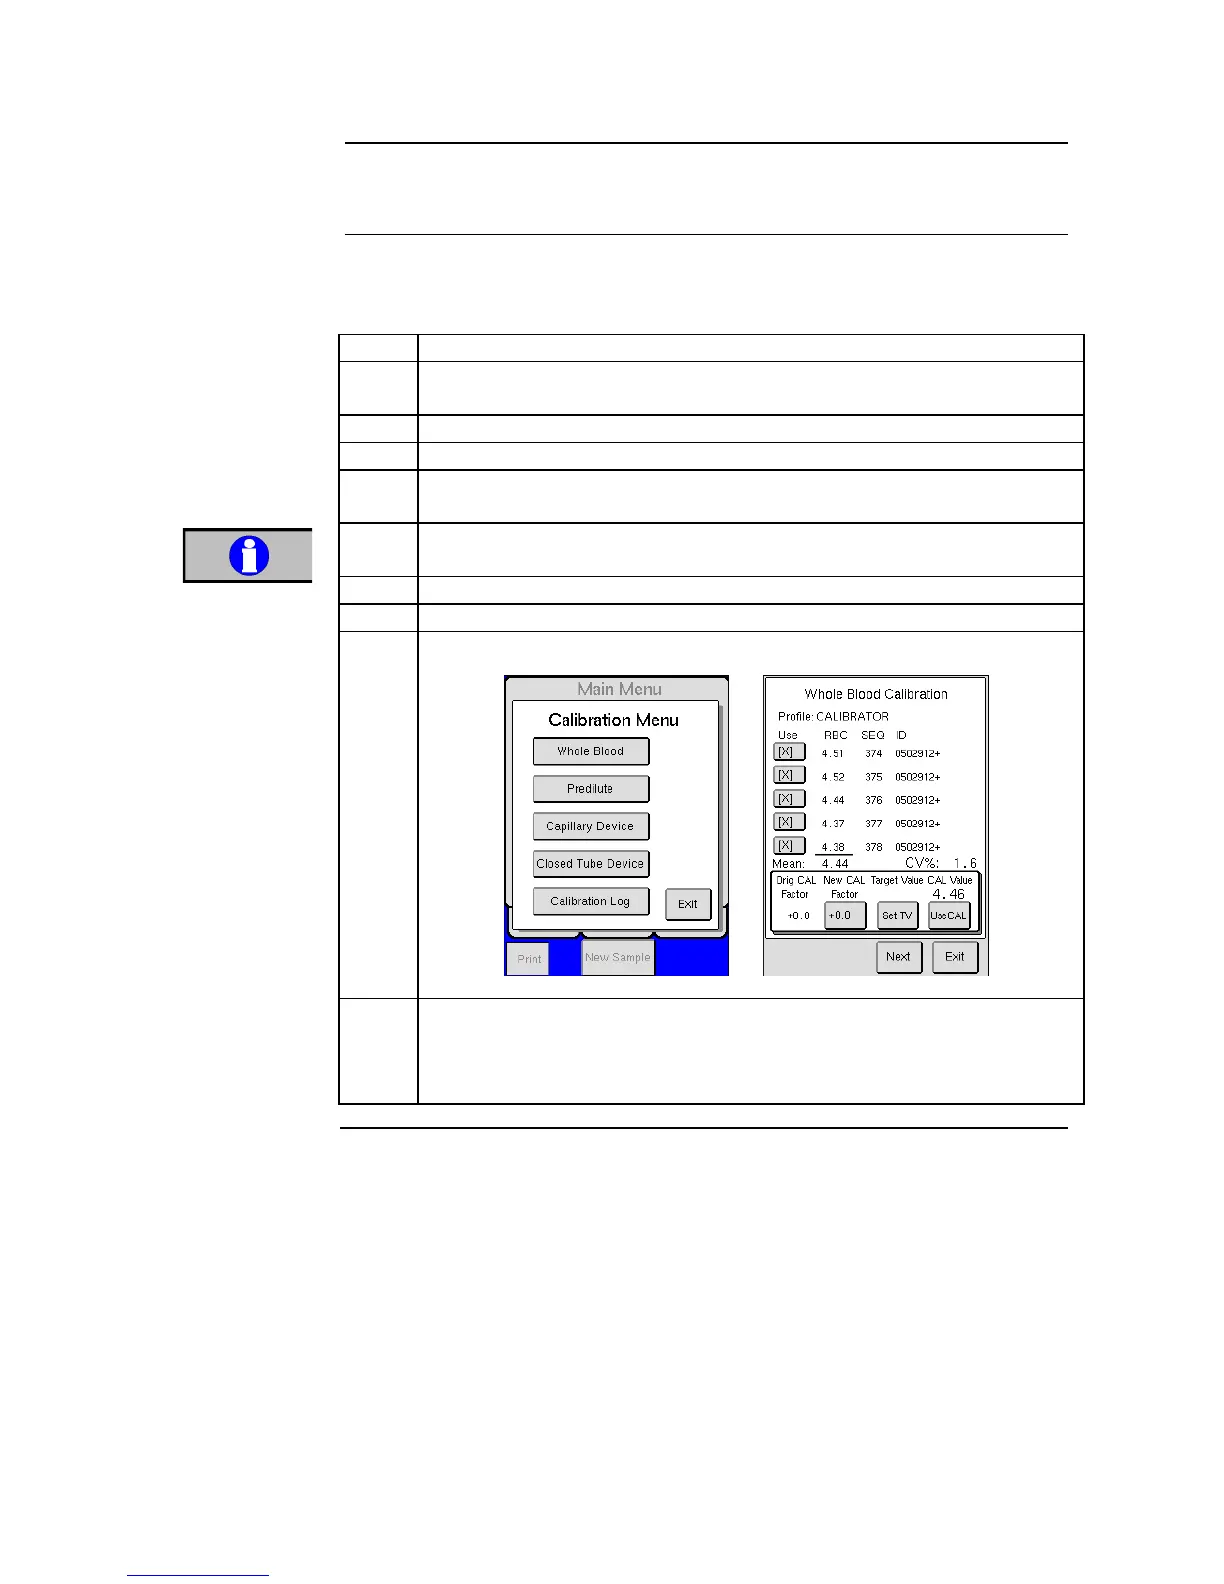
When analyses are complete press [ADVANCED] from the MENU tab.
Press [CALIBRATION] and then choose [WHOLE BLOOD].
Calibration analysis must be last analysis performed on instrument for
parameter values to be shown in calibration menus. (e.g. no values will
show if in the middle of calibration a patient sample analysis was
performed)
 Loading...