1 Determine the position of the flashing light: it should be near the gate
and easy to see; it can be secured to a horizontal as well as vertical
surface.
2Slide out the diffuser [A] from the bottom by pressing the two buttons
[B].
3 Separate the lamp holder with the aerial from the base.
4Breach the four holes for the screws and the hole for the passage of
the cables in the bottom or side, depending on the installation position,
using a screwdriver.
5Mark the drilling points using the bottom as reference and make sure
that the hole in the bottom matches the outlet for the cables.
6Drill the holes in the wall using a hammer drill with a 6 mm bit and insert
the 6 mm screw anchors.
7 Secure the bottom with the screws [C].
14 Instructions SL1
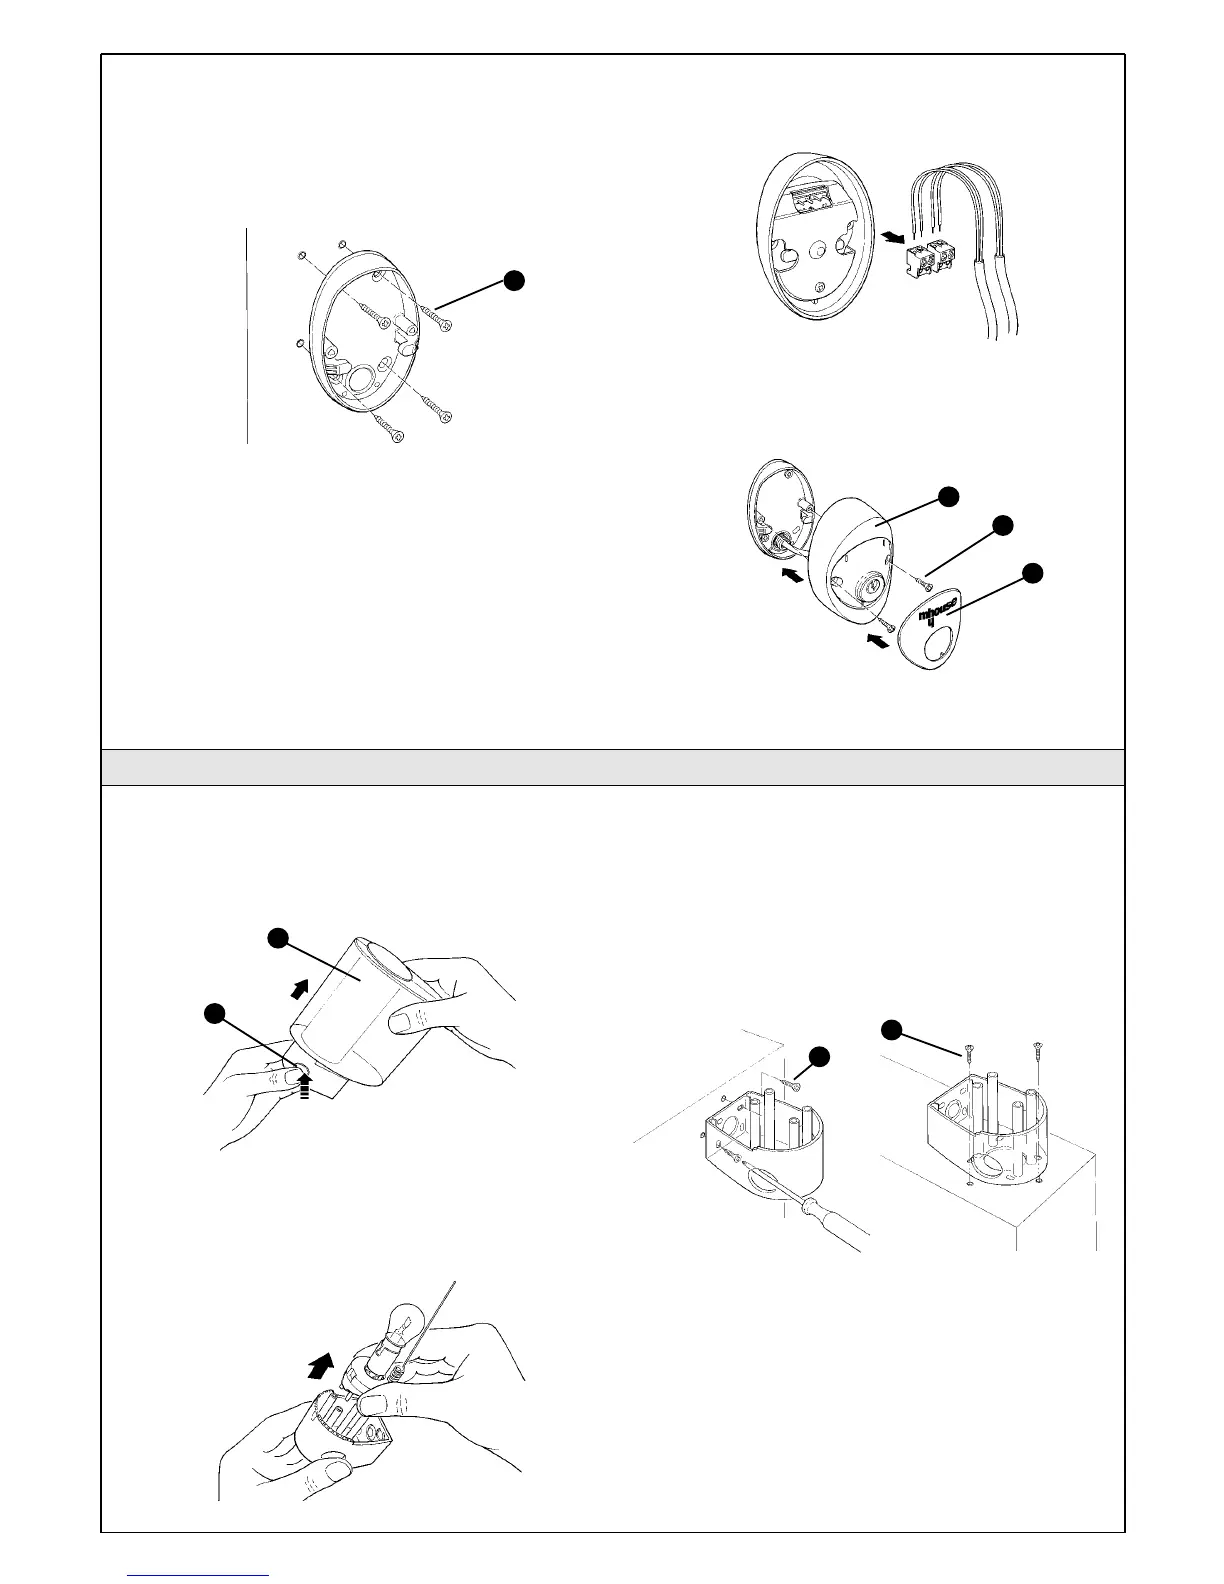
4Breach the four holes at the bottom with a screwdriver; mark the
drilling points using the bottom as reference; make sure that the hole in
the bottom matches the outlet for the cables.
5Drill the holes in the wall using a hammer drill with a 5 mm bit and insert
the 5 mm screw anchors.
6 Secure the bottom using the four screws [B].
7 Connect the electric cables to the appropriate OPEN and STOP
terminals, as shown in figure 41. It is not necessary to observe any
polarity. The terminals can be removed in order to facilitate the
operations; make the connections and then reinsert them.
8To insert the shell on the bottom you need to turn the key. After you
have inserted it, turn the key back to the centre position.
9 Secure the body [C] using the two screws [D] and a Phillips
screwdriver. Finally insert the glass [E], pressing it gently to close it.
Figure 40
Figure 41
3.3.5 FL1 Flashing Light
Figure 42
B
E
D
C
Figure 43
A
B
Figure 45
C
C
Figure 44
 Loading...