SL1 must not be used to power a gate that is not efficient and
safe. It cannot solve defects resulting from incorrect installation
or poor maintenance of the gate.
Before proceeding with the installation you must:
• Make sure that the weight and dimensions of the gate fall within
the specified operating limits. If they do not, SL1 cannot be used.
• Make sure that the structure of the gate is suitable for
automation and in compliance with regulations in force.
• Make sure that there are no points of greater friction in the
opening or closing travel of the gate.
• Make sure there is no danger of the gate derailing.
• Make sure that the mechanical stops are sturdy enough and
that there is no risk of the gate derailing out of the ground guide
even when it hits the mechanical stop violently.
• Make sure that the gate is well balanced: it must not move by
itself when it is placed in any position.
• Make sure that the area where the gearmotor is fixed is not
subject to flooding. If necessary, mount the gearmotor raised
from the ground.
• Make sure that the installation area is compatible with the size
of the gearmotor and that it is safe and easy to release it.
• Make sure that the mounting positions of the various devices
are protected from impacts and that the mounting surfaces are
sufficiently sturdy.
• Make sure that the mounting surfaces of the photocells are flat
and that they enable the proper alignment between TX and RX.
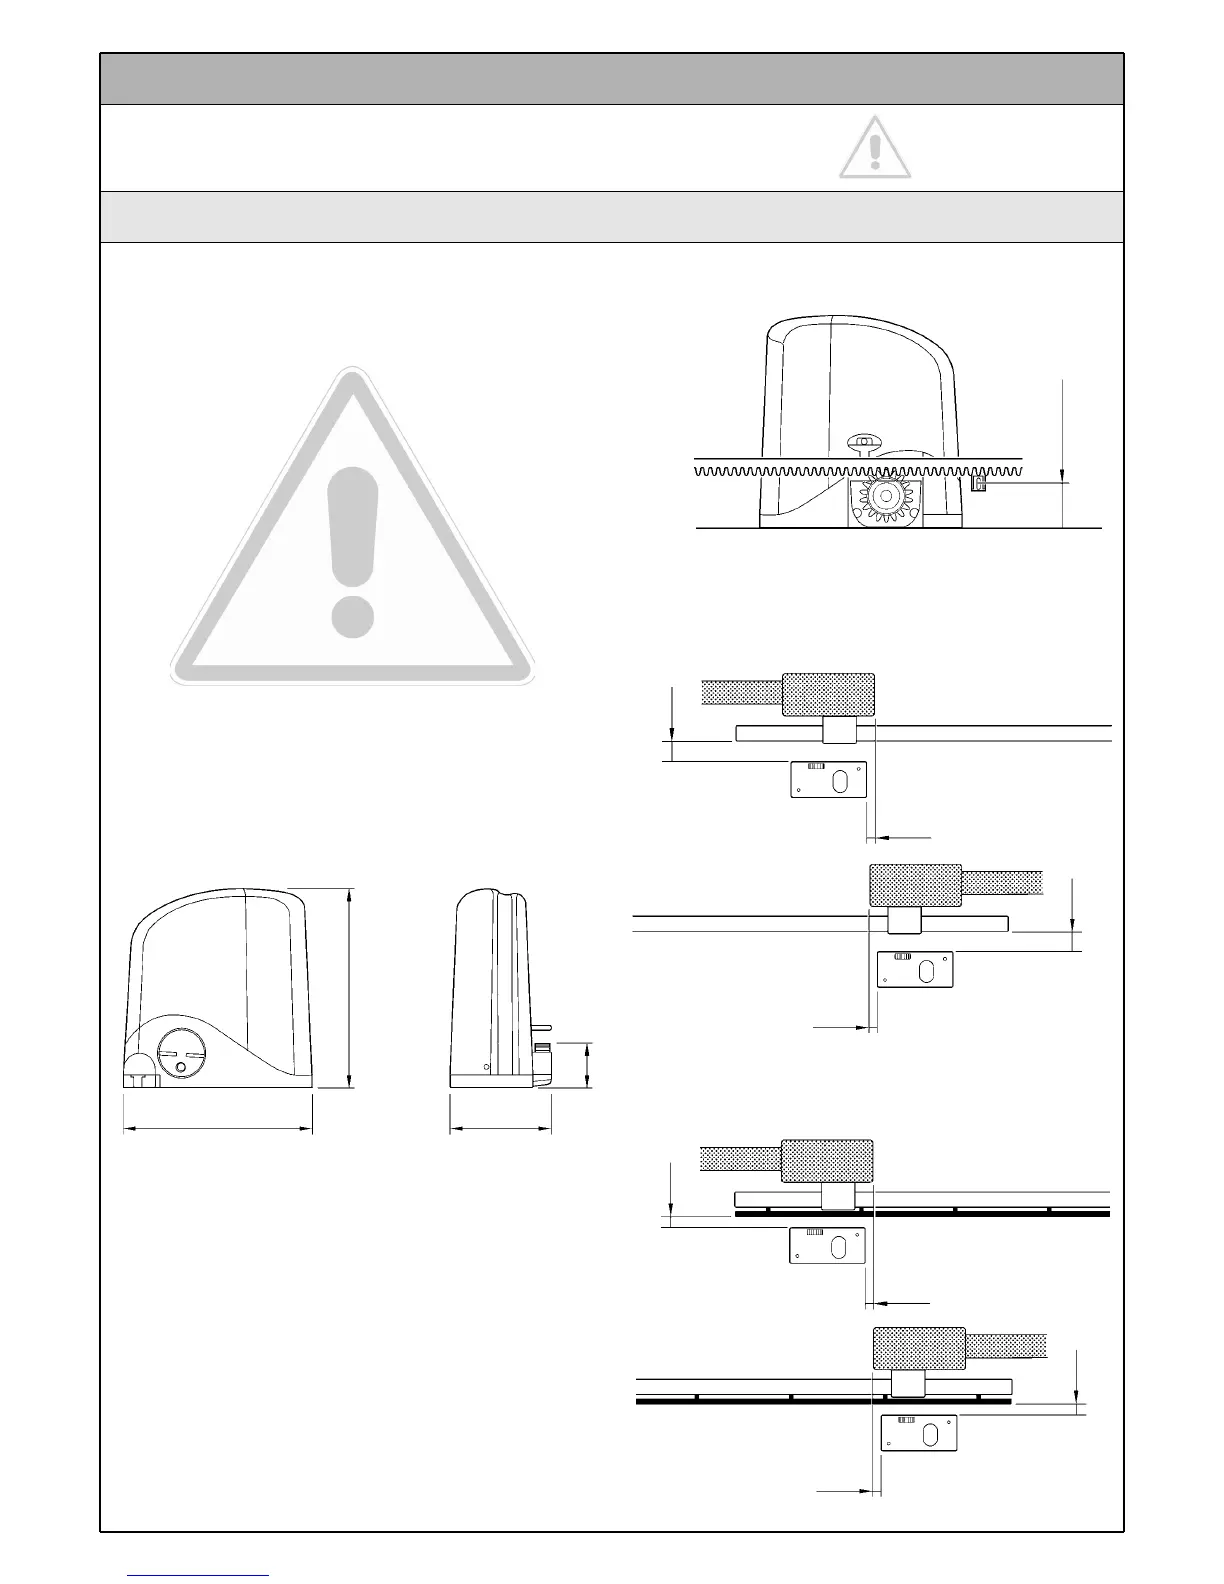
• Make sure there is a suitable fixing surface at the points where
the rack is fixed to the gate. For the CR100 rack, see figure 10.
• Both with the gearmotor mounted to the left "LT" and to the
right "RT", the distances indicated in figure 11 (gate without rack)
or figure 12 (gate with rack) must be respected.
Instructions SL1 7
The installation must be carried out by qualified and skilled
personnel in compliance with the directions provided in chapter
1 "Warnings".
3 Installation
3.1 Preliminary checks
Figure 9
300
295
163
84
Figure 11
50
0 ÷ 50
Figure 10
60
SX
DX
50 ÷ 100
50
0 ÷ 50
50 ÷ 100
10
10
Figure 12
SX
DX