Selecting the Voltage SediGraph III 5120 Installation
40 Mar 2010
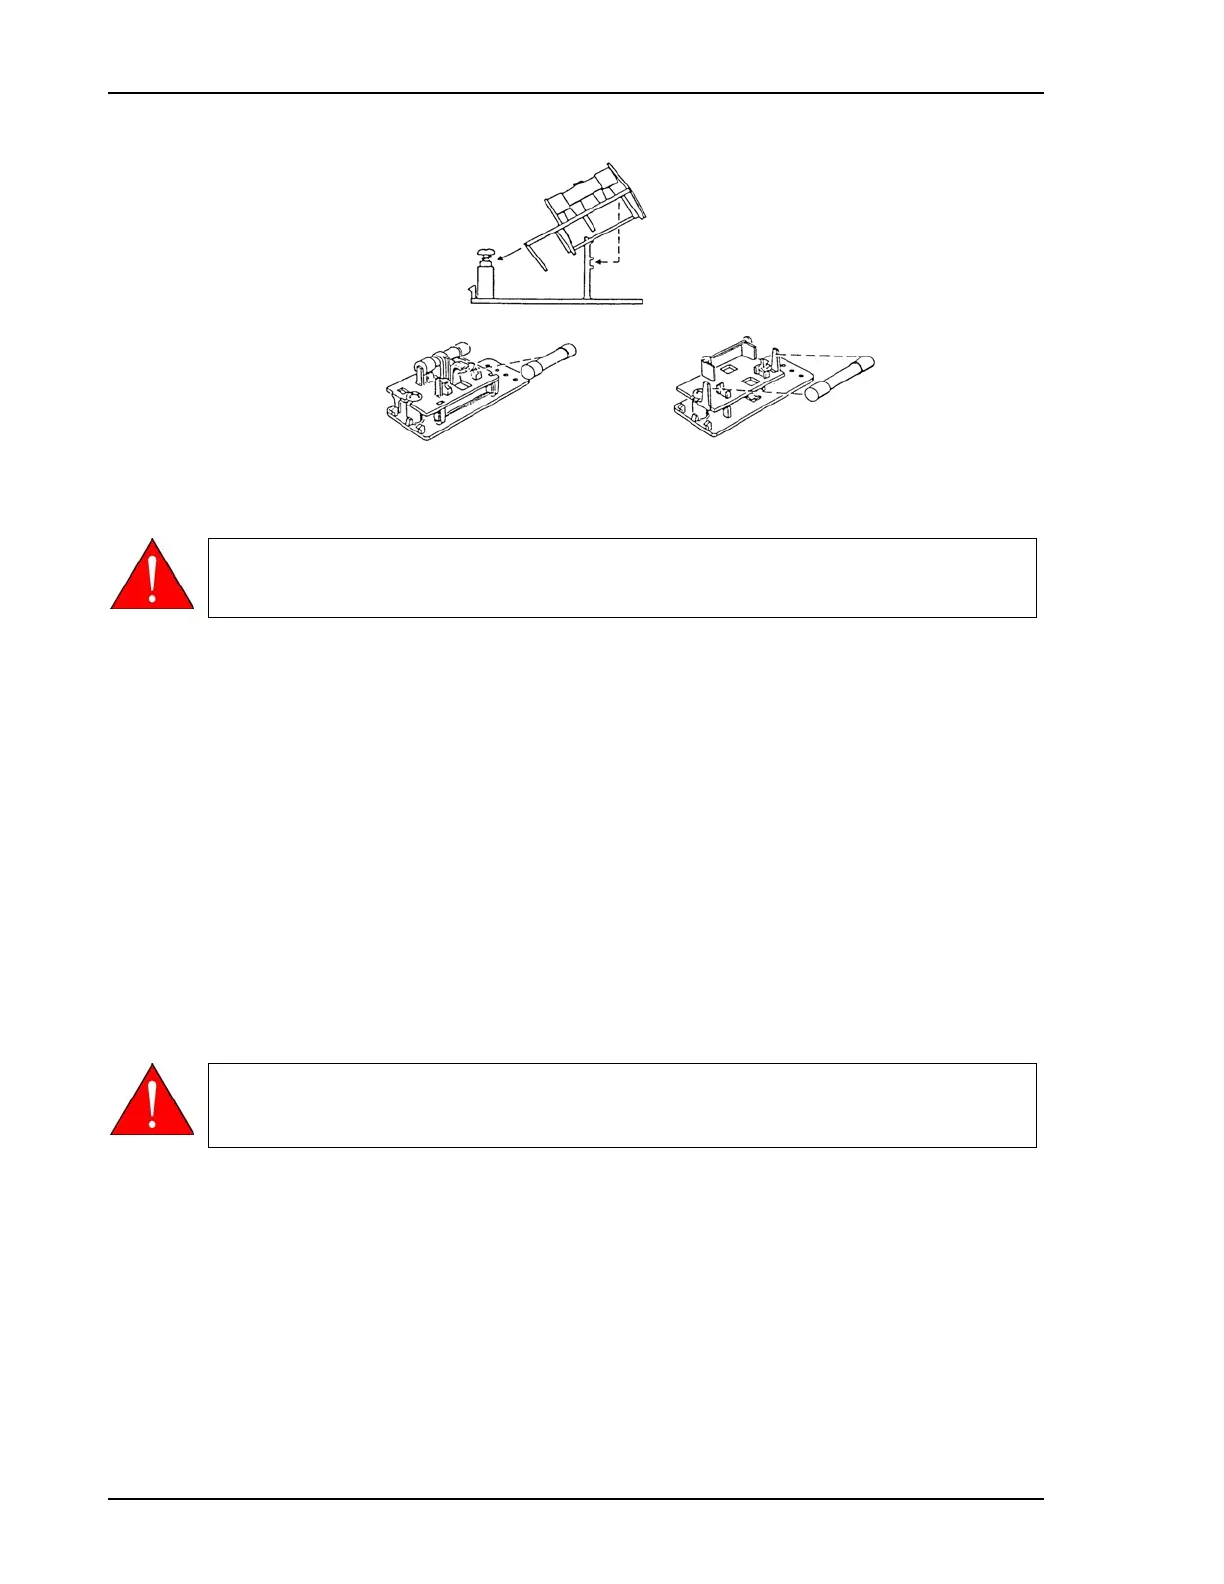
a. Observe the position of the fuse block, using the previous figure for reference. If the
single-fuse arrangement is desired, position the fuse block so that the side with the
single-fuse slot and the jumper bar is away from the cover.
If the double-fuse arrangement is desired, position the fuse block so that the side with
the double-fuse slots is away from the cover.
b. If the fuse block is positioned properly for the fusing desired, proceed to Step c.
If the fuse block is not positioned properly for the fusing desired:
1) Remove the fuse block retaining screw.
2) Lift the fuse block from the cover.
3) Rotate the fuse block.
4) Mount the fuse block to the cover.
5) Replace the retaining screw.
c. Insert appropriate fuse(s) for the input power source. Refer to the chart below for the
appropriate fuse rating.
Power Source Fuse
100-120 VAC 3AG, 2.00 Amp Slow-Blow
200-240 VAC 5x20 mm, 1.00 Amp Slow-Blow (Type T)
The power cord should be disconnected from the MasterTech when installing or
replacing fuses. Failure to do so could result in electrical shock.
The fuses used in the MasterTech must be identical in type and rating to that
specified. Use of other fuses could result in electrical shock and/or damage to the
MasterTech.

 Loading...


