SediGraph III 5120 Installation Turning on the MasterTech
Mar 2010 41
7. Insert the fuse block and cover assembly into the input power connector (as shown in the
following illustration) and snap it into place. Once the fuse block and cover assembly are
in place, the position of the indicator pin shows the input power selected.
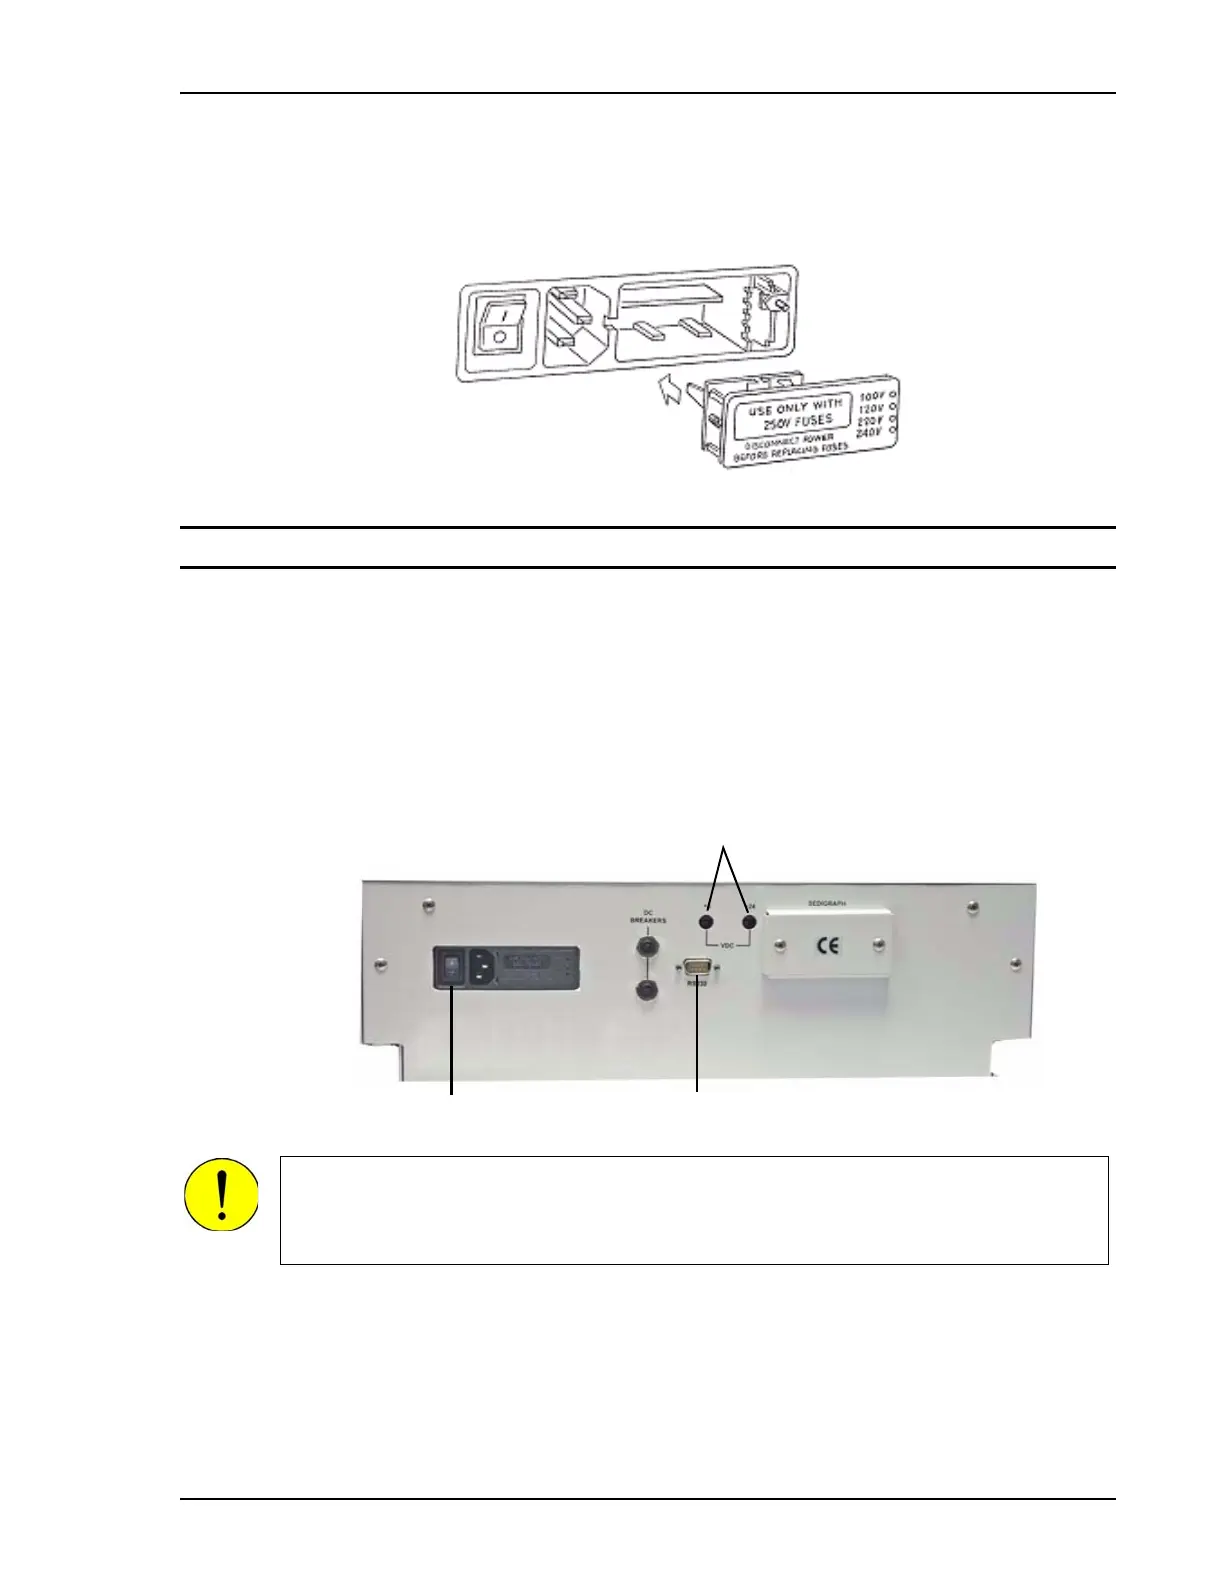
Turning on the MasterTech
1. Make sure the proper operating voltage and fuse are selected and in place.
2. Insert the power cord into the connector on the rear panel of the MasterTech and into an
appropriate power source.
3. Place the POWER ON/OFF switch, located on the MasterTech rear panel, in the ON ( | )
position. The +5 and +24 LEDs on the rear panel and some of the LEDs in the front panel
switches should illuminate.
Power On/Off Switch
RS232 Connector
+5 and +24 VDC Indicators
The ultrasonic probe should not be turned on at this point. Observe the indicator on
the ULTRASONIC PROBE AUTO/ON switch on the front panel of the MasterTech
(shown in the following illustration). If the indicator below ON is illuminated, press the
switch to turn off the probe. The indicator below AUTO should illuminate.

 Loading...


