Installing Sample Transfer Tubing SediGraph III 5120 Installation
46 Mar 2010
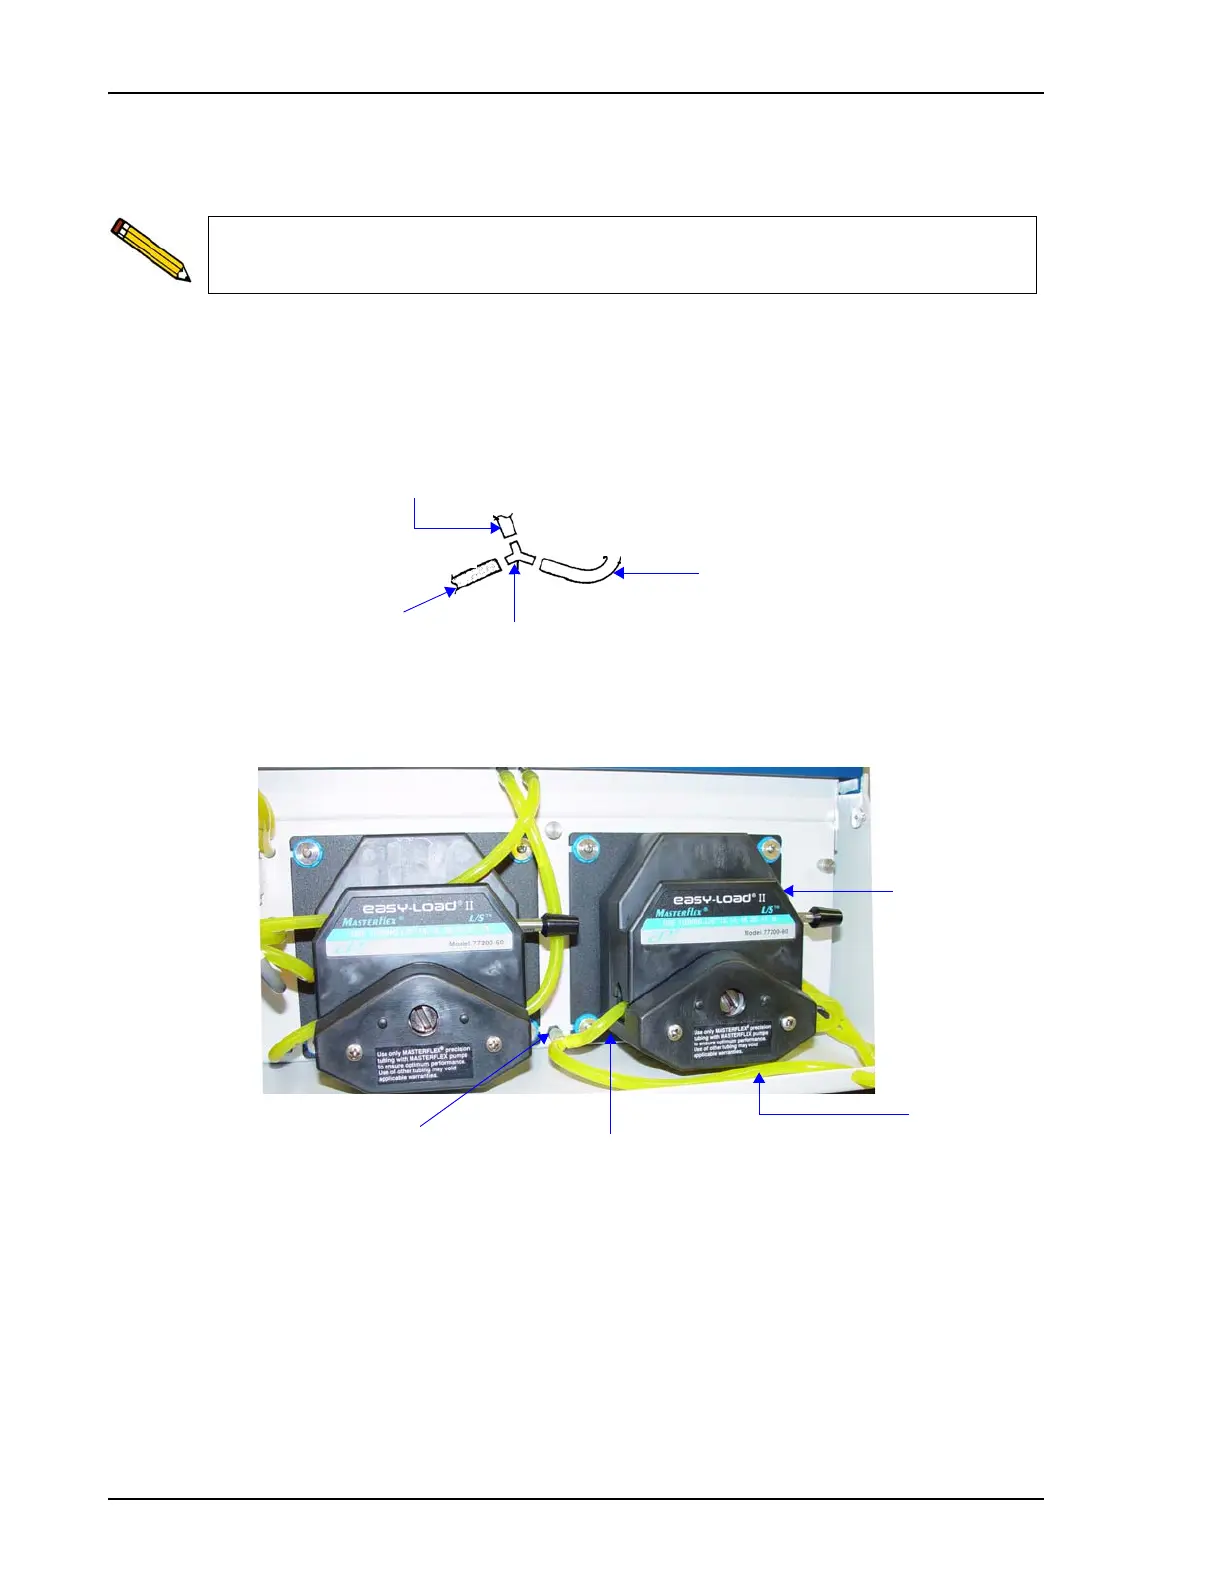
8. Attach the end of another segment of tubing to the Discharge Tube connector on the front
of the MasterTech.
9. Thread the other end of the tubing through the hole in the analyzer lower front panel.
10. Attach tubing to the Y-connector as shown below.
11. Attach the tubing from the Y-connector to the rigid tubing connector on the analyzer.
12. Re-install the pump module cover.
13. Continue with the SediGraph installation (“Verifying Operation” on page 19).
If the MasterTech is located on top of the SediGraph, use the longer segment of
tubing (P/N 052-32802-00).
Y-Connector
MasterTech
Mixing Pump Tubing (F)
Tubing Segment
cut in step 7 -
connects to rigid
tubing connector
Tubing
Tubing segment cut
in Step 7 - connects
to rigid tubing
connector
Mixing pump tubing
Y-connector
MasterTech tubing
Mixing pump
MasterTech
tubing
Rigid Tubing Mixing Pump
Connector Tubing (F)

 Loading...


