Classic Manual Rev L
31 | P a g e 1 0 - 0 0 1 - 1 R E V L
Use the UP and DOWN ARRO keys to change the current limit; depress ENTER to save this
data.
LED Modes
OFF - No LED activity
Rick Mode - LED activity for errors and warnings only (Over-current, Arc Fault, etc.)
Blinky - Cycles all the LEDs in a disco fashion (Useful for parties)
LED 1 - LED activity for Float, warnings, and errors
o A green LED indicates the Classic is in Float
o A yellow LED indicates a warning (Over-temp, over-current, etc.)
o A red LED indicates an error (Arc Fault, etc.)
To change the LED Mode:
o Depress the MAIN MENU key repeatedly until CHARGE is highlighted
o Scroll to the right until MISC is highlighted and depress ENTER
o Scroll to LED MODE and depress ENTER
o Use the UP and DOWN ARROW keys to select the mode you prefer. After selecting the
appropriate LED Mode, depress ENTER to save this data to the Classic.
o Depress STATUS key to return to the main status page
There are three LEDs inside the Classic that can be viewed through the upper vents.
Red LED - Indicates AUX 1 is active
Yellow LED - Indicates AUX 2 is active
Blue LED - Follow–Me:
o A short (1/10 second) blip means the Classics received a good data packet
o A long blip (½ second) means it got a bad packet or no packet at all.
o Consistently long blips generally indicate a bad Follow-Me cable.
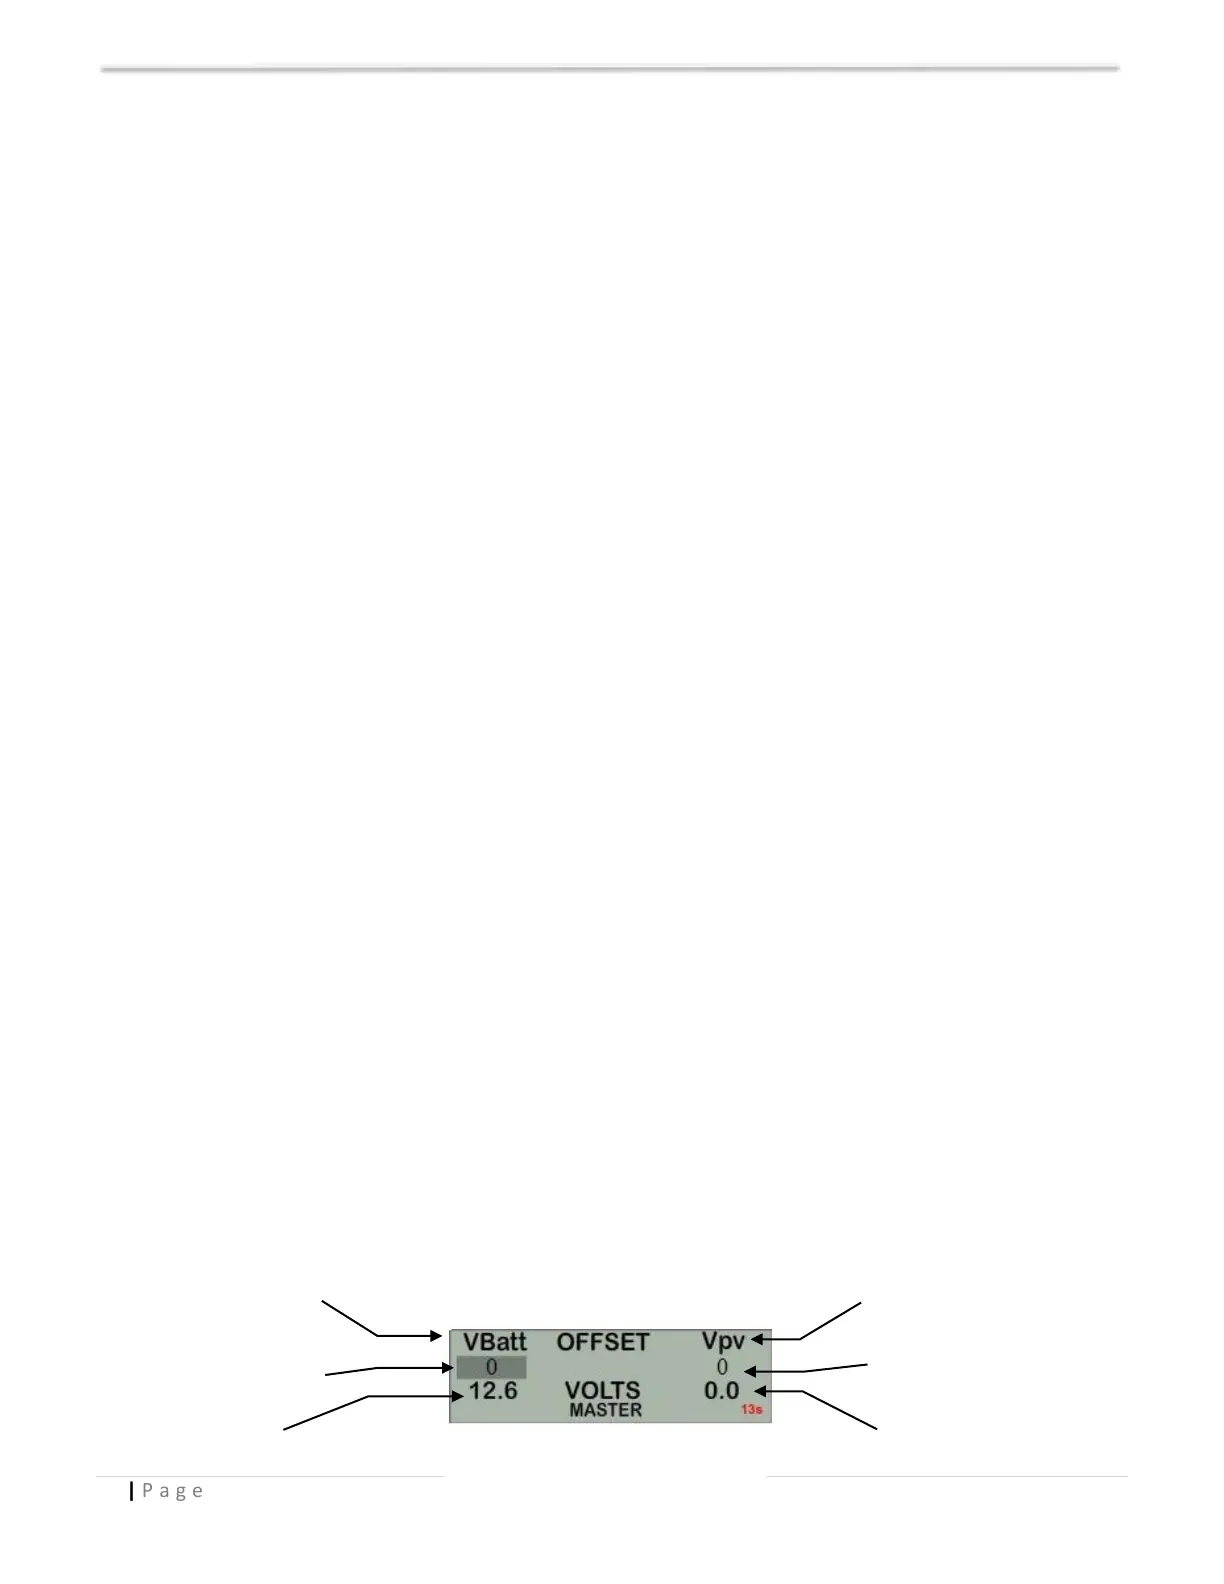
Calibrating Battery and PV Voltage
To calibrate the Classic battery and PV voltage readings, you will need an accurate and calibrated
voltmeter to check the actual battery bank voltage or input PV voltage. Using the voltmeter,
measure the voltage on the DC terminal connector of the Classic and compare this reading to the
reading on the MNGP in the TWEAKS menu (refer to Screenshot 2). To adjust the reading of the
Classic to the reading on the voltmeter, follow these steps:
Depress MAIN MENU, scroll to TWEAKS, depress ENTER.
Highlight VBatt and use the UP and DOWN ARROW keys to match both readings.
Depress ENTER to save.
Displayed battery voltage
Screenshot 2 – TWEAKS Menu