36
Cut Out Data with Registration Mark
Making sticker with a register mark (When using FineCut)
Create registration marks on an output image that you want to make a seal, and then the plotter detects
them to cut it out.
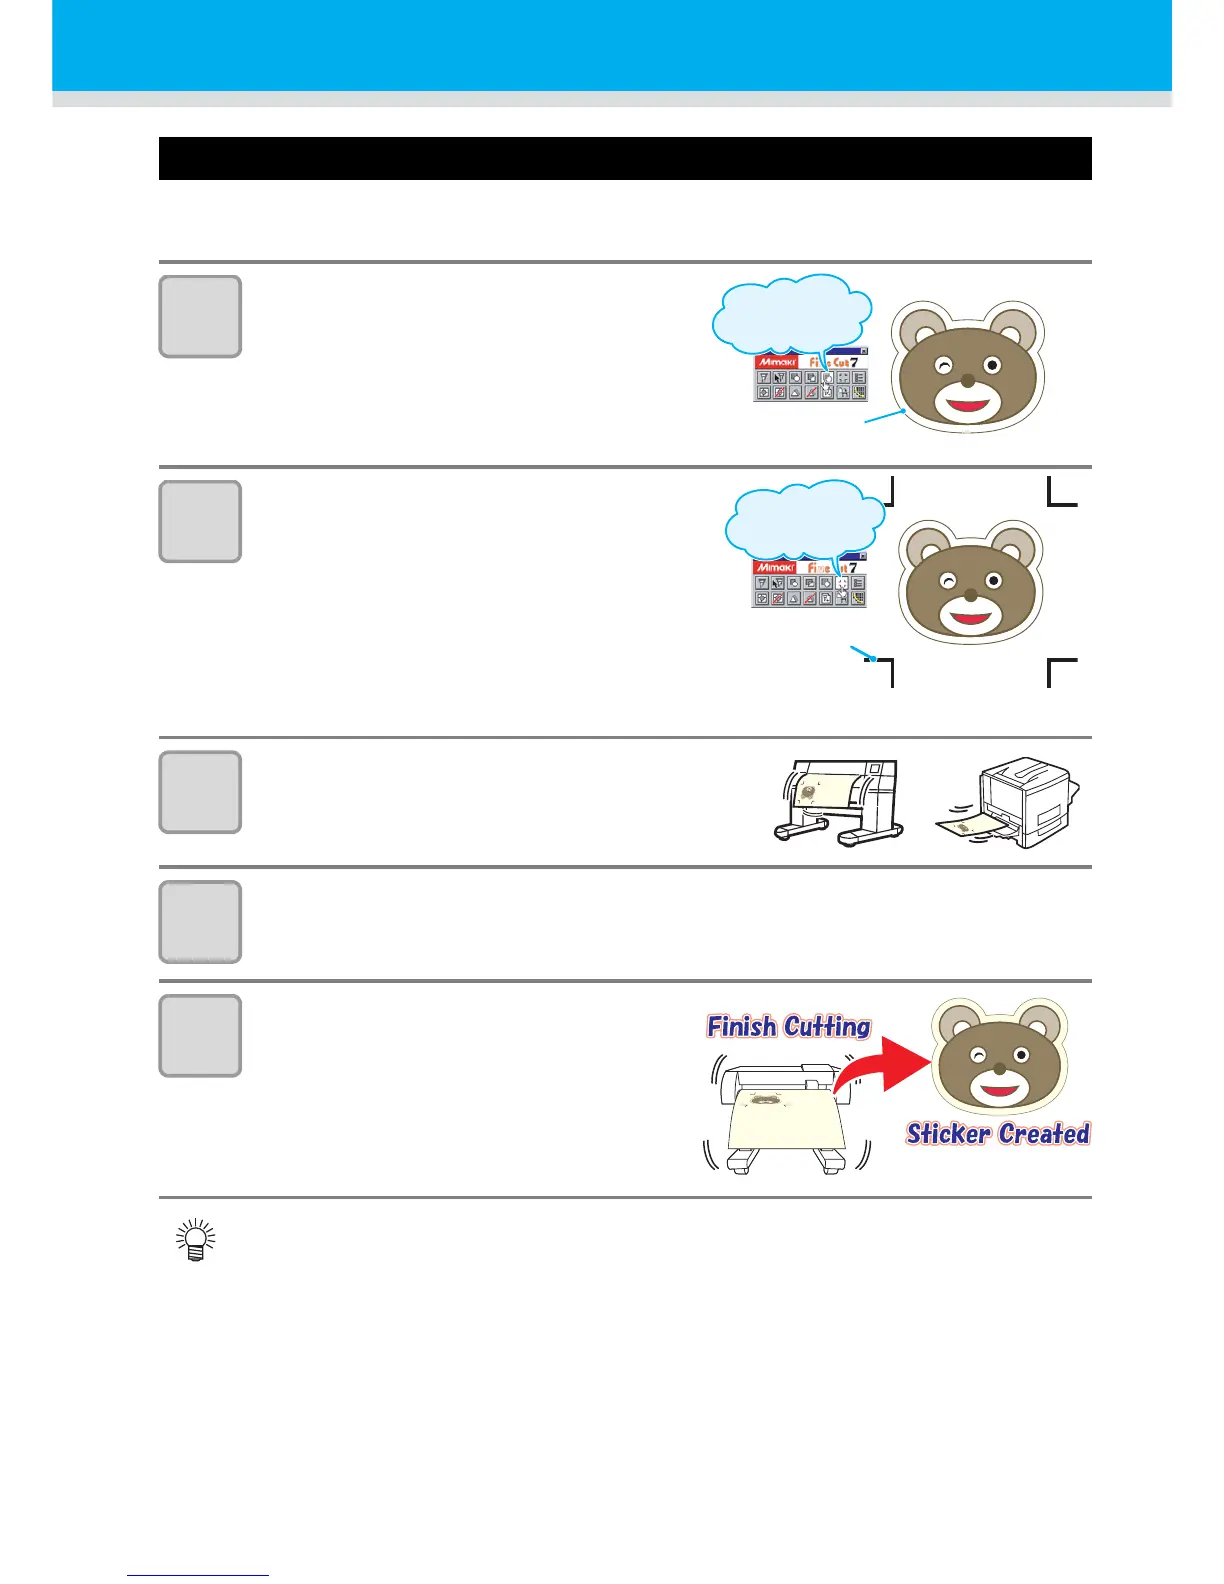
1
Make frame around the image.
• Make frame with an attached plug-in soft
“FineCut”
2
Make register mark.
• Make register mark at corners of image.
• Cutting start position is settled according to
the register mark.
• Use “FineCut” to make a register mark.
• Refer to P.39 to P.42 for the limitation of
making a register mark.
3
Print the image with register mark.
4
Load the sheet to CG-SRII.
• Refer to P.23 for loading the sheet.
5
Send the data with “FineCut” from
computer, and cut.
• For the operation of plug-in software FineCut, refer to the operation manual provided with a
FineCut CD-ROM.
 Loading...