Installing a tool
18
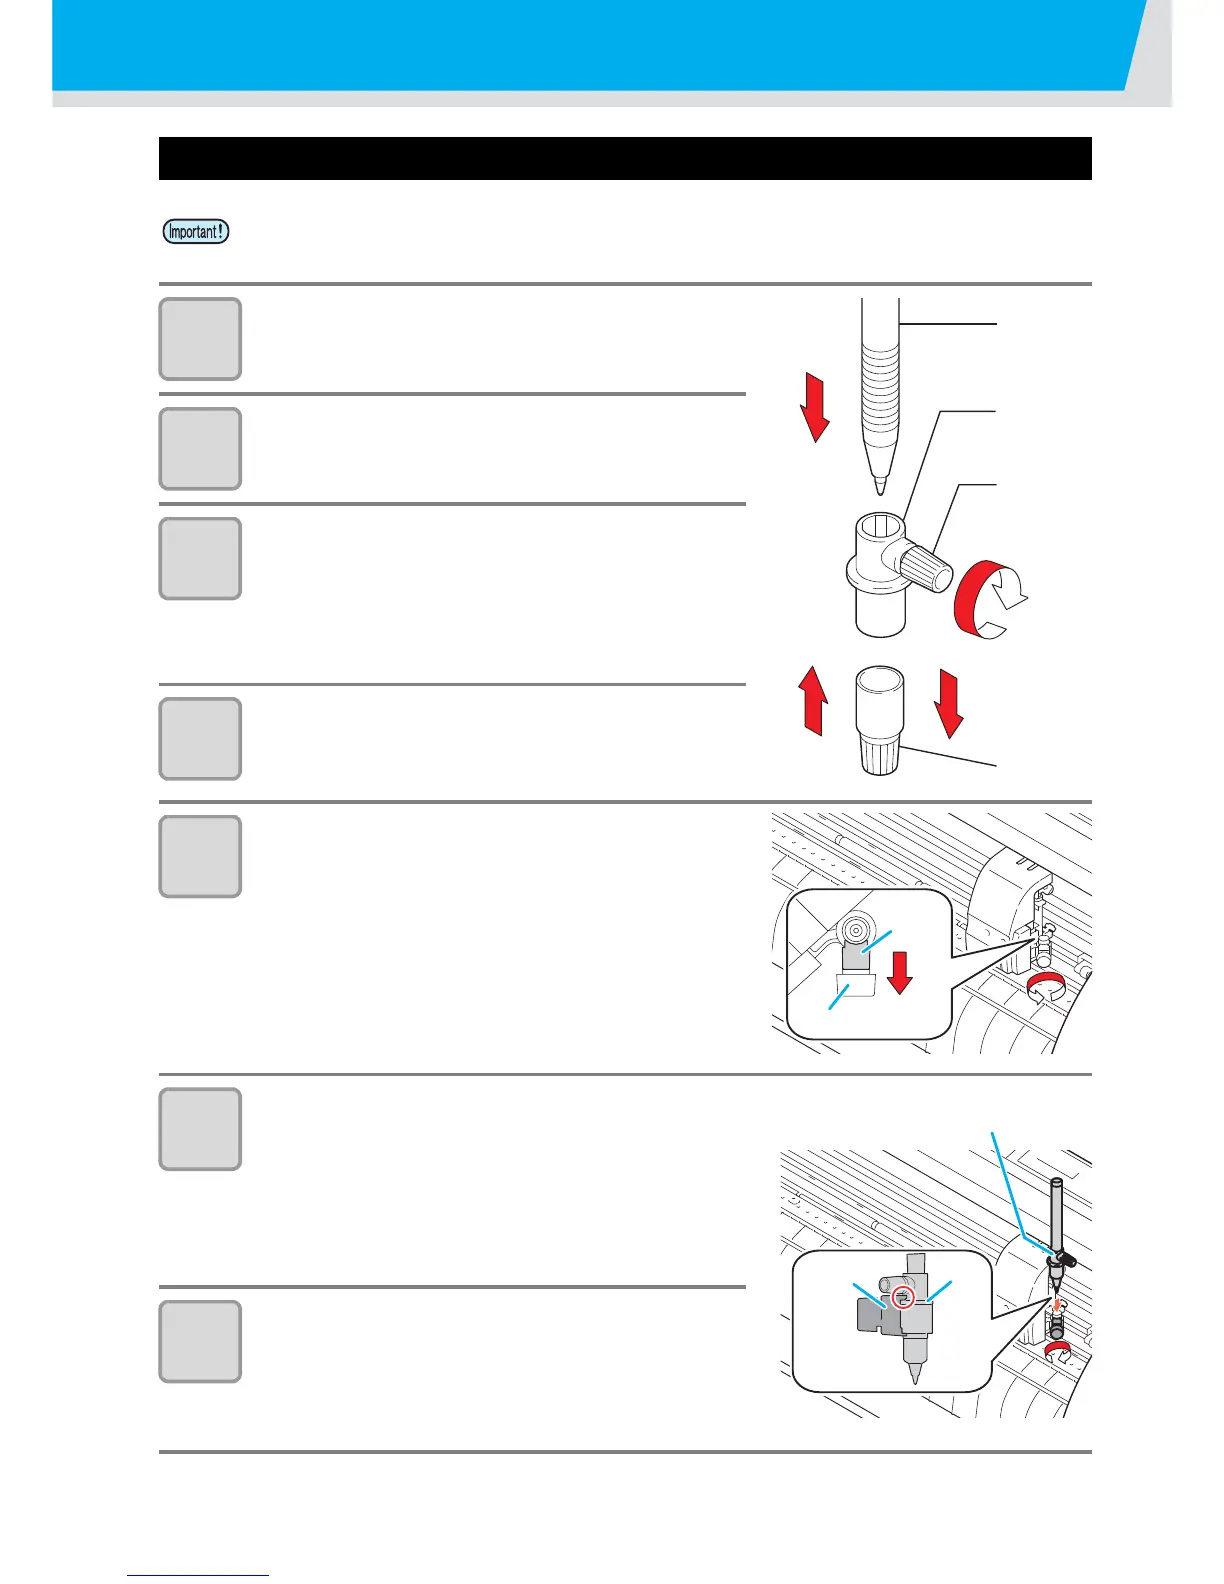
How to Install a Ballpoint Pen
1
Put the cap on the pen adapter.
• Use the cap to adjust the pen height.
2
Insert the pen into the pen adapter.
• Insert the pen until the pen head reaches the cap.
3
Fix the pen tip.
• Tighten the fixing screw clockwise.
• Be careful not to over-tighten the fixing screw for
the pen adapter. If tightened too much, the ball-
point pen may crack.
4
Remove the cap.
5
Rotate the knob to loosen the holder
presser.
6
Insert the pen adapter with the pen into
the tool holder.
• Make sure that the collar of the pen adapter is
rested on the holder.
• Set the adapter in such a way that the fixing screw
will not obstruct operation.
7
Turn the knob of the tool holder
clockwise to fix the tool.
• When use a boll-point pen on the market, refer to the oeration manual and select a installable
boll-point pen.
 Loading...