44
D26 Camera Manual: Installation
2.3.2 Procedure
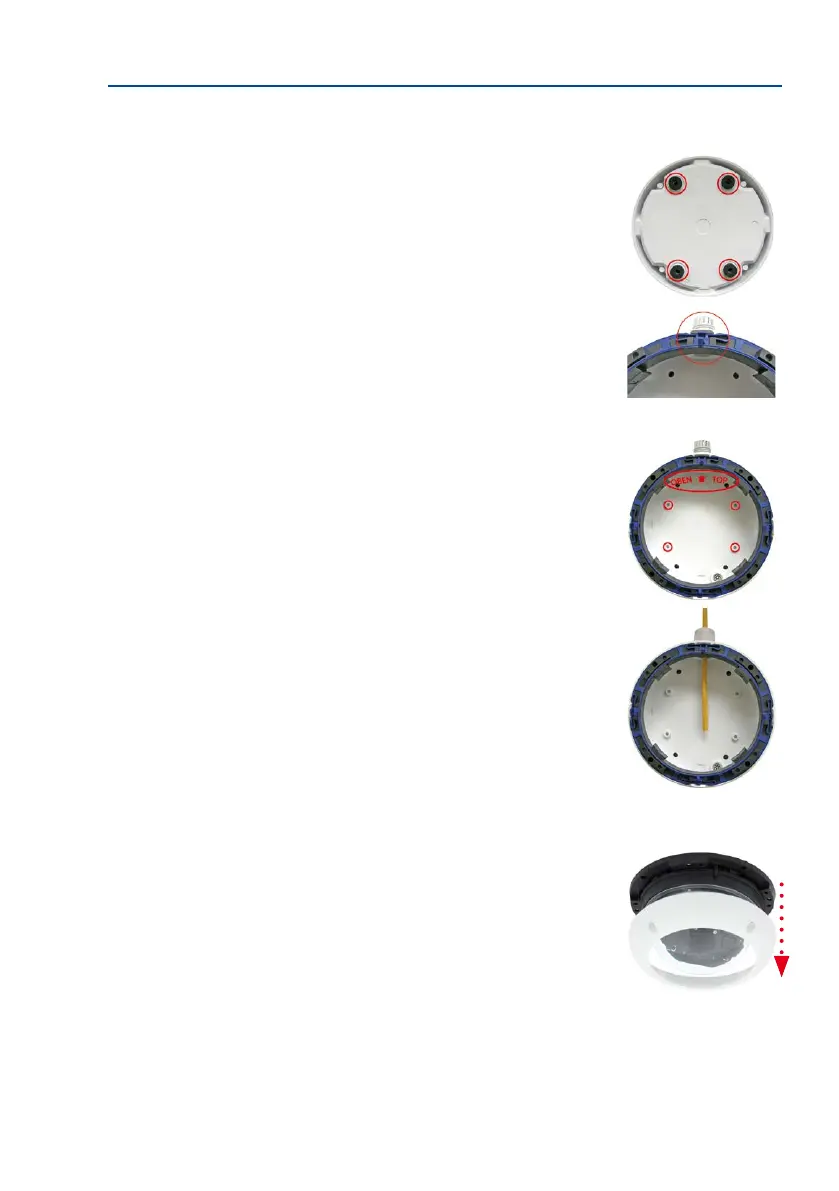
1. Attach washers: Prior to installation, stick a black foam
rubber washer around each of the four screw holes on the
rear side of the on-wall housing (remove the adhesive foil
and press into place, surface must be clean and free of
grease). This prevents water from entering the housing.
2.
Prepare the cabling: Insert the seal into the cable open-
ing of the On-Wall Set such that the black rubber seal is
on the outside. Fix it in place from the inside using a small
hexagonal nut.
3.
Mount the On-Wall Set: Mount the On-Wall Set (without
the camera) at the intended position using the Torx screws
(included with D26 camera, items 1.10 – 1.12).
4. Cable feeding: Attach the counter nut to the network
cable, pass it through the seal from the outside and
tighten the nut. The network cable is now screwed into
the On-Wall Set, weatherproof. All unused openings must
be sealed with the included sealant plugs. The cable
passing into the housing must always be installed using
the supplied three-part ttings.
5. Remove the camera outer shell: Remove all four Allen
screws with the supplied Allen wrench and li o the
outer shell (not mounted upon delivery).