EXAMPLE:
n
The camera is not in the same subnet as the computer.
n
The user name and password of the camera are not known.
NOTE! Using the Bonjour service (en.wikipedia.org/wiki/Bonjour_(software)), the application finds not only
MOBOTIX cameras on the same subnet, but also in other subnets. Normally, you would not be able to estab-
lish any connection to cameras in a different network or subnet.
NOTE! This is the case, for example, if you are integrating cameras into a network without DHCP server (i.e.
with fixed IP addresses) and the IP address range is different from the 10.x.x.x range supported by the cam-
eras in addition to DHCP.
MxManagementCenter can automatically configure such a camera so that it is "integrated" into your exist-
ing network.
2.
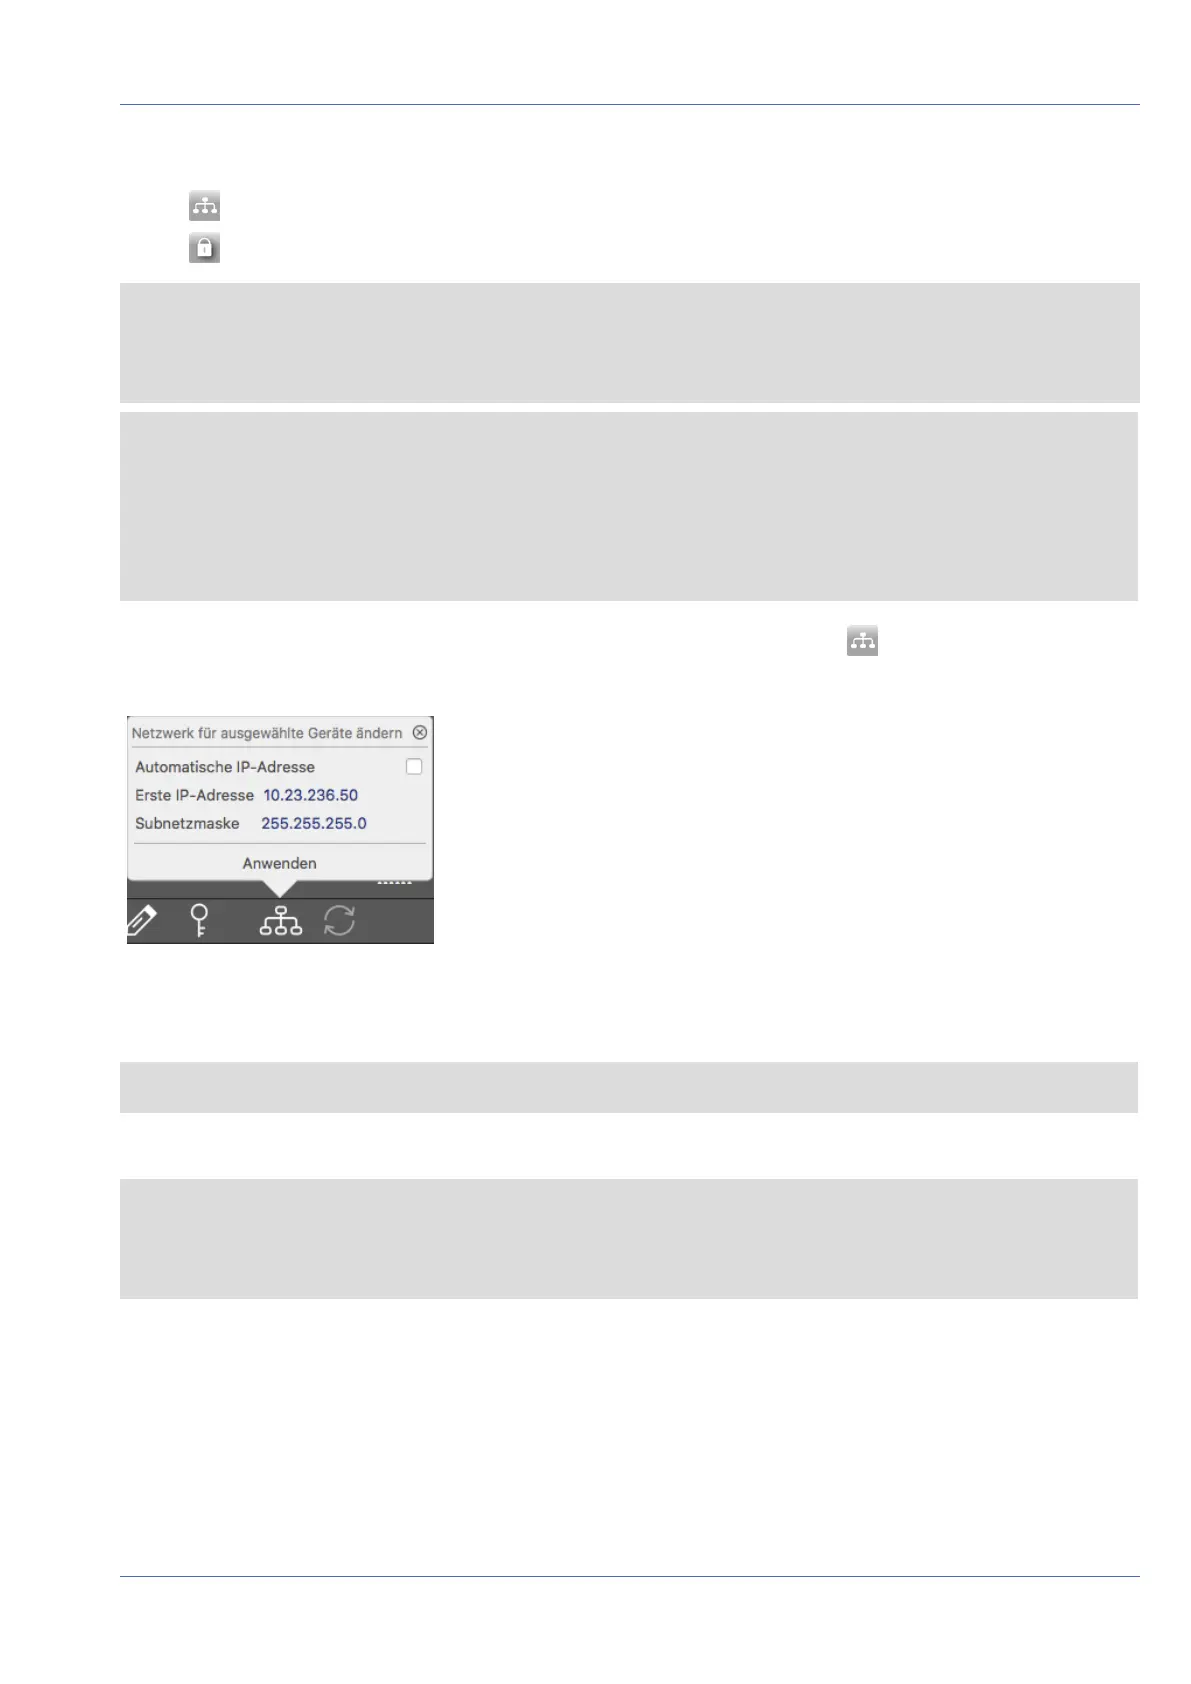
Select the camera you want to set up and click on Edit Network Settings at the bottom of the pro-
gram window. The Change Network Settings for Selected Devices dialog opens.
Fig. 81: Change network settings for selected devices
3. Enter the IP address and the subnet mask of the selected camera.
NOTE! The IP addresses of the other cameras are automatically incremented by 1.
4. Click on Apply to apply the settings.
NOTE! For more information on this feature, please read the MxManagementCenter online help or the
Tutorial (see www.mobotix.com> Support> Download Center> Documentation> Brochures & Guides>
Tutorials).
Operating the Camera
Network Settings
96 / 110