User Manual
19
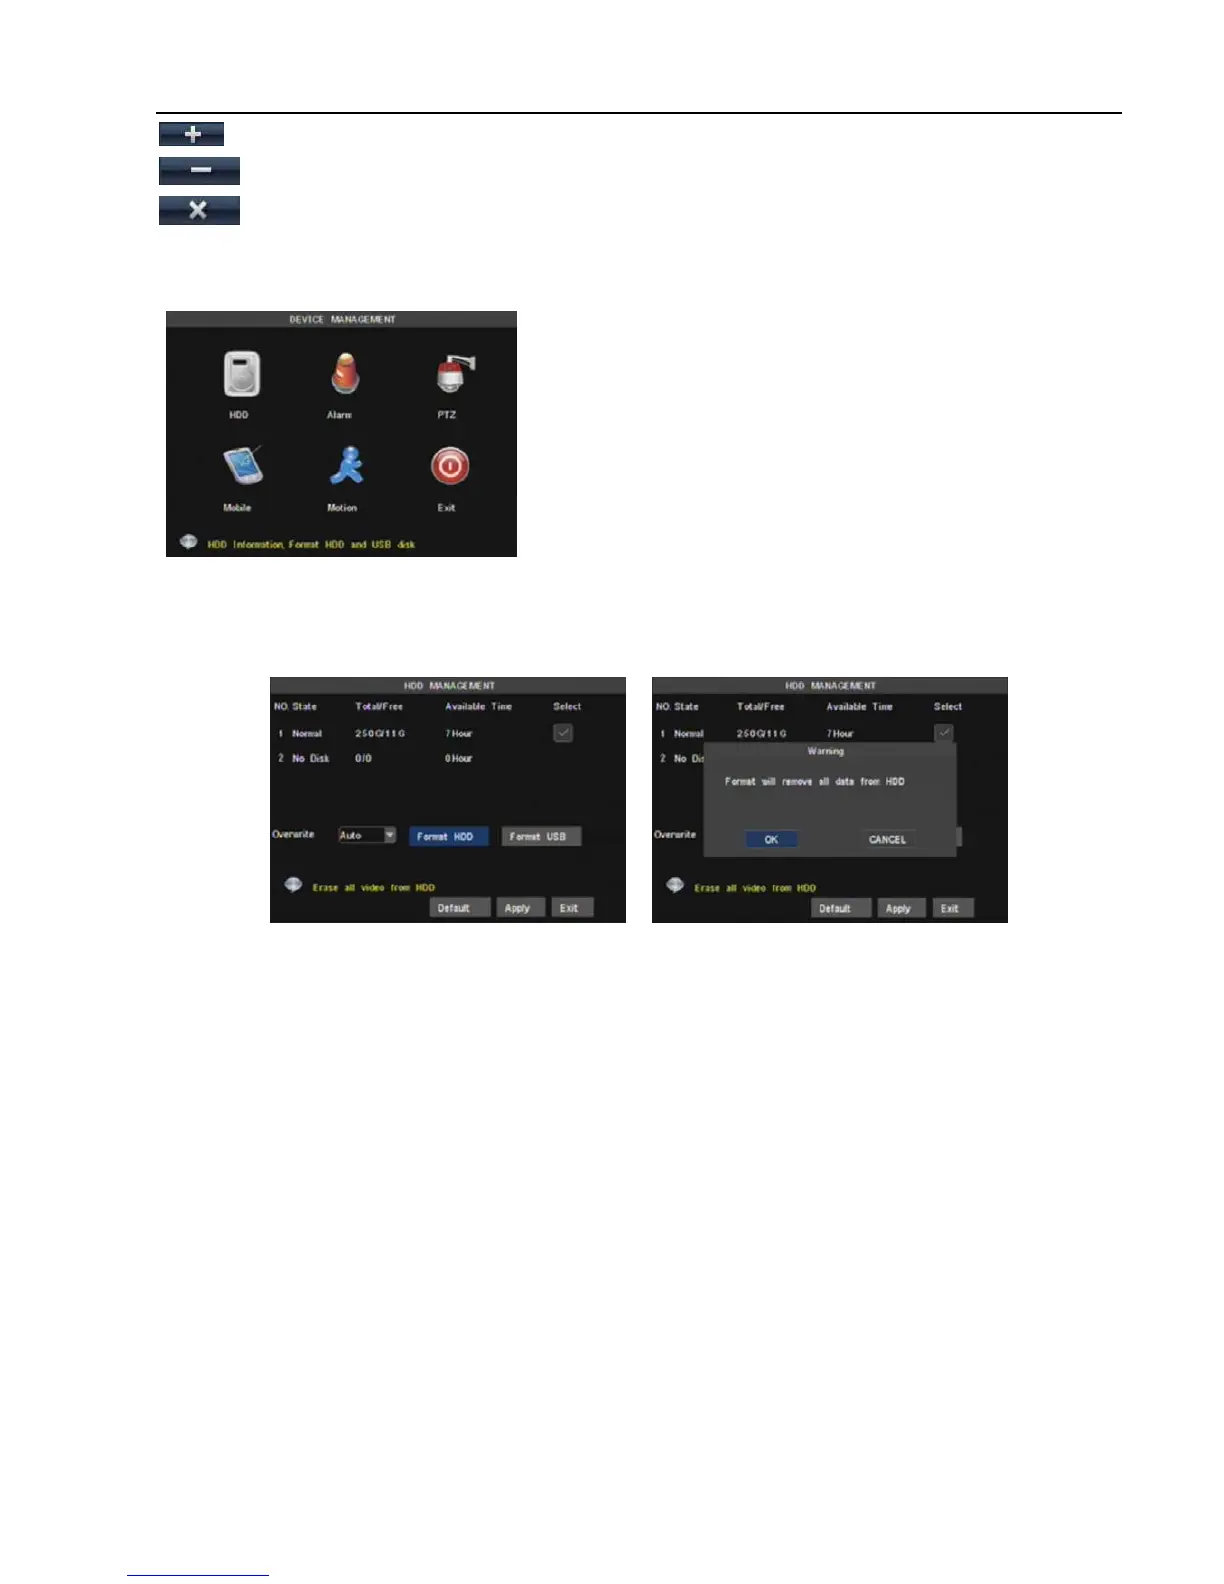
Objects in <device manage> include HDD, Alarm, PTZ,
Mobile and Motion.
Click [Main MenuDevice Management] option to enter
into the window shown as Picture 5-23.
[Add]: click the button to add one record file
[Del]: click the button to delete one record file.
[Del all]: click the button to delete all the record files in the event list.
5.3.6 Device Manage
5.3.6.1 HDD Manage
In the [Device Manage] screen, highlight and click [HDD] icon to enter into the window shown as Picture
5-24.
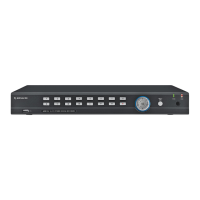
When DVR is connected to a HDD, the system will automatically detect if HDD is normal or not;
If the cable connected to HDD is loosen or HDD is abnormal, HDD status will be shown as “No Disk”, or,
If HDD need to be formatted, status will be shown as “no format”, otherwise, the HDD status will be shown
as “Normal” (refer to Picture 5-23).
NO:HDD number defaulted by system
State:Available Hard drive. You could use HDD only when formatting the HDD and inspect its status
normal.
TOTAL/AVAIL: Indicates total space available on Hard Drive. / Unused space available on the Hard Drive.
AVAIL TIME: Based on current image detail/quality and frame rate, system will show you how many
record time you have left on the Hard Drive.
OVERWRITE: If you select “on” the system will automatically overwrite the oldest recordings once the
hard drive is full; if you select “off”, recording will stop once the hard drive is full.
HDD FORMAT: You use this option to format the hard drive, you can not record files to the hard drive until
it has been formatted. Click [Format HDD] button to start formatting. When selecting [Format HDD] option
the system will prompt you – “Format HDD will loss all the data, do you confirm?” ; click “OK”, system will
prompt you – “Is formatting…” and “successful format”; and then system will restart automatically.
USB FORMAT: Use this option to format USB devices.
Picture 5-23
Picture 5-23
Picture 5-24