User Manual
14
[Bit rate] include three options – Best, Good and Normal.
[Frame rate] include two options – Fixed and Manual. When set to “Manual” and click [Frame rate setup]
option, you may allocate the frame rate for each channel.
[Audio] option allows you turn audio on/off.
[Mode] allow you select record modes, including Always and Scheduled. To record 24 hours a day set the
[Mode] to Always. To record on motion or a set schedule, select the [Schedule] option.
[Pack time] indicates maximum continuous record time (15, 30, 45 and 60 min).
[Copy to] allow you copy current settings to any other channel.
When setting [Mode] to Schedule, the schedule screen will appear as shown in Picture 5-7.
[Record CH] options include All, CH-1, CH-2, CH-3 and CH-4 in turn. Please click the channel you need.
To setup weekly schedules, tick-select the box of the record status you want (Alarm, General, or No
Record) and then click on each box in the schedule time line that you want this method to apply to. You can
use the [From – To] pull-down menus and Copy button to copy settings from one day to another day or all
days.
After you complete the schedule you activate it by clicking the [Apply] button.
You can also click the [Default] button to use the system defaults.
Explanation: On the [record] Set and [Search] mode, original color stands for no record, “Red” stands for
alarm record and “Green” stands for normal record.
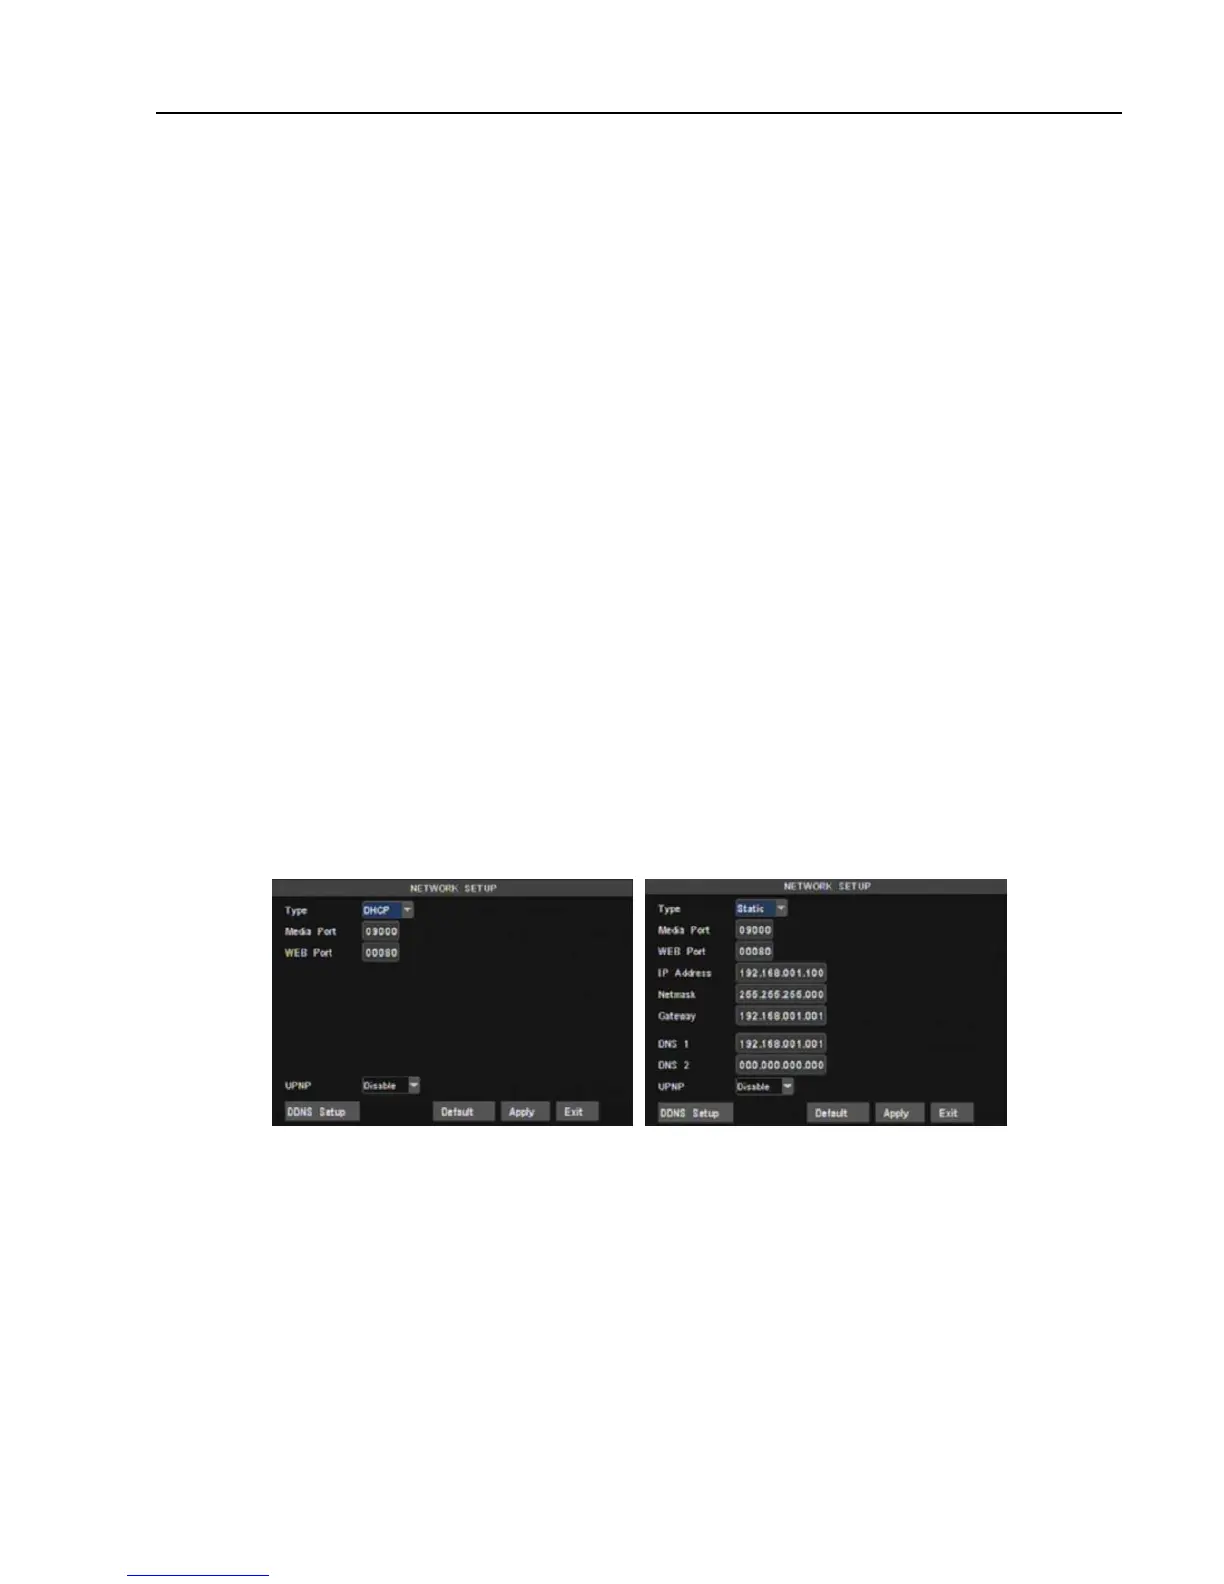
5.3.3 Network Setup
Enter into [Main MenuNetwork Setup] to setup the network configuration (Shown as picture 5-8):
After selecting network mode - such as DHCP, PPPOE or static allocation- and setting up web ports,you
can visit DVR remotely through a network or internet.
UPnP (Universal Plug and Play) function: If router supports UPnP function and set <UPnP> to On, system will
automatically forward port to router.
DNS: DNS server is generally provided by local ISP. Herein please enter the IP address of your DNS.
When selecting DHCP the router will allocate DVR IP address automatically after you exit the menu. The
IP address of the DVR might change whenever the unit is turn on. Therefore, you need to forward
corresponding IP address and web port when you remotely visit the DVR each time.
Processing step:
1. Select network type (DHCP);
2. Input media port and web port and media port is not equal to web port;
3. Click <Save> button and restart, now DVR will capture IP address automatically;
4. If <UPnP> function is set to “Off”, you can forward IP address captured by DVR to router and set
relative parameter shown as Picture 5-11; If your router support <UPnP> function and set to “on”, you
no need to perform this step 4;
5. You visit the DVR remotely.
Picture 5-8
Picture 5-9