SETUP AND OPERATION
MOTOMAN 4-5 Spot Welding Manual for Medar
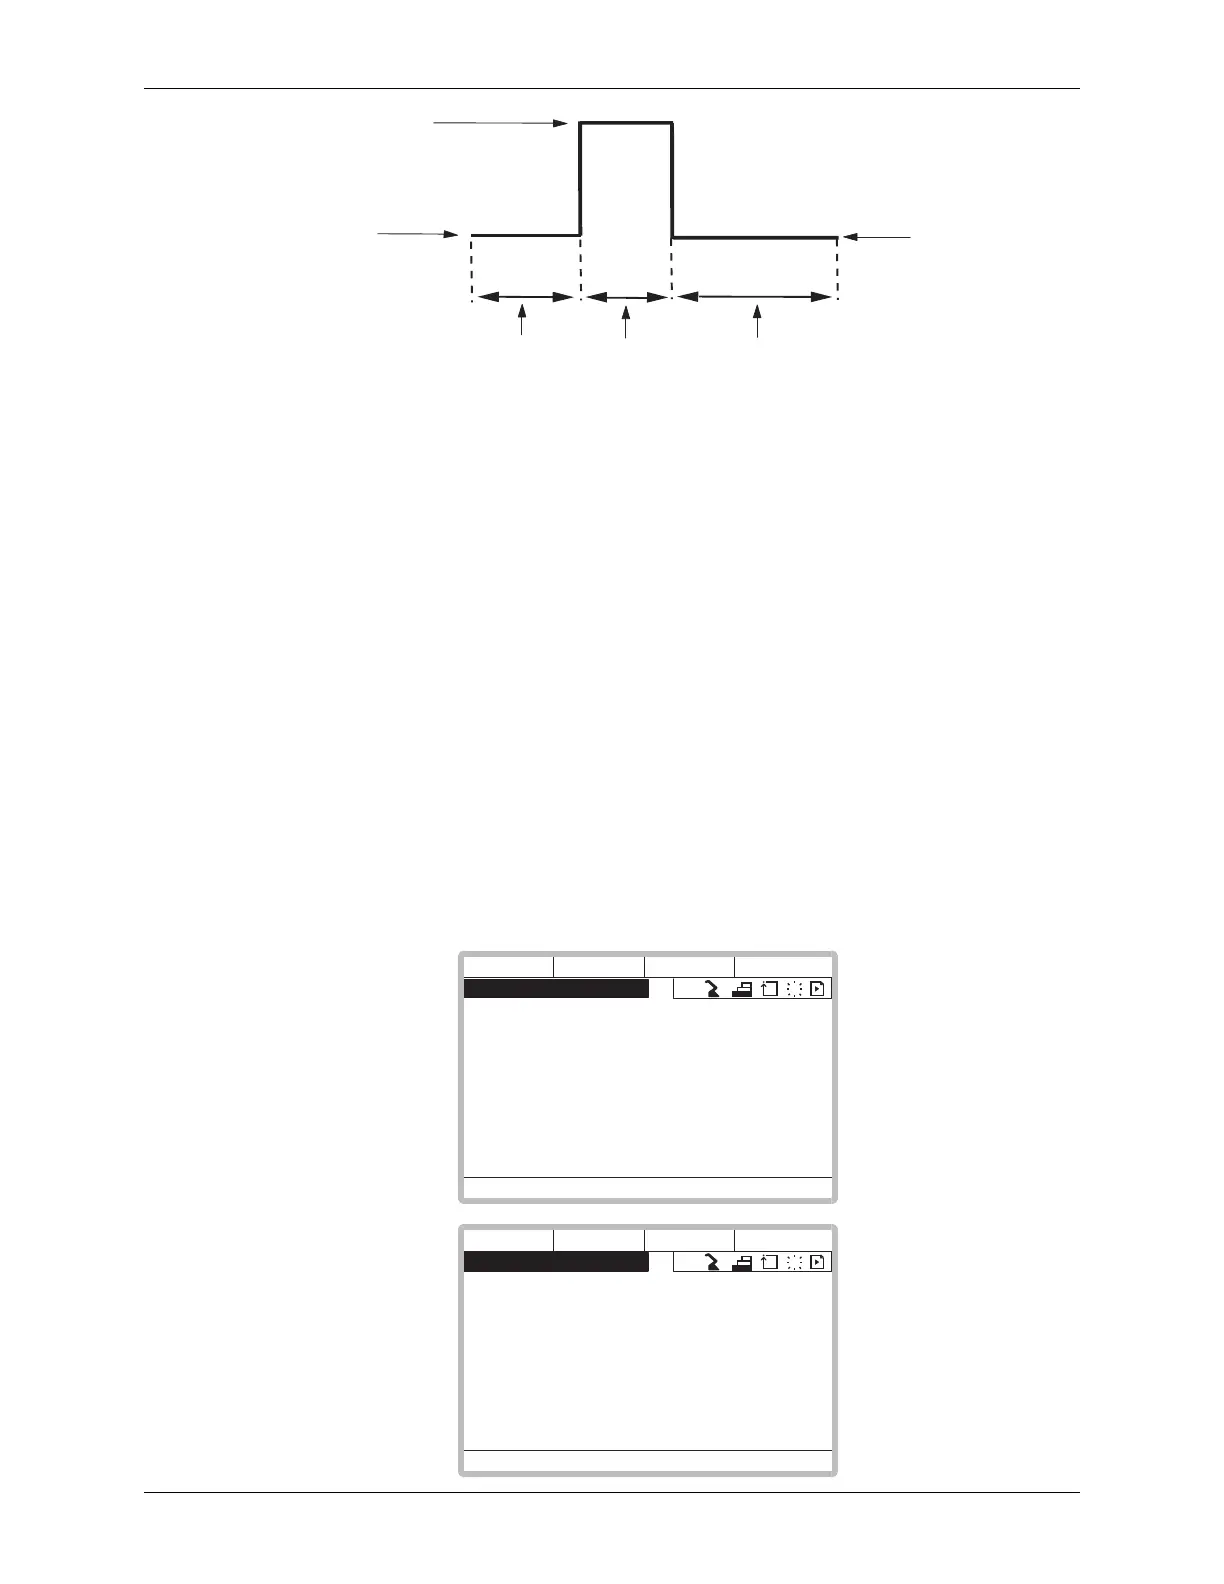
Figure 4-1 Simple Weld Condition File
4.4 Enhanced Weld Schedules
To set up an enhanced weld schedule, first follow the instructions in paragraph 4-1,
step 5, and set the weld schedule type to Enhanced (1). Then, using the XRC
programming pendant, follow these instructions:
1. From the Spot Welding Function Menu, select WELDING COND. The first
enhanced weld condition file will appear. Use the CURSOR key to scroll
through the file. Figure 4-2 depicts this particular enhanced weld condition
file.
NOTE: Any of the weld segments shown in Figure 4-2 can be eliminated by entering zero in the timers.
Likewise, slopes can be eliminated by making the start and end values the same. Cool times
can be eliminated by setting them to zero.
SQUEEZE
TIME
(5 cycles)
9000 AMPS
GUN CLOSED
*
GUN OPEN
WELD
TIME
(4 cycles)
HOLD
TIME
(10 cycles)
NOTE: Timers are programmed in cycles.
One cycle = 1/60 sec; 4 cycles = 4/60 sec
*
If a servo gun is used, set the squeeze time to zero. The weld schedule will not start until
the programmed pressure is achieved. The WST (0 - 2) parameter in the SV spot instruction
(see Motor Gun Function Manual) defines whether to start the weld schedule at the first or
second pressure level in the gun pressure file.
* If a pneumatic gun is used, increase the SQUEEZE TIME to enough cycles to allow the
gun to close and settle.
WELD CONDITION FILE
!
R1
S
C
L
DATA
EDIT DISPLAY UTILITY
DOWNLOAD: DONE/NOT DONE
FILE NO.
:
SQUEEZE TIME
:
WELD1 SLOPE TIME
:
WELD1 BEG SLOPE CURRENT
:
WELD1 END SLOPE CURRENT
:
WELD1 COOL TIME
:
WELD2 IMPULSE HEAT TIME
:
WELD2 IMPULSE COOL TIME
:
1
5
10
3500
5500
5
4
8
WELD CONDITION FILE
!
R1
S
C
L
DATA
EDIT DISPLAY UTILITY
WELD2 IMPULSE COUNT :
WELD2 CURRENT
:
WELD2 COOL TIME
:
WELD3 POSTHEAT TIME
:
WELD3 CURRENT
:
HOLD TIME
:
3
9000
0
8
4000
10
 Loading...