7-8 Disassembly/Reassembly Procedures: Radio Disassembly
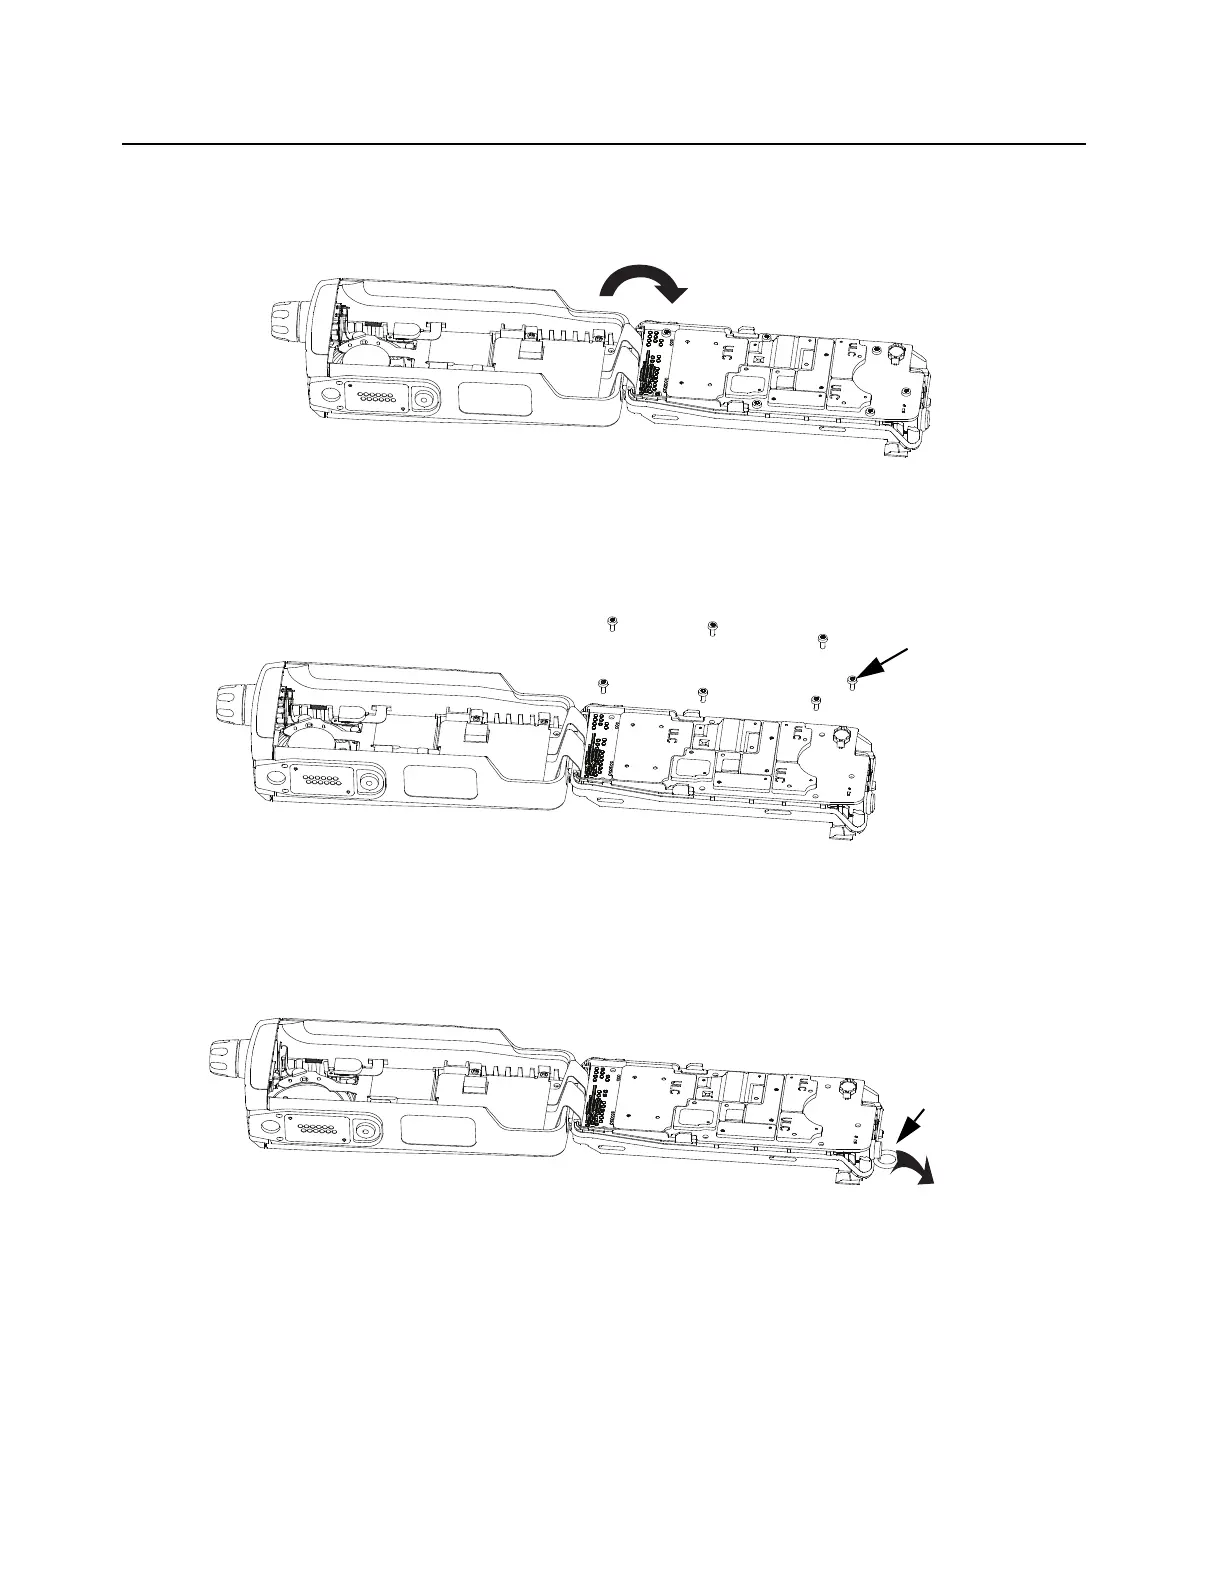
2. After the Chassis (26) is disengaged, slide the chassis assembly down and lift it away from
the Front Kit (A) and lay both sub-assemblies on the anti-static mat (part of anti-static ground
kit) as shown in Figure 7-8.
Figure 7-8. Remove the Chassis Assembly
7.4.5.2 Removal of the Chassis Screws (15)
1. Remove the black chassis screws (15) as shown in Figure 7-9.
Figure 7-9. Remove the chassis screws
7.4.5.3 Removal of the Main Board(16)
1. Remove the Main O-Ring (25) at the antenna holder as shown in Figure 7-10.
Figure 7-10. Remove the Main O-Ring at the antenna holder
2. Lift up the Main Board (16) from the Chassis (26) towards the Front Housing (2) and gently
unplug the connectors from the Front Kit Flex and Keypad Flex (11) to remove the Main
Board as shown in Figure 7-11. and Figure 7-12 respectively.

 Loading...