Section 2, Installation and Setup
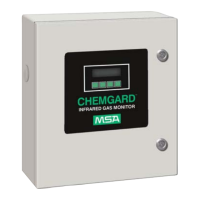
Chemgard Infrared Gas Monitor
4. Do not mount the unit where it will be
exposed to direct solar heating.
5. For proper cooling, allow at least three
inches (76.2 mm) clearance around all
surfaces except for the mounting
surface.
6. Mount unit so the front panel is easily seen
and accessed for service and calibration.
idelines for Locating the
ampling Point(s)
e to the wide variation in equipment room
youts, each situation must be analyzed
vidually. A sampling point may be remotely
cated up to 150 feet (46 m) from the monitor
500 feet [152 m] if 0.180" [4.57 mm] I.D. tubing is
sed) in an area where gas vapors are most
kely to leak or accumulate.
OTE: The 150 and 500 feet (46 and 152 m)
allowances refer to the total sample and
exhaust line length for each sample point.
ctivity in the Room
he expected activities in the room must also be
onsidered when determining the sensing point.
OTE: Select sampling locations which result in the
shortest possible line length in order to
reduce transport time.
sider the following guidelines when selecting
he location for the sampling point(s).
1. Place the end of the sampling line in an area
that provides the instrument with a
representative sample; ventilation Smoke
Tubes (P/N 458480) are useful in
determining air flow patterns in ambient
sampling areas.
2. Properly exhaust the instrument to a safe
area or to outside atmosphere.
3. Ensure the sampling area is free of
particulate matter and condensing
moisture; ensure sample lines will not draw
moisture up into the line.
NOTE: The sample gas must be
adequately filtered before
entering the instrument.
End-of-sample-line filters must
be used with the unit. These
filters must be installed at the
end of all sample lines.
4. Ensure the end of the sampling line is
unobstructed to allow the sample to flow
freely to the instrument.
5. Keep sample lines as short as possible to
Ensure that tubing radii are wide enough to
prevent kinking or bending. Otherwise, an
obstruction may occur, preventing the
instrument from sampling the intended area.
6. DO NOT:
• back-pressure the exhaust line or
• connect it to a vacuum source or
• install a flow meter in the exhaust line.
ALWAYS :
connect an exhaust line
that is vented to a safe area or an
outside atmosphere.
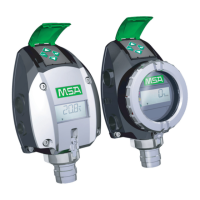
Mounting the Standard Enclosure Unit
The instrument has four mounting lugs
(FIGURE 2-1). Securely mount the unit to a wall
or support, using appropriate hardware.
WARNING
Do not mount the unit directly to a source
which may affect the operation of the
monitor, resulting in incorrect readings.
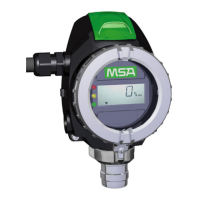
Sample System Installation
1. Remove all caps on the sample inlets and
exhaust of the Chemgard Monitor
(FIGURE 2-2).
WARNING
Failure to remove any caps from the unit
gas inlet or exhaust fittings prevents gas
sampling and may cause an undetected toxic
and hazardous gas build-up and a flow
trouble indication.
2. Route the 1/4" (6.35 mm) OD tubing into
the areas to be monitored.
3. After the line(s) are installed and BEFORE
they are connected to the monitor:
a. Clean lines with compressed air or
nitrogen to remove any debris.
b. Perform a leak-check to assure they are
free of leaks.
c. Connect the line(s) to the sample port(s)
on the monitor.
d. Install the end-of-line filters.
NOTE: All unused sample inlet(s) must be
plugged or have an end-of-line filter
installed to avoid debris entering the
unit. To disable these unused lines,
refer to the setup screen shown in
FIGURE 3-11.