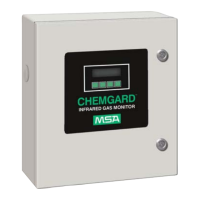
Chemgard Infrared Gas Monitor
Mounting Your Unit
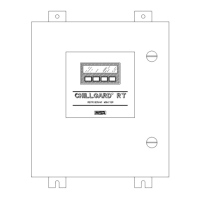
Mount the Chemgard Relay Module adjacent to
the controlling Chemgard Infrared Gas Monitor
using the four mounting holes as shown in
FIGURE B-2 (hardware not supplied).
Electrical Connections for
the Chemgard Relay Module
Follow all applicable practices and local codes.
Use appropriate conduit and cable glands when
installing the Chemgard Relay Module and
Chemgard Infrared Gas Monitor.
Main Power Connections
Ensure that all primary power is turned OFF at
the circuit breaker or fuse. Do not wire the
Chemgard Relay Module with power ON.
WARNING
Wiring the Chemgard Relay Module with the
power ON may result in electrocution which
may cause injury or death.
Identify the main power voltage that will power
the Chemgard Relay Module; if unsure of your
primary power, consult an electrician or local
power utility.
CAUTION
Application of improper power to the
Chemgard Relay Module will result in
damage to the unit.
Refer to FIGURES B-3, B-4 and B-5 to identify
the location of the main power connections within
the Chemgard Relay Module.
1. Locate the power wiring entry on the lower left
hand side of the unit and remove the hole
plug.
2. Route the power wiring through the hole using
proper hardware/conduit (not supplied).
3. Strip the power wiring conductors.
4. Insert each stripped conductor into its proper
location in the power cable connector
(FIGURE B-4
).
5. Tighten each screw within the connector to
secure each wire.
6. Pull on each wire to ensure that it will remain
in place. If a wire comes out of the
connector, loosen the screw, reinsert the
wire, and re-tighten the screw.
7. The Relay Module must have the same
electrical ground as the Monitor unit.
Communication Cable Connections
Use the factory-recommended RS485
communication cable. Low capacitance wire for
RS485 communications, such as Beldon #9841,
is recommended.
CAUTION
Maximum length of the communication cable
is 1000 feet (305 m); otherwise, the
Chemgard Relay Module will not operate
properly.
WARNING
Use only the recommended cable. Using
inferior or wrong communication cable
causes improper operation of the Chemgard
Relay Module.
Do not exceed the maximum length of
communication cable listed; otherwise, the
Chemgard Relay Module may not operate
properly and may not indicate a trouble
condition.
Communication Cable Connections to the
Chemgard Relay Module
1. Locate the RS-485 communication cable
inside the Chemgard Relay Module
enclosure.
2. Locate the eight cable entries on the right side
of the relay module (FIGURE
B-2). From
these eight cable entries, choose one of
the three bottom entries and remove the
hole plug.
3. Route the communication cable through the
hole using proper hardware (not supplied)
to secure the cable. A 30 mm distance
must be maintained between this
communication cable and the electronic
assembly or power line feeds.
Communication Cable Connections to the
Chemgard Infrared Gas Monitor
1. Route the communication cable to the
Chemgard Infrared Gas Monitor.
2. Find an unused entry in the Chemgard
Infrared Gas Monitor enclosure and
remove the hole plug.
3. Route the communication cable through the
hole using proper hardware (not supplied)
to secure the cable.
4. Strip each communication cable conductor.
5. Insert each stripped conductor into its
proper location on the communication
cable connector (Refer to FIGURE B-5 for
connector location and function
designation). The connector labeled "+" on
the Relay Module must be connected to the