-23-
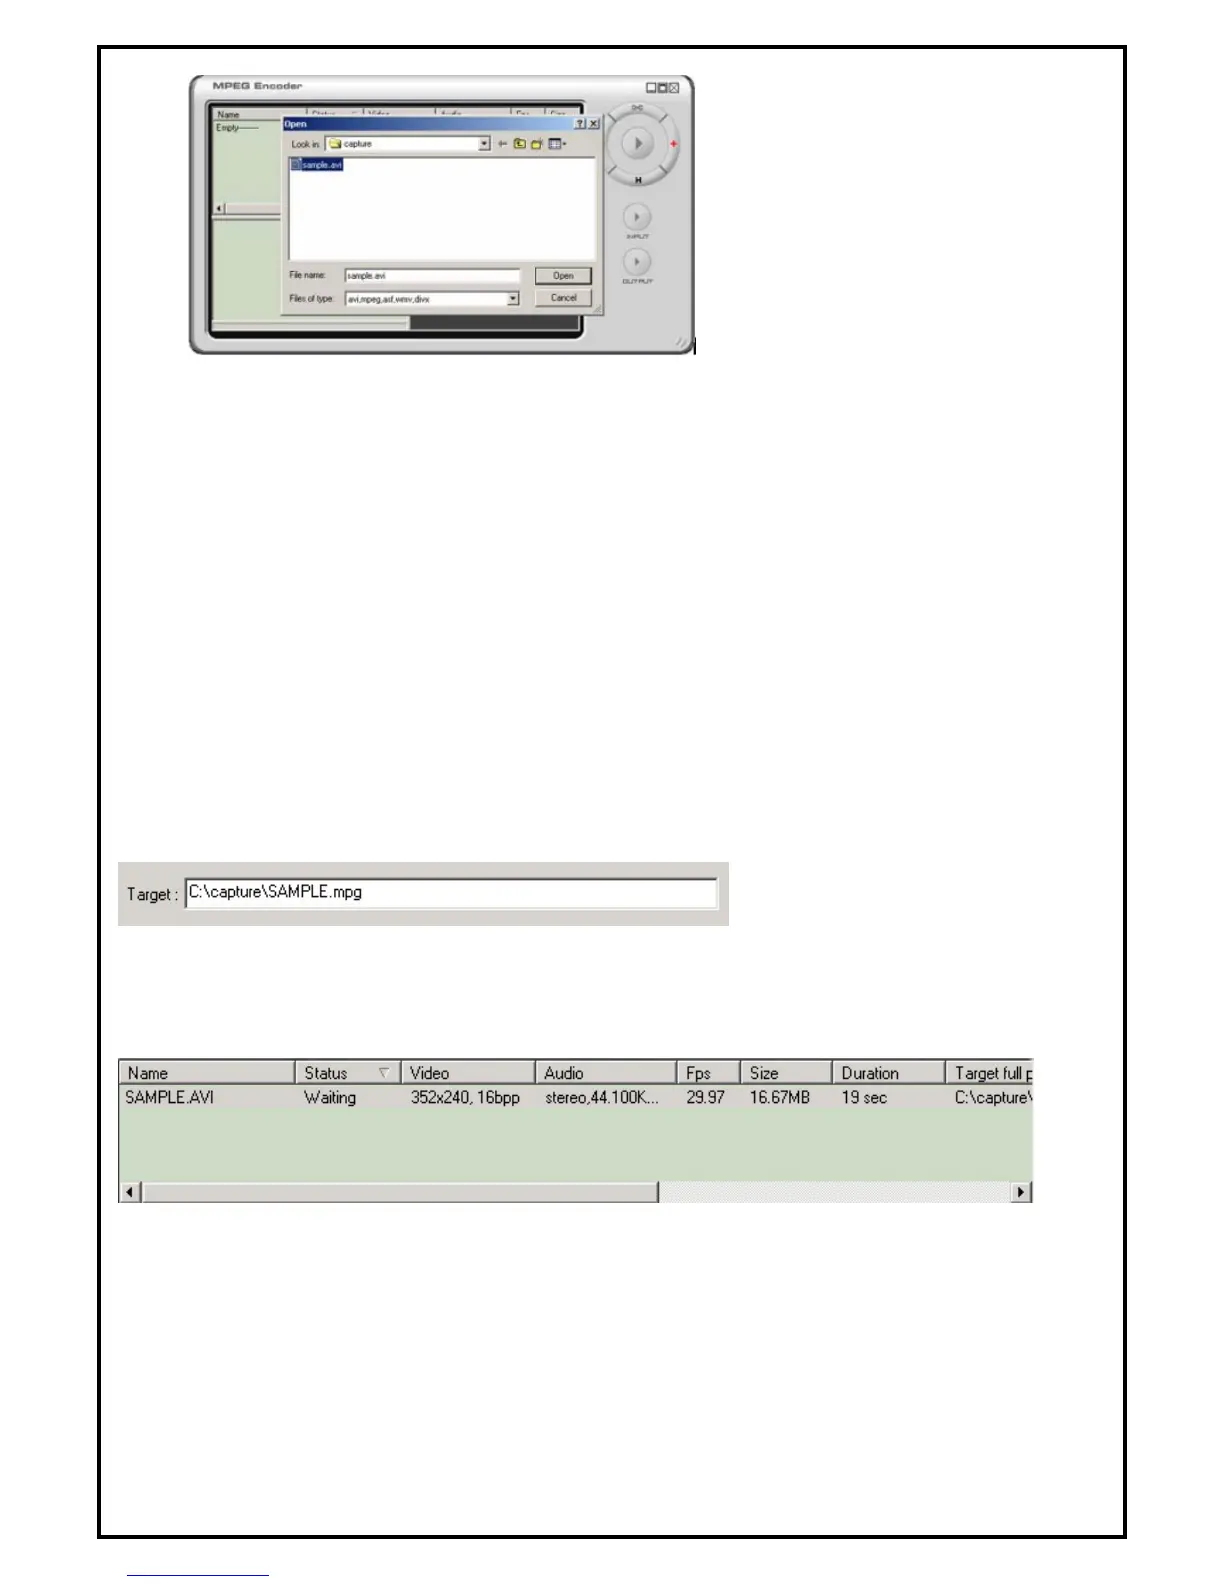
Fig. 6.3
To add a multimedia file to be transcoded, click the "+" or "Add" button. This will open the "Browse"
dialog box. Browse to the directory/file wanted and click on "Open". (Another method of adding files to the
“Batch Process Display Window” is to simply highlight a file, then drag and drop it into the Batch Process
Display Window.) Refer to Fig. 6.3
Once the multimedia file is added to the “Batch Process Display Window,” the Option Selection Dialog Box
appears. This begins the process of selecting the output format for the transcoder to create. Choose among
four categories of formats: MPEG 1, MPEG 2; Category tabs appear at the top of the window. After
selecting a format category, choose a specific video format (and detailed options if necessary). Please refer to
Fig. 6.2
The output file will be created in the same directory as the original file unless a different path is manually
chosen. It will also maintain the original video file name and add a file extension matching the video format
of the output type selected. The file name can also be manually changed. Refer to Fig. 6.4
Fig. 6.4
Once the output video format and options are selected, click "OK", then the file will appear in the Batch
Process Display Window. Refer to Fig. 6.5
Fig. 6.5
The Batch Process Display Window shows three states of process in the Status column.
1. “Waiting” means that the media file displayed is queued for transcoding (compression and/or translation).
The transcoding of video files in the "Waiting" state begins when the Encoding button is clicked.
2. “Exclusion” means that transcoding of that file will not occur.
3. “Done” means that the transcoding (compression and/or translation) is successfully completed.