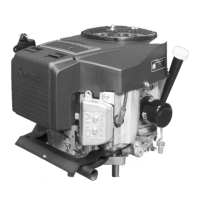
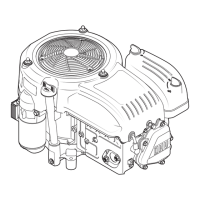
English Operating manual for FH381V/FH430V
10
6MWOSJIRKMRIHEQEKI
;LIRVIEWWIQFPMRKXLIEMVJMPXIV
IRWYVIXLEXMXMWGSQTPIXIERHXLEXEPP
XLITEVXWEVIMRXLIGSVVIGXPSGEXMSR
'SVVIGXP]EXXEGLXLIEMVJMPXIVGSZIV
■ Insert the foam element and paper
element into the air filter housing.
■ Insert and press the lower plates
(F/Fig. 11) of the air filter cover into
the housing slots (G/Fig. 11).
Spark plug
6MWOSJFYVRW
,SXIRKMRIGSQTSRIRXW%PPS[E LSX
IRKMRIXSGSSPHS[RJMVWX
■ Remove the spark plug terminal.
■ Unscrew the spark plug with
a spark-plug wrench.
■ Clean the electrodes (A/Fig. 12)
with a wire brush.
■ Check the porcelain structure for
damage and cracks. Change
a defective spark plug.
■ Check the electrode gap
(B/Fig. 12). The electrode gap
must be 0.75 mm.
■ If required, correct the electrode
gap with a suitable tool.
(IWXVYGXMSRSJXLIG]PMRHIV
LIEH
(SRSXSZIVXMKLXIRXLIWTEVOTPYK
■ Screw in the spark plug.
Tightening torque max. 22 Nm.
■ Attach the spark plug terminal.
When changing the spark
plug, insert the correct type of spark
plug! Several countries stipulate
resistor-type spark plugs to
suppress ignition signals.
Storage
If engines are stored for longer than
30 days, the fuel must be drained in
order to prevent deposits from
forming on the fuel system and
important carburettor parts.
6MWOSJJMVI6MWOSJ
I\TPSWMSR
4IXVSPERHTIXVSPZETSYVWEVILMKLP]
JPEQQEFPIERHI\TPSWMZI
r (VEMRTIXVSPSYXHSSVWSVMRE[IPP
ZIRXMPEXIHVSSQ
r /IITJYIPE[E]JVSQWTEVOW
REOIHJPEQIWGSRXMRYSYWJPEQIW
LIEXWSYVGIWERHSXLIVMKRMXMSR
WSYVGIW
r 'EXGLTIXVSPMREWYMXEFPI
VIGITXEGPI7XSVITIXVSPMR
EYXLSVMWIHJYIPGERMWXIVWSRP]
■ Leave the engine to cool down.
■ Remove the spark plug terminal.
■ Turn off the petrol tap (optional).
■ Remove fuel from the tank.
■ Connect the spark plug terminal.
■ Start the engine (see Starting the
engine) to remove residual fuel
from the carburettor.
■ Leave the engine to cool down.
■ Remove the spark plug terminal
and unscrew the spark plug.
■ Pour 1–2 ml of fresh engine oil
through the spark plug bore into
the cylinder head.
■ Screw in the spark plug.
■ Slowly rotate the engine to
distribute the oil.
■ Clean the engine thoroughly.
■ Store the unit in a dry location and
protect from dust with a tarpaulin.
■ When bringing the unit out of
storage, change the oil.
Warranty
The warranty regulations issued by
our company or the importer are
valid in all countries. We shall repair
your defective unit free of charge in
accordance with the warranty,
provided the cause is a material or
production fault. If making a claim
under the warranty, please contact
your dealer or nearest branch.
Service
For service and repair work, please
contact an authorised customer
service centre.
!
!