© Munters AB, 2020 11
•
Install electronic controls in a separate ventilated control room that is protected from extreme
temperatures and dirty environments. Place the controls so that the operators can conveniently
use the control and read indicators and displays.
•
Keep low voltage wires separate from high voltage wires.
•
Use shielded wiring for low level signals. For buried wiring (building to building runs) use high
grade jell filled cables that are impervious to moisture.
•
Seal cable entry points and control boxes to prevent contamination and corrosion. If you use
silicon sealant with acetic acid cure, keep the control open and ventilated until cured.
Otherwise, the acetic acid will attack the metal parts, including circuitry.
3.1.2
W
HAT
C
OMES IN THE
P
ACKAGE
•
One Trio unit
•
One hanging bracket
•
Two screws
3.2
Mounting the Unit
•
Knockouts
•
Hanging the Unit
3.2.1
K
NOCKOUTS
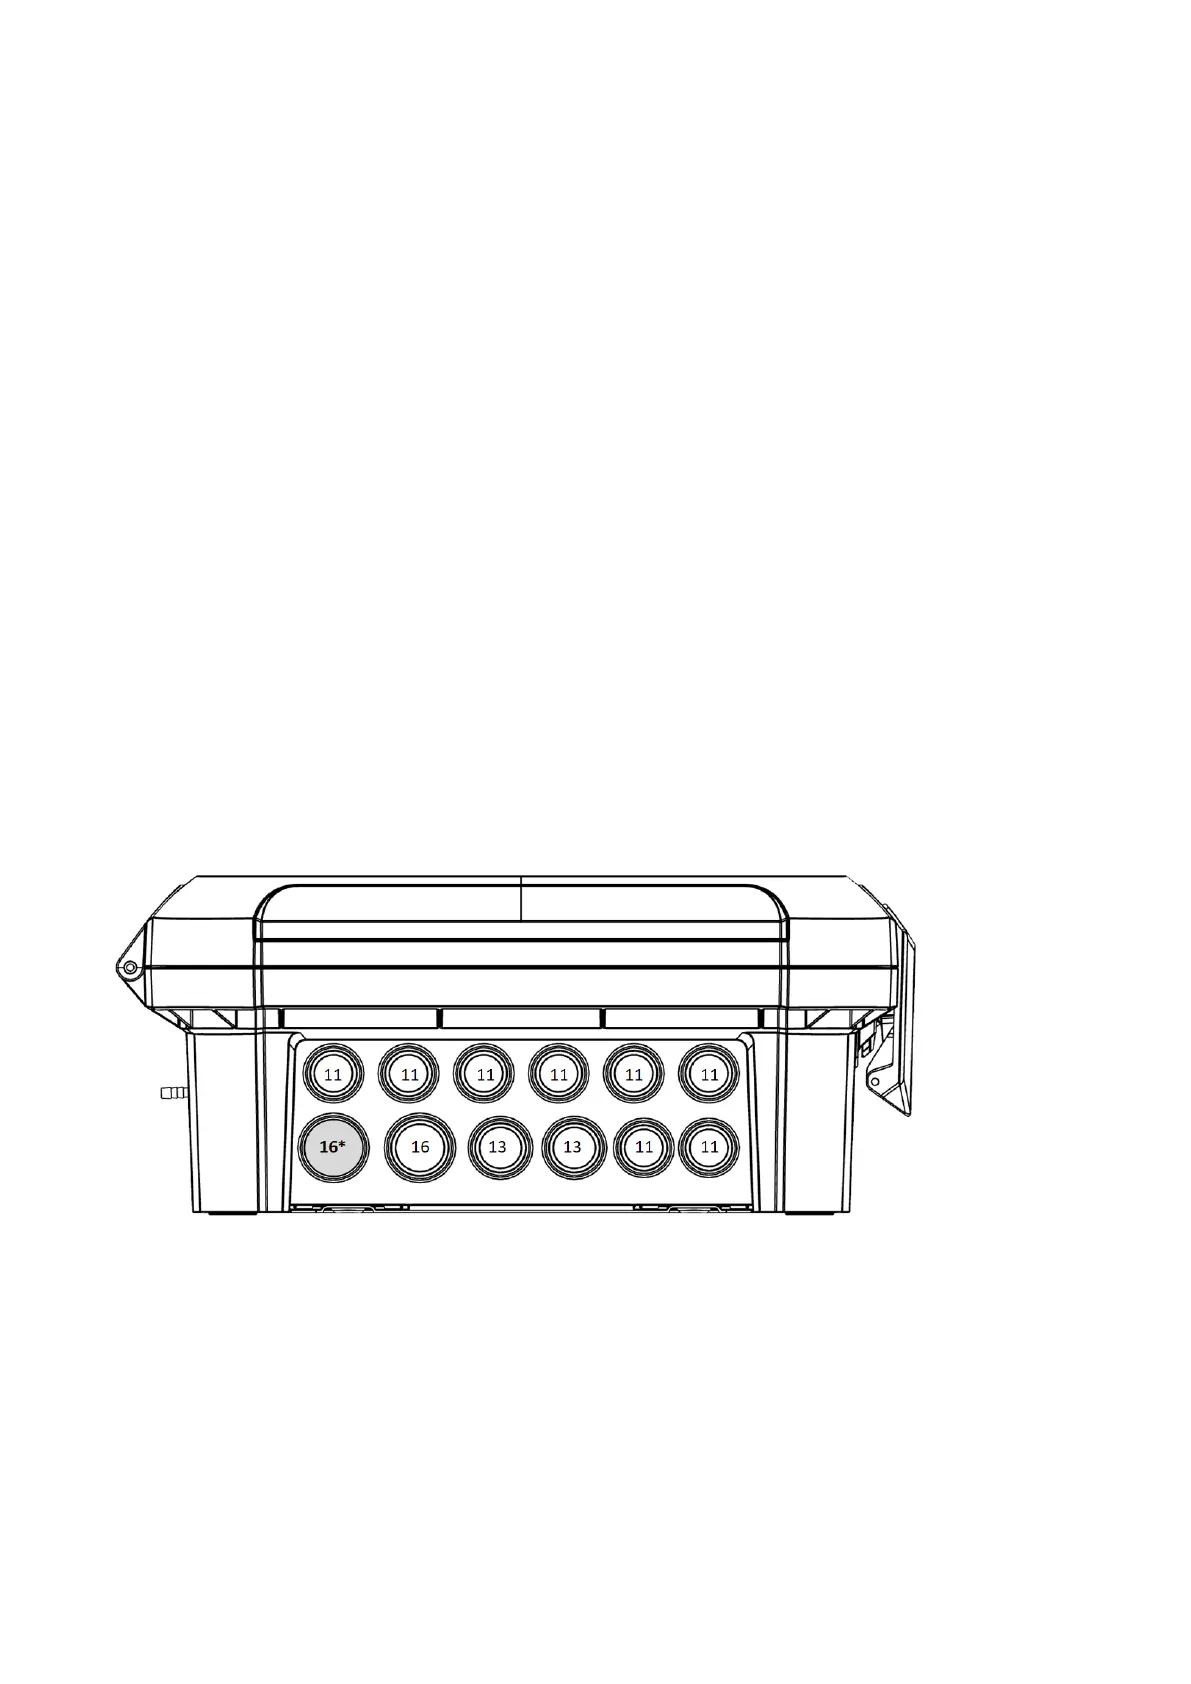
1. Using the supplied clips and screws, mount the Trio.
2. On the bottom the Trio are knockouts used to route the low and high voltage cables.
Figure 1: Trio
Knockouts and PG Size
o
Using a screwdriver and a hammer, gently apply pressure to the knockouts.
o
Only open up the holes that you require.
o
Munters recommends removing the knockouts before mounting the unit.
o
16*: Use this knockout for the Ethernet cable.
3. Place the required cables through the cable holders at the bottom of the unit.
CAUTION
Run low voltage cables through one knockout and high voltage relay cables through a
separate knockout. Do not place them in the same knockout!