EN
W415-2036 / D / 08.05.21
23
maintenance
2. Ensure to handle the GGA-1 as shown (Fig. 1) as the floating intermediate glass might fall out of the assembly if
handled incorrectly.
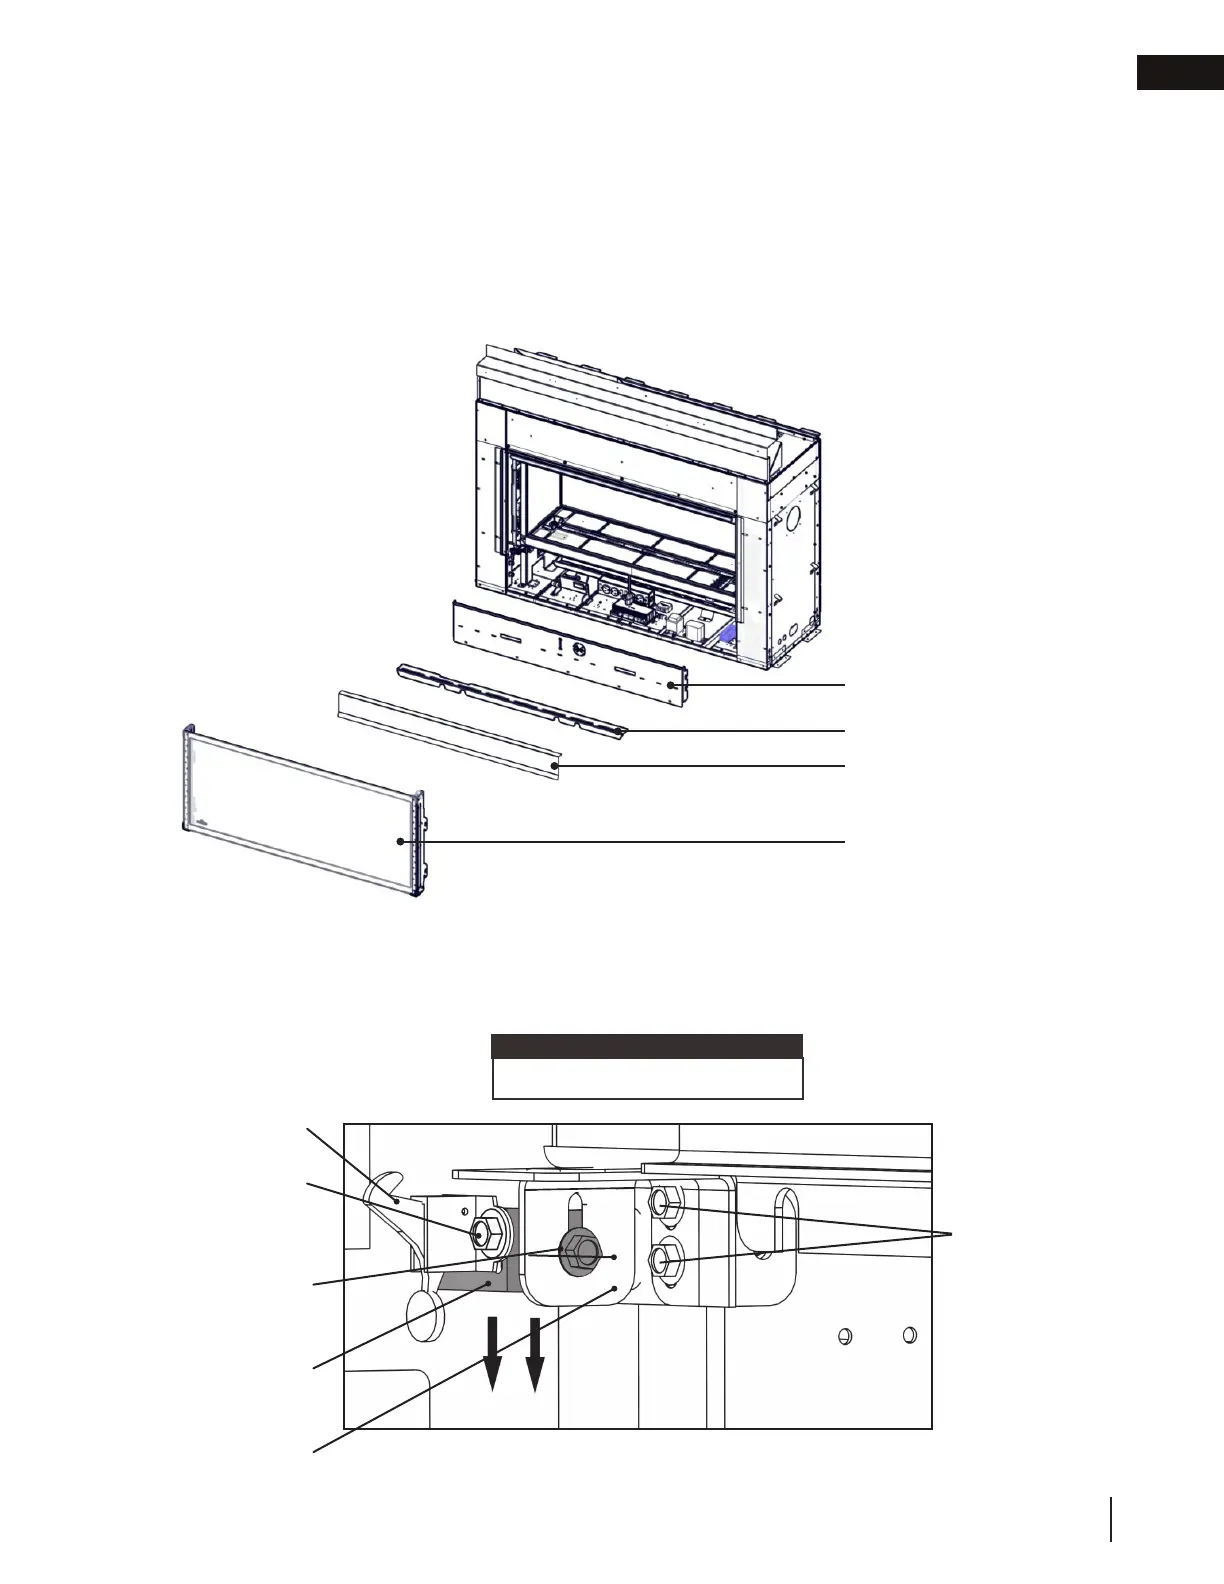
3. For ease of installation during preliminary adjustment, remove the door trim, control cover and access panel
(Fig. 3).
4. For ease of fitting, the latch securing screws should be located at the bottom of their slots. it may be necessary
to loosen the latch securing screws and slide them all the way down. Retighten the latch securing screws
loosely taking care not to overtighten (Fig. 4). Repeat for other end of GGA-1.
note:
DO NOT OVERTIGHTEN.
Fig. 3
1. Unpack the GGA-1 and keep packaging materials to store the GGA-1 after test fitting.
Access panel
Control cover
Door trim
GGA-1
Latch
Latch bracket
mounting screws
(FOR ADJUSTMENT)
Latch securing
screws
(DO NOT REMOVE)
Latch mounting
bracket
(FOR ADJUSTMENT)
Door rail support
(FIXED)
Fig. 4
Door rail support
mounting screws
(DO NOT LOOSEN)