W415-2036 / D / 08.05.21
EN
24
maintenance
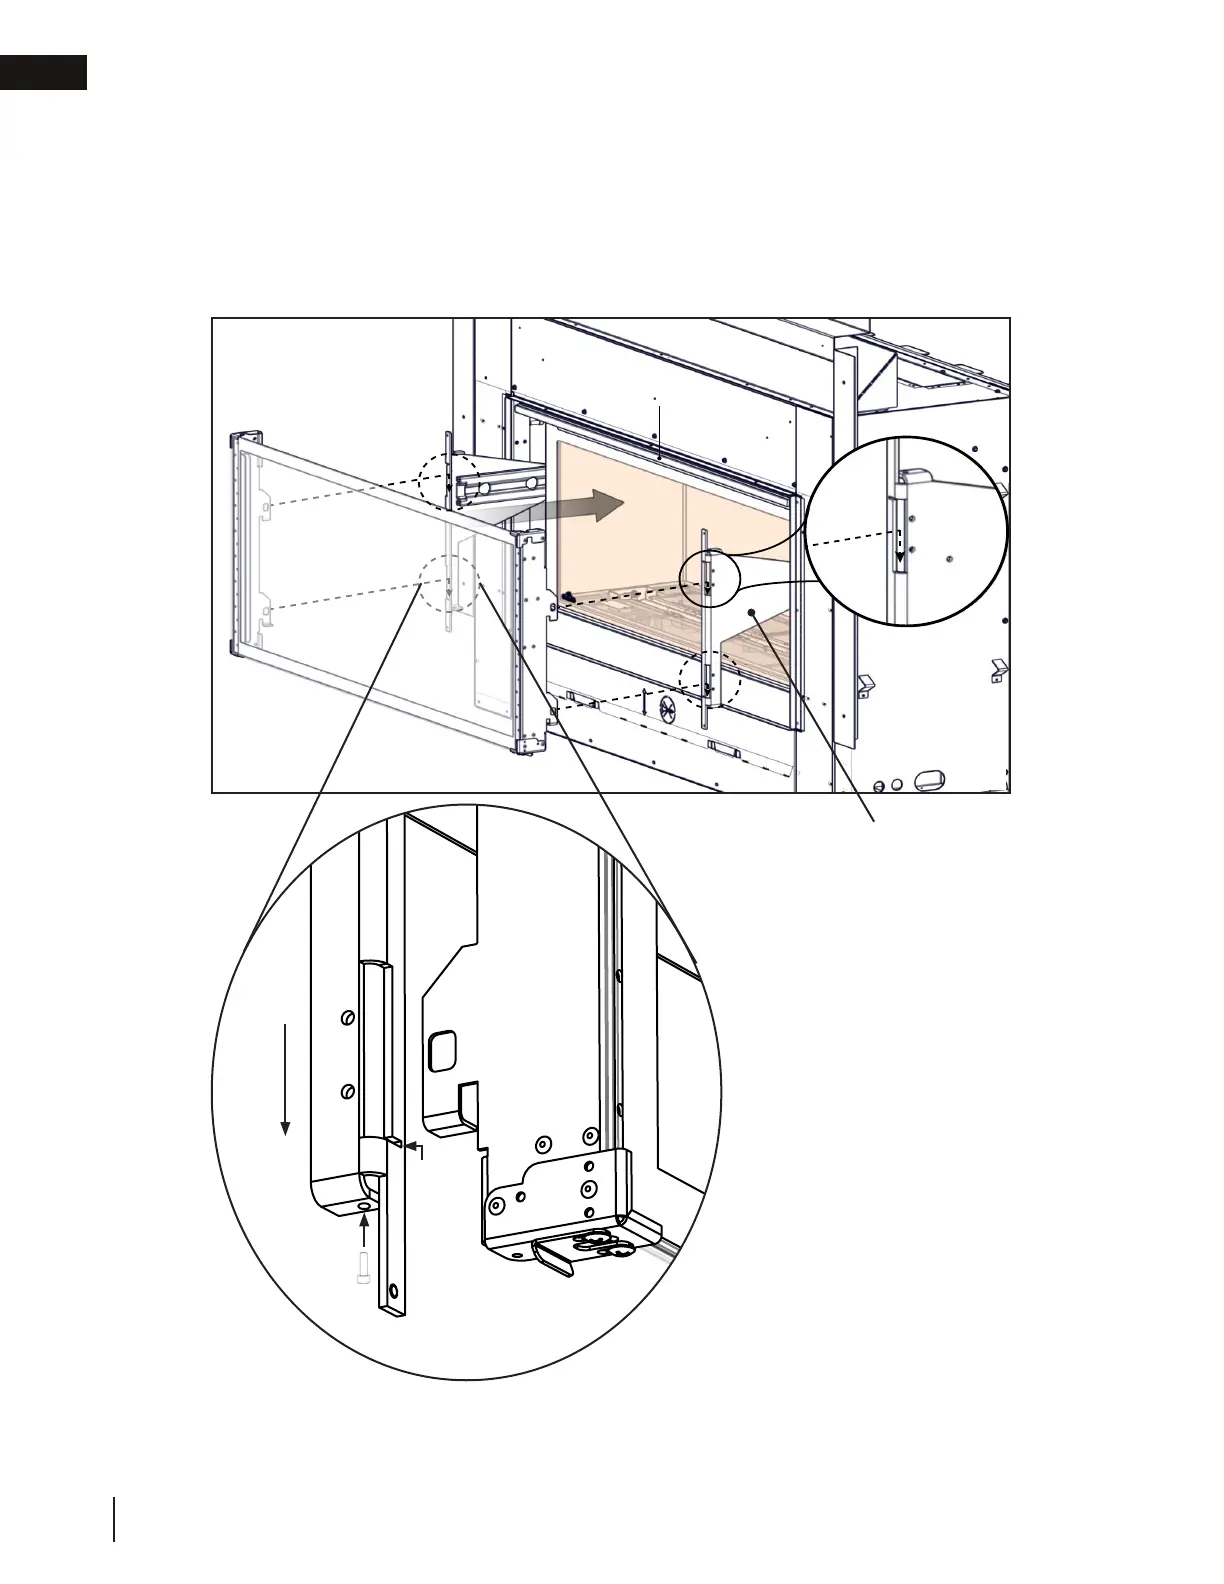
Bottom Hook
A
B
A
B
GGA-1 slider bracket
C
Fig. 6
Fig. 5
5. Fully extend the two GGA-1 slider brackets of the appliance outward (Fig. 5).
6. Carefully hook GGA-1 onto GGA-1 slider brackets by aligning the horizontal tabs on the GGA-1 with the
horizontal slots in the bottom of the GGA-1 slider brackets and moving the GGA-1 back into the GGA-
1 slider brackets (A). Ensure both top and bottom tabs of the GGA-1 engage with hooks of the GGA-1
slider brackets (B) (Fig 5).
7. Install 2 vertical adjustment screws underflush of GGA-1 slider bracket surface (C) (Fig. 6).