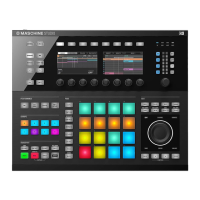
7.1 Building Up a Beat in Step Mode
Until now, we recorded all Patterns “live”: We hit the various pads at the desired moments
while the sequencer was playing and the sequencer directly recorded our hits. This is the re-
cording workflow when the controller is in Control mode. On the contrary, in Step mode you pro-
gressively build up the Pattern by programming a sequence for each individual Sound of the
selected Group. Notably, the sequencer does not need to be playing.
7.1.1 Using Step Mode
On your controller, do the following:
1. Press button A to select Group A (with the drum kit).
2. Press PATTERN + pad 3 to select the Pattern slot 3 (still empty).
3. Hit the pad with the Sound you want to sequence.
4. Press the STEP MODE button at the top left of your controller to enter Step mode.
Each pad now represents one step of a 16-step sequence: you can activate each step by
pressing a pad once, lighting it up. If you press the pad again, the step is removed. This
way it’s quick and easy to create a drum pattern.
5. Press PLAY to start the sequencer.
Now you will hear the sequence and see a light chasing through the pads, starting from
pad 1, going up all four rows from left to right and ending at pad 16. You may continue to
activate or deactivate pads to build your sequence during playback.
6. To switch to another Sound, press SELECT and the pad with the Sound you want to se-
quence.
→
Progressively, you build up a new Pattern.
At any time, you can leave Step mode:
►
Press the STEP MODE button to exit Step mode.
For now, let’s stay in Step mode — we want to show you a few more things in this mode — so
press STEP MODE again if needed (STEP MODE must be lit).
Creating Beats with the Step Sequencer
Building Up a Beat in Step Mode
MASCHINE STUDIO - Getting Started - 102

 Loading...