7. Now click the Start button and, since the recording is going to be triggered by the se-
quencer, start the sequencer (e.g., by pressing PLAY on your controller or the [Space] bar
on your computer keyboard).
→
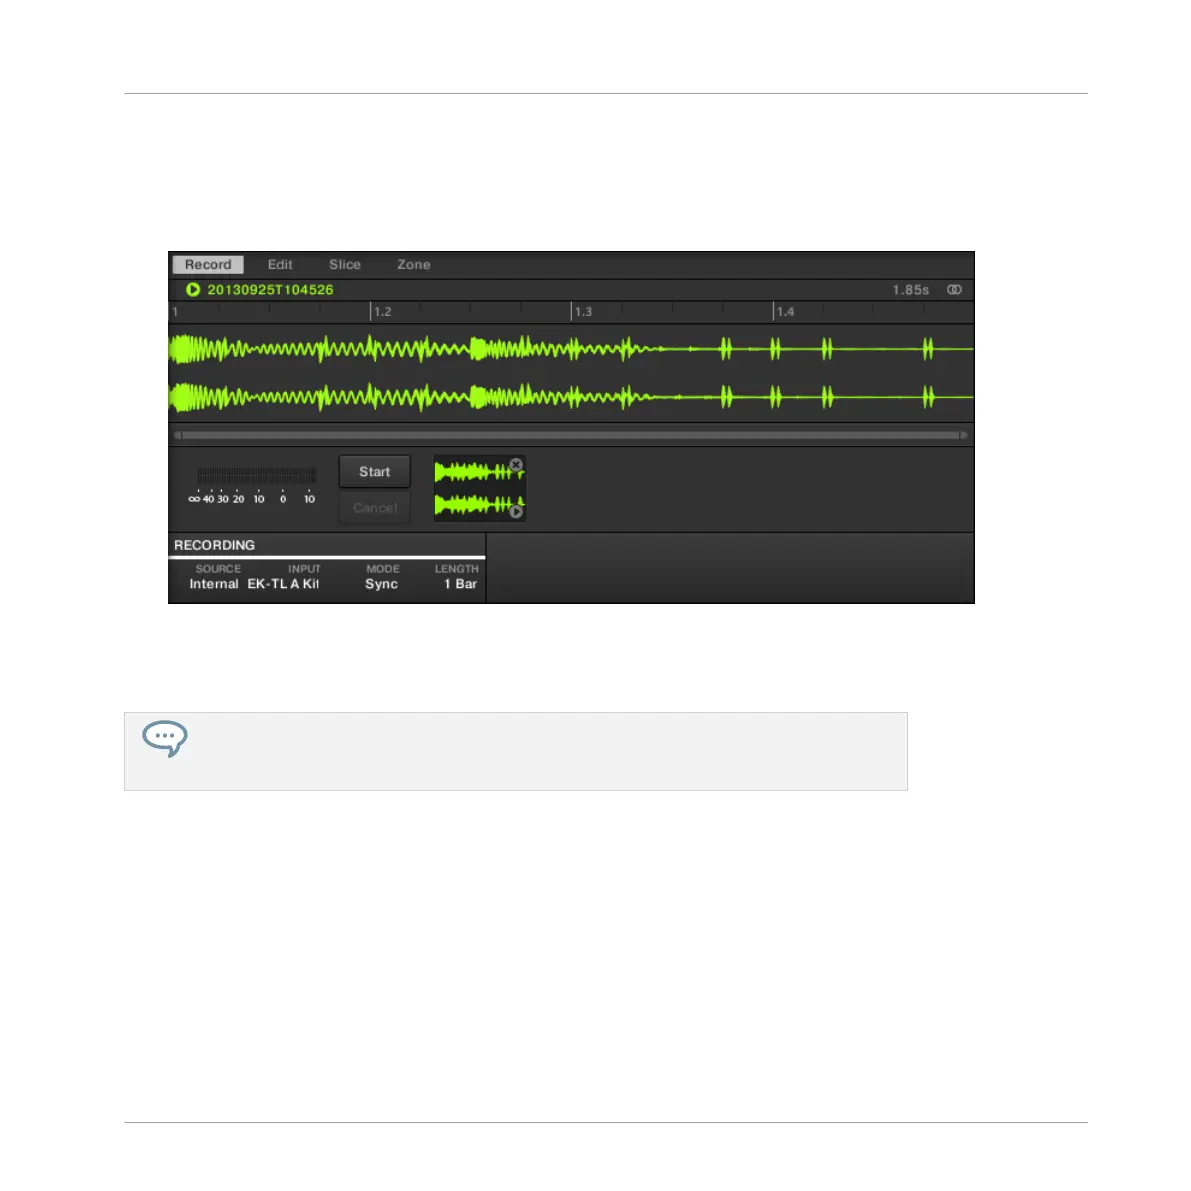
After the recording stops, you will see the waveform of your Sample:
Under the large Waveform representing the recorded Sample, you can see a small icon for each
Sample that was recorded into this Sound slot: this is called the Recording History. You can
drag the Samples to other Sound slots to use them separately.
For external Samples coming from an instrument that is not synced to MASCHINE by
way of MIDI Clock, it is more useful to record it manually or in Threshold mode. Please
refer to the Manual for more information.
9.3.2 Editing, Slicing and Mapping Your Sample
MASCHINE provides you with many features to make an efficient use of your recorded Sample.
These features are found in the other three tabs of the Sample Editor:
▪ The Edit tab allows you to adjust the start and end point of your Sample, to define a loop
range within the Sample, to adjust the envelope of the Sample, and to apply various audio
processing commands to your Sample.
Using Advanced Features
Sampling
MASCHINE STUDIO - Getting Started - 143