NCR SelfServ 34 ATM Installation Guide
B006-6590-C000 31
12. Refit the lower collar moulding removed earlier. Locate the interlocking tabs on the
lower collar moulding with the vertical sides of the collar. Secure underneath at each
corner using two M4 x 10 screws.
13. Pull the ATM back against the building wall to ensure a tight fit.
14. Remove the ATM from its moving device.
15. Select an appropriate silicone sealant for the wall type and colour. Prior to applying
the sealant, ensure the joining surfaces are clean, dry and free of grime. Apply the
sealant around all the collar edges, wall and joins, ensuring there is a waterproof seal
between the ATM and wall.
16. Proceed to the section “Bolting the ATM to the Floor or Plinth
”.
Bolting the ATM to the Floor or Plinth
The final stage of installation is to seal the ATM to the wall and bolt it down.
Note: Bolts are not provided with the ATM, they must be supplied by the owning
organization. You will require:
● 4 bolts 16 mm (0.63 in.) diameter x 120 mm (4.72 in.) long
● 4 anchor washers to fit the bolts. These must be at least 3 mm (0.12 in.) thick and have
a maximum outside diameter of 40 mm (1.57 in.) and an inner diameter of 18 mm
(0.71 in.).
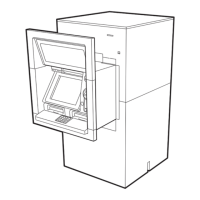
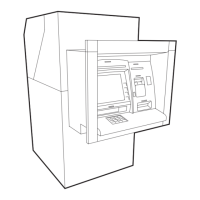
1. Open the exterior of the ATM.