EasyManuals Logo

NetApp HCI User Manual

NetApp HCI
363 pages
To Next Page IconTo Next Page
To Previous Page IconTo Previous Page
Page #316 background imageLoading...
Page #316 background image
Node model Steps
H610S 1. Match the slot number of the failed drive from
the Element UI with the number on the
chassis.
The LED on the failed drive is lit amber.
2. Remove the bezel.
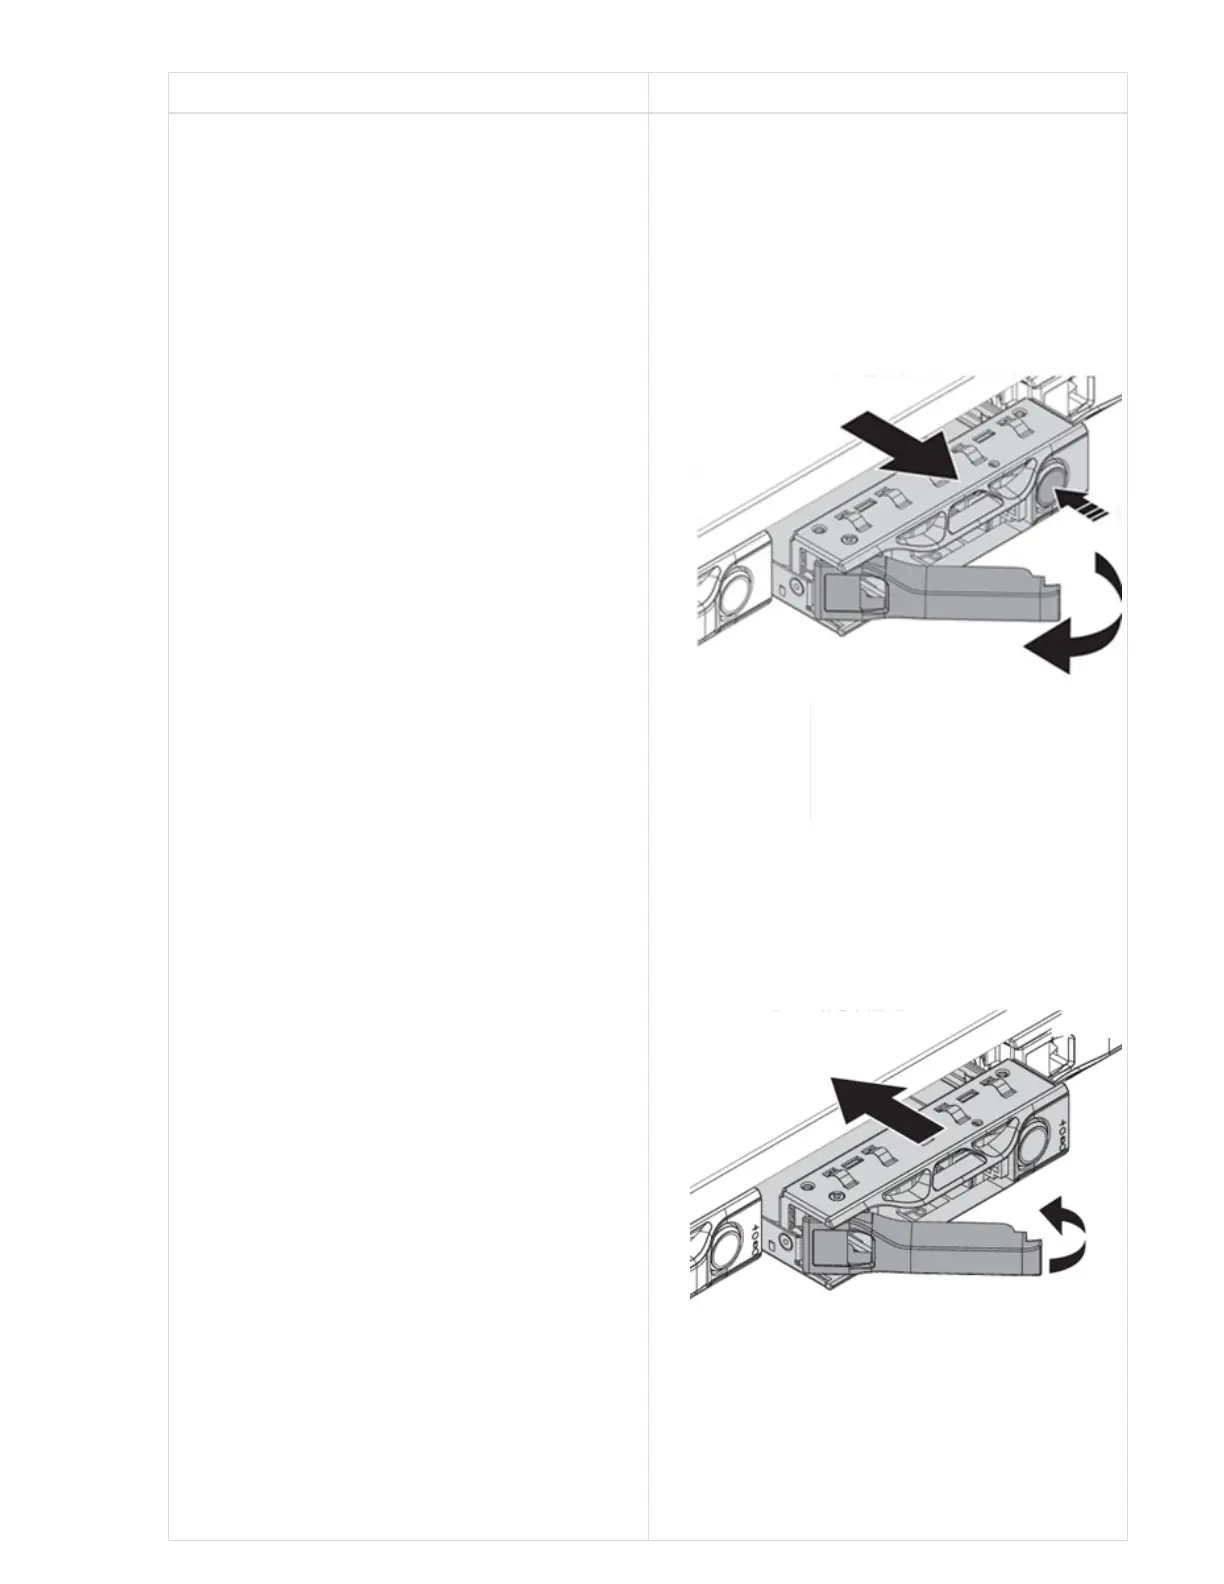
3. Press the release button, and remove the
failed drive as shown in the following
illustration:
Ensure that the tray handle
is fully open before you
attempt to slide the drive
out of the chassis.
4. Slide the drive out, and place it on a static-
free, level surface.
5. Press the release button on the replacement
drive before you insert it into the drive bay.
The drive tray handle springs open.
6. Insert the replacement drive without using
excessive force.
When the drive is inserted fully, you hear a
click.
7. Close the drive tray handle carefully.
Reinstall the bezel.
Notify NetApp Support about the drive
replacement.

Table of Contents

Questions and Answers:

Question and Answer IconNeed help?

Do you have a question about the NetApp HCI and is the answer not in the manual?

NetApp HCI Specifications

General IconGeneral
Product TypeHyperconverged Infrastructure (HCI)
Data ServicesData protection, encryption
Connectivity10 GbE, 25 GbE, 40 GbE, 100 GbE
Hypervisor SupportVMware vSphere
Management NodeIncluded in the solution
Storage MediaSSD and HDD
Node TypesCompute nodes, storage nodes
Storage ProtocolsiSCSI
Data ReductionDeduplication, compression, thin provisioning
High AvailabilityBuilt-in redundancy

Related product manuals