3 Assembly instructions, storage, preparation, installation
B 1000 en-2518 23
3.7 Fitting push-on gear units
NOTICE
Gear unit damage
The bearings, gear wheels, shafts and housing may be damaged by incorrect fitting.
• Observe the assembly instructions.
• The push-on gear unit must be fitted onto the shaft using a suitable puller, which will not exert damaging axial
forces on the gear unit. In particular, do not hit the gear unit with a hammer.
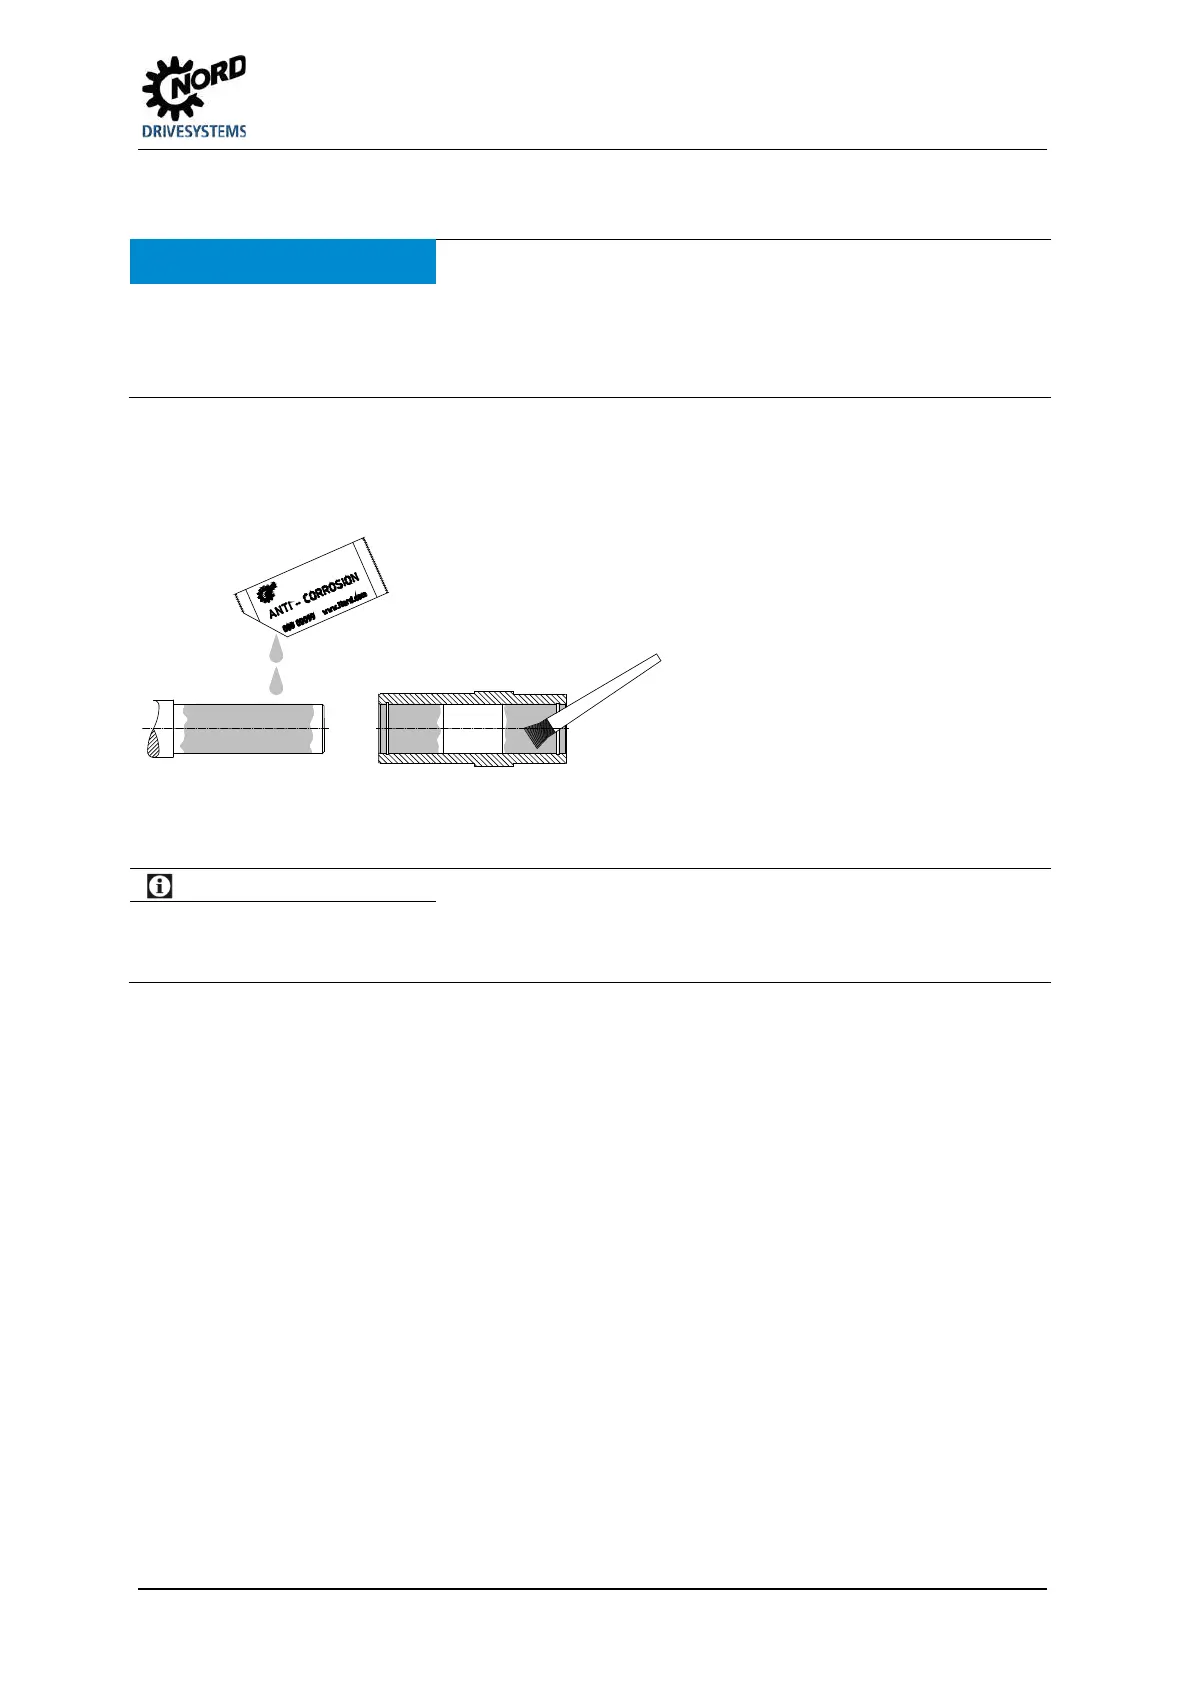
Assembly and subsequent dismantling is aided by applying an anti-corrosive lubricant to the shaft
before fitting (e.g. NORD Anti-Corrosion Part No. 089 00099). Excess grease or anti-corrosion agent
may escape after assembly and may drip off. Clean these points on the output shaft after a running-in
time of approx. 24 hours. This escape of grease is not due to a leak in the gear unit.
Figure 7: Applying lubricant to the shaft and the hub
Information
The gear unit can be fitted to shafts with and without a shoulder using the fastening element (Option B). Tighten
the bolt of the fastening element to the correct torque(please see chapter 6.5 "Torque values"). For gear units
with option H66, the factory-fitted closing cap must be removed before assembly.
For push-on gear units with option H66 and fastening element (Option B) the pressed-in closing cap
must be pushed out before fitting the gear unit. The pressed-in closing cap may be destroyed during
dismantling. As standard a second closing cap is supplied as a loose spare part. After fitting the gear
unit, fit the new / new condition closing cap as described in Section3.9 "Fitting the covers".
135



 To Next Page