Page 58/106 GEO S12 HARDWARE SETUP PROCEDURE
IMPORTANT
GEO S12 can be flown “Up” or “Down”:
- “Up” means Nexo logo on front grid is at the top;
- “Down” means Nexo logo on front grid is at the bottom.
GEO S12 can be connected “Up” or “Down” by simply flipping the cabinets.
Whenever possible, NEXO recommends symmetrical designs (ie Nexo logo in the same
position on Left and Right clusters for stereo designs)
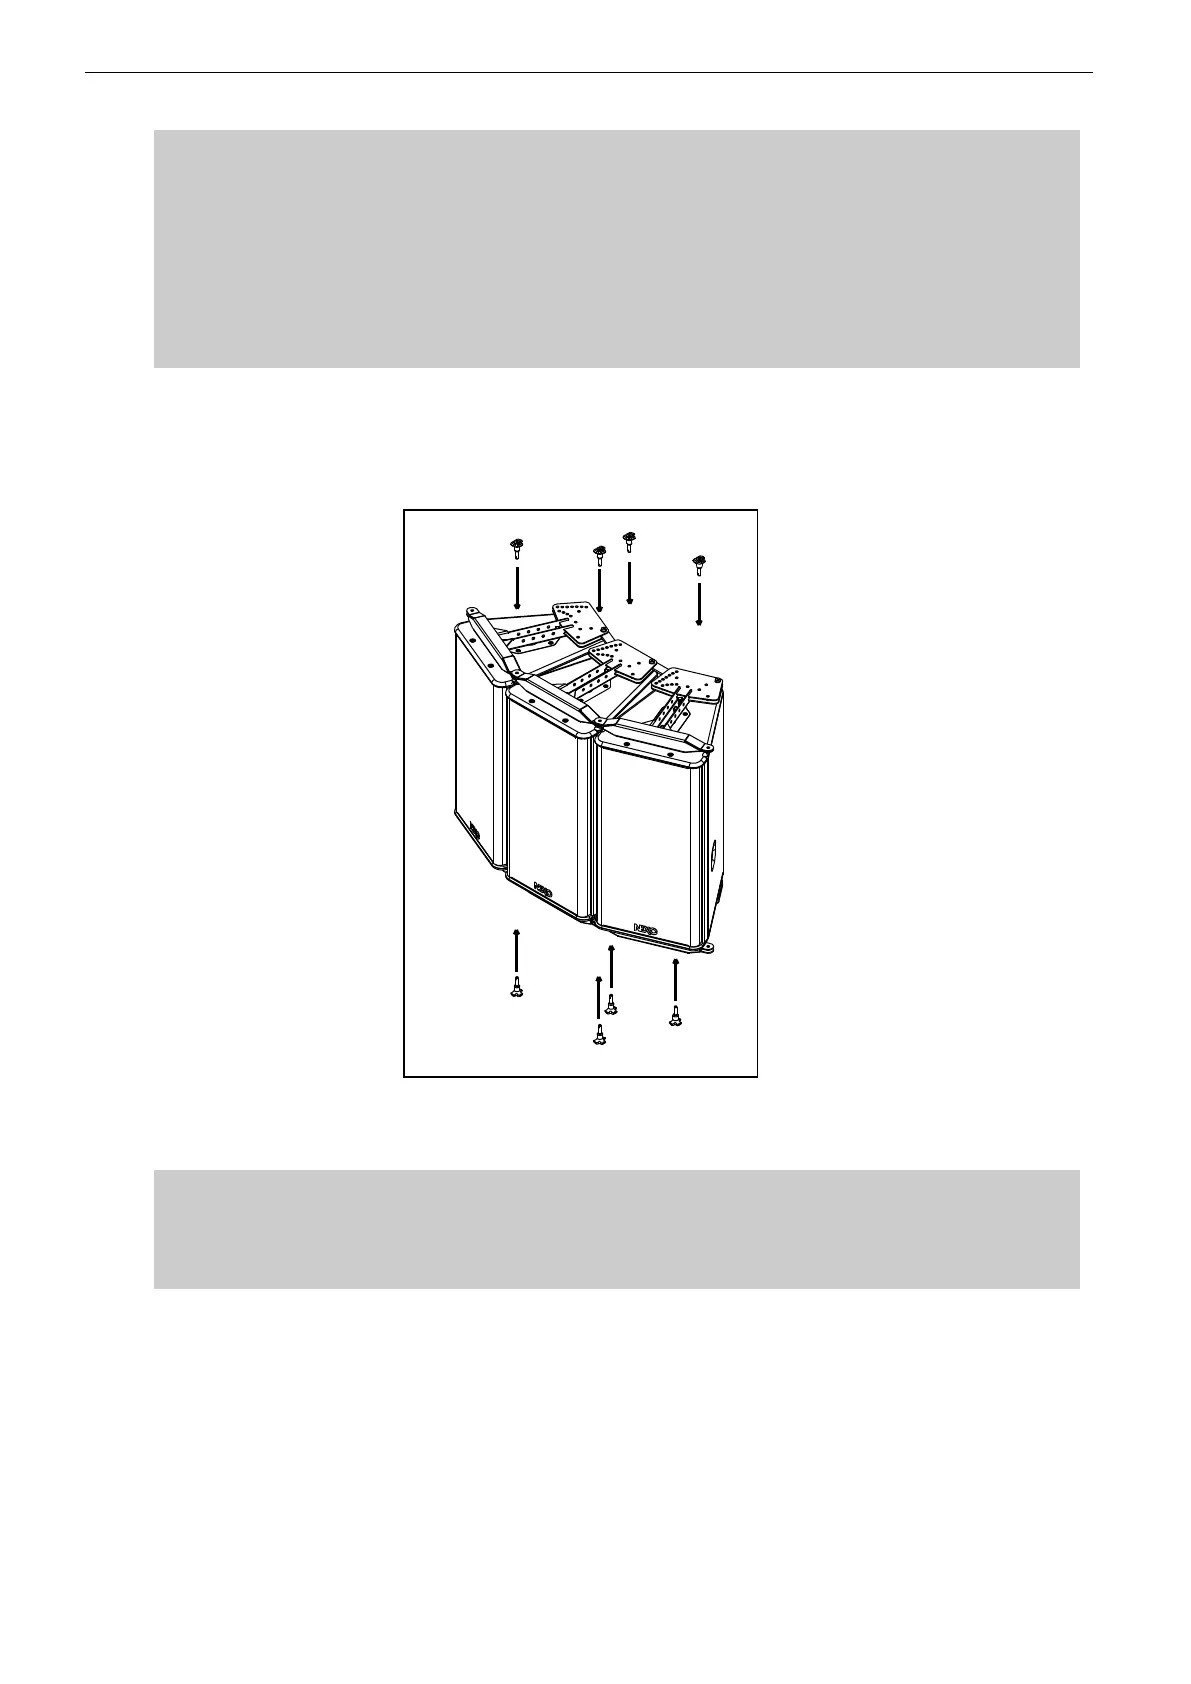
Connect second Geo S12 with X-Bow front articulation holes and rear link bars and
ensure quick release pins are properly locked;
Repeat above steps for subsequent GEO S12’s;
IMPORTANT
Ensure angle settings are identical on upper and lower side of the cabinets
Ensure that safety pins are properly locked into GEO S12s connecting panels.
Ensure that all quick release pins are properly locked into their position.
Connect lifting rings to “U” bracket with 8x45 quick release pins supplied with VNT-
XHBRK; ensure quick release pin is properly locked;