Chapter 4 Setting Up the Microscope
4.2 Setup Procedure
2-32
3
Attach the field diaphragm unit.
C
A
U
T
IO
N
–
C
L
A
S
S
3
B
L
A
S
E
R
R
A
D
I
A
T
IO
N
W
H
E
N
O
P
E
N
A
V
O
I
D
E
X
P
O
S
U
R
E
T
O
T
H
E
B
E
A
M
V
O
R
S
IC
H
T
–
L
A
S
E
R
S
T
R
A
H
L
U
N
G
K
L
A
S
S
E
3
B
,
W
E
N
N
A
B
D
E
C
K
U
N
G
G
E
Ö
F
F
N
E
T
N
I
C
H
T
D
E
M
S
T
R
A
H
L
A
U
S
S
E
T
Z
E
N
Figure 4.2-4
1. Remove the rubber cap on the left side of the
microscope.
2. Insert the field diaphragm unit.
3. Tighten the locking screw using an Allen wrench,
and secure the field diaphragm unit.
4
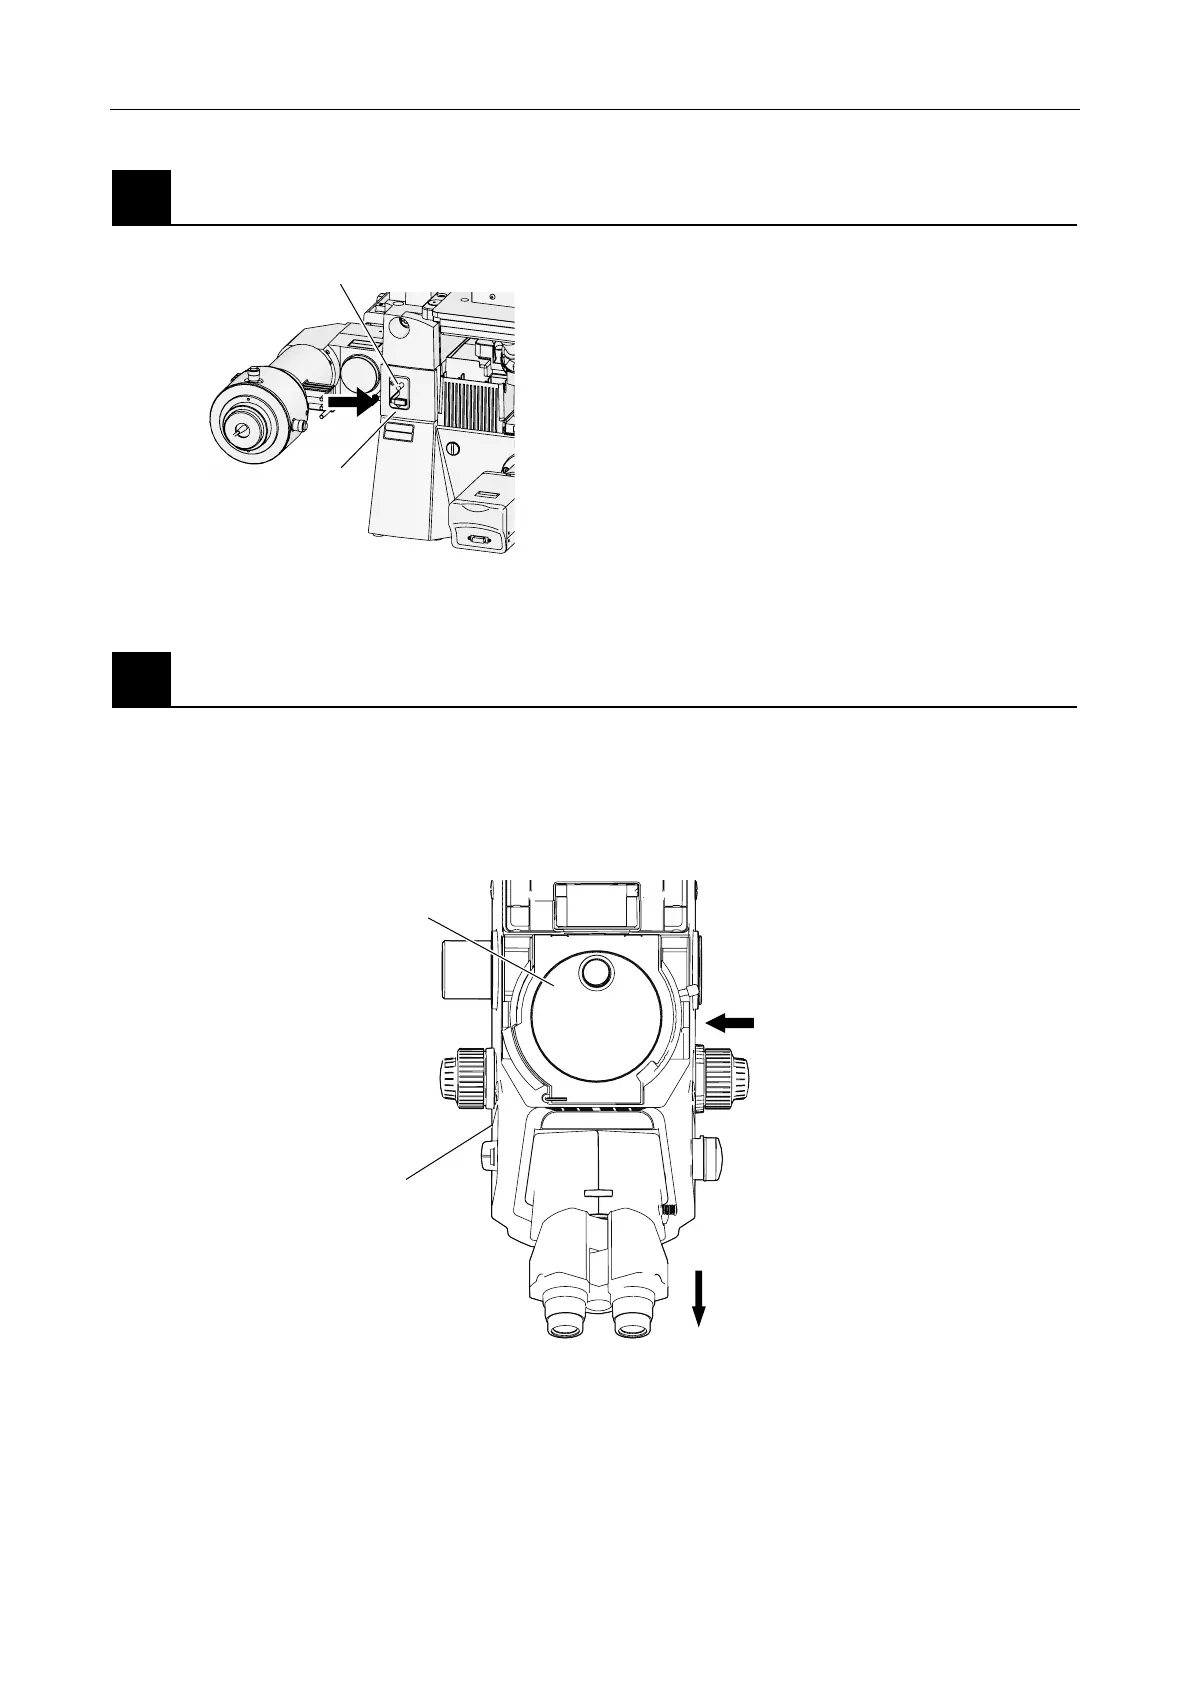
Attach the epi-fl filter turret.
Attach the epi-fl filter turret to the microscope main body.
Insert the epi-fl filter turret along the attachment groove from the right side of the microscope and
secure with screws on the left and right. (Use an Allen wrench. Note that the screws should be
tightened after the filter cube port cover is removed.)
Figure 4.2-5
When using the epi-fl filter turret in combination with the Ti-E or Ti-E/B, the protection plate (for
nosepiece) must be installed between the epi-fl filter turret and the nosepiece.
* For installation procedure, see Section 4.2.2, “Attaching the Laser Safety Kit.”
Filter cube port (and its cover)
Epi-fl filter turret
Front side
Insert from right
Field diaphragm unit
Locking scre