Chapter 4 Setting Up the Microscope
4.2 Setup Procedure
1-75
1
Attach the light source (TIRF illuminator unit, motorized TIRF illuminator unit, or photo
activation illuminator unit).
Figure 4.2-1
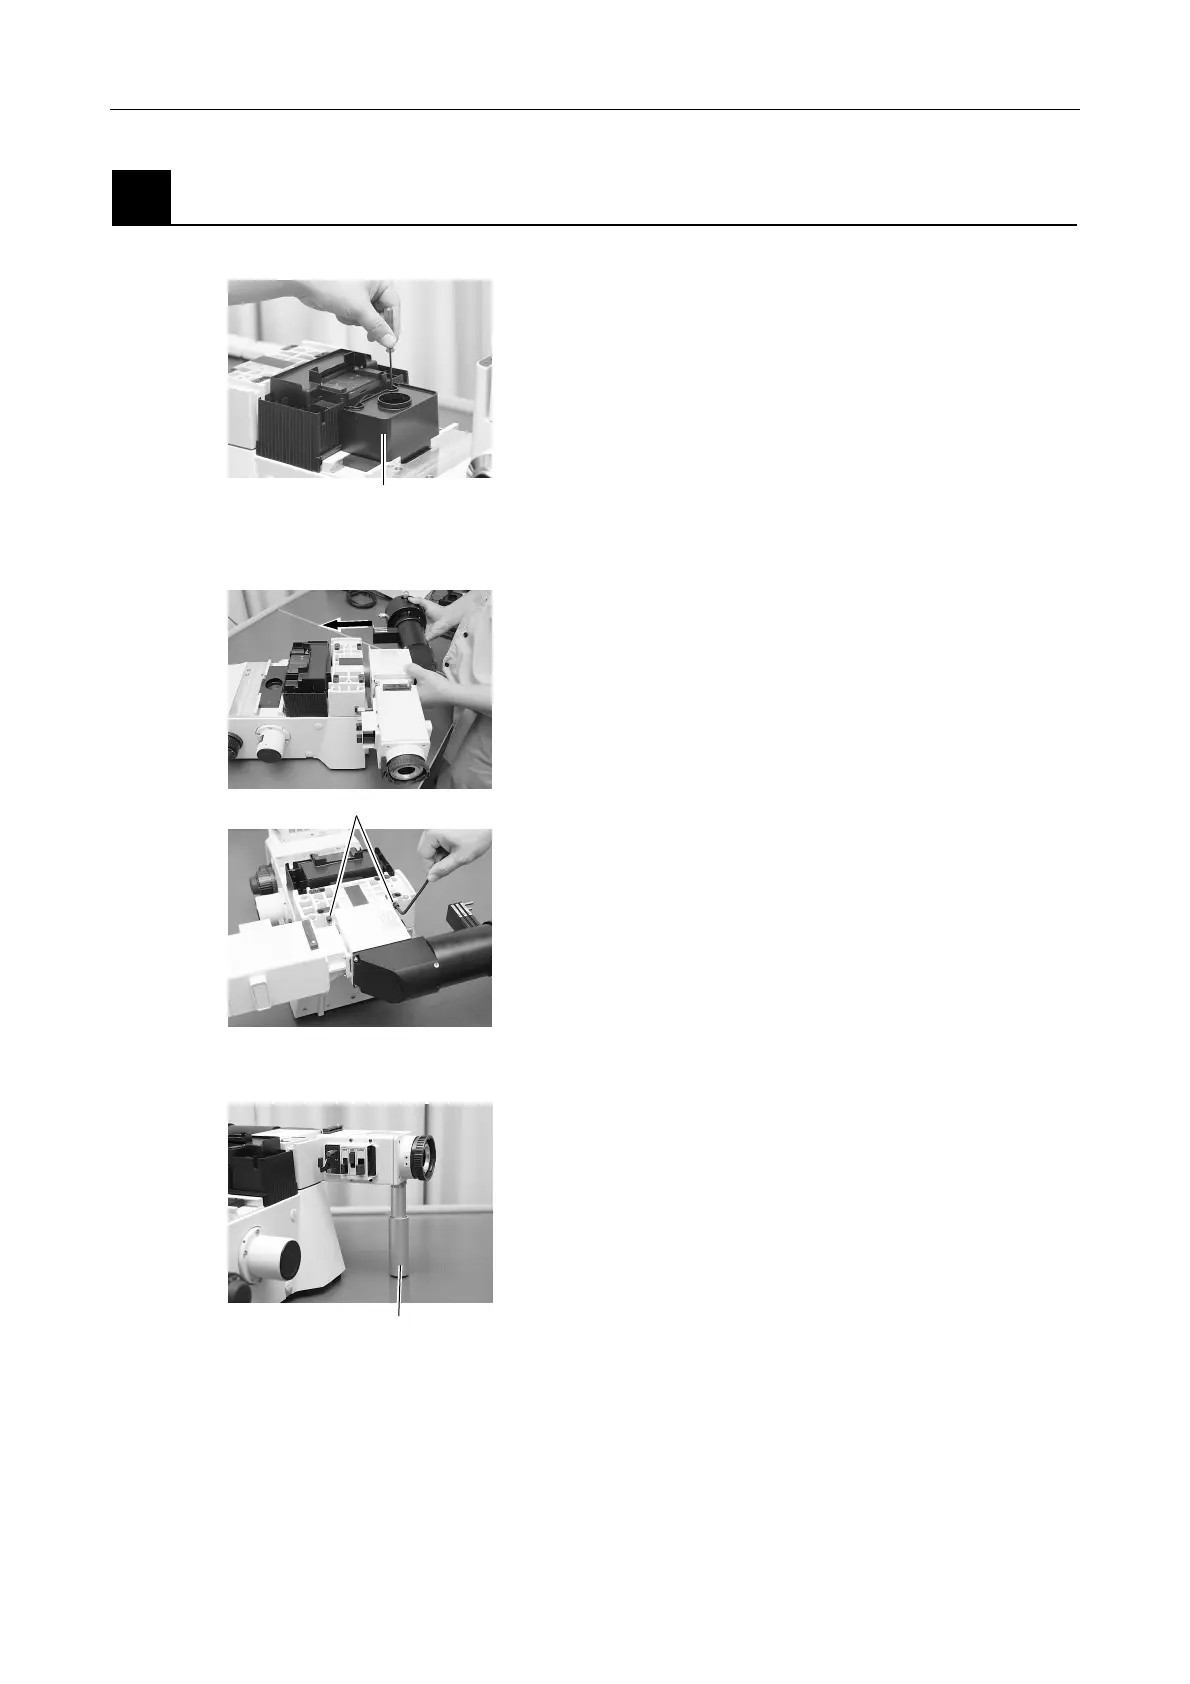
1. Remove the black cover on the center of the
microscope base.
(1) Using an Allen wrench, remove the two
screws securing the black cover.
(2) Remove the black cover.
2. Attach the light source (TIRF illuminator unit,
motorized TIRF illuminator unit, or photo
activation illuminator unit) to the microscope main
body.
(1) Insert the light source into the guide on the
back of the microscope main body.
Figure 4.2-2
(2) Secure the light source by tightening the 4
clamp screws using the Allen wrench.
Figure 4.2-3
3. Attach the support pillar to the light source.
(1) Use an Allen wrench to loosen the clamp
screw securing the support pillar so that the
sliding part at the end slides freely.
(2) Screw the support pillar into the mounting
hole on the bottom of the light source to
attach it.
(3) Adjust the length of the support pillar so that
its tip touches the installation surface, and
then tighten the clamp screw with the Allen
wrench to secure it.
Remove the black cover
Support pilla
Insert the light source
Four clamp screws