Chapter 4 Setting Up the Microscope
4.2 Setup Procedure
1-76
Figure 4.2-4
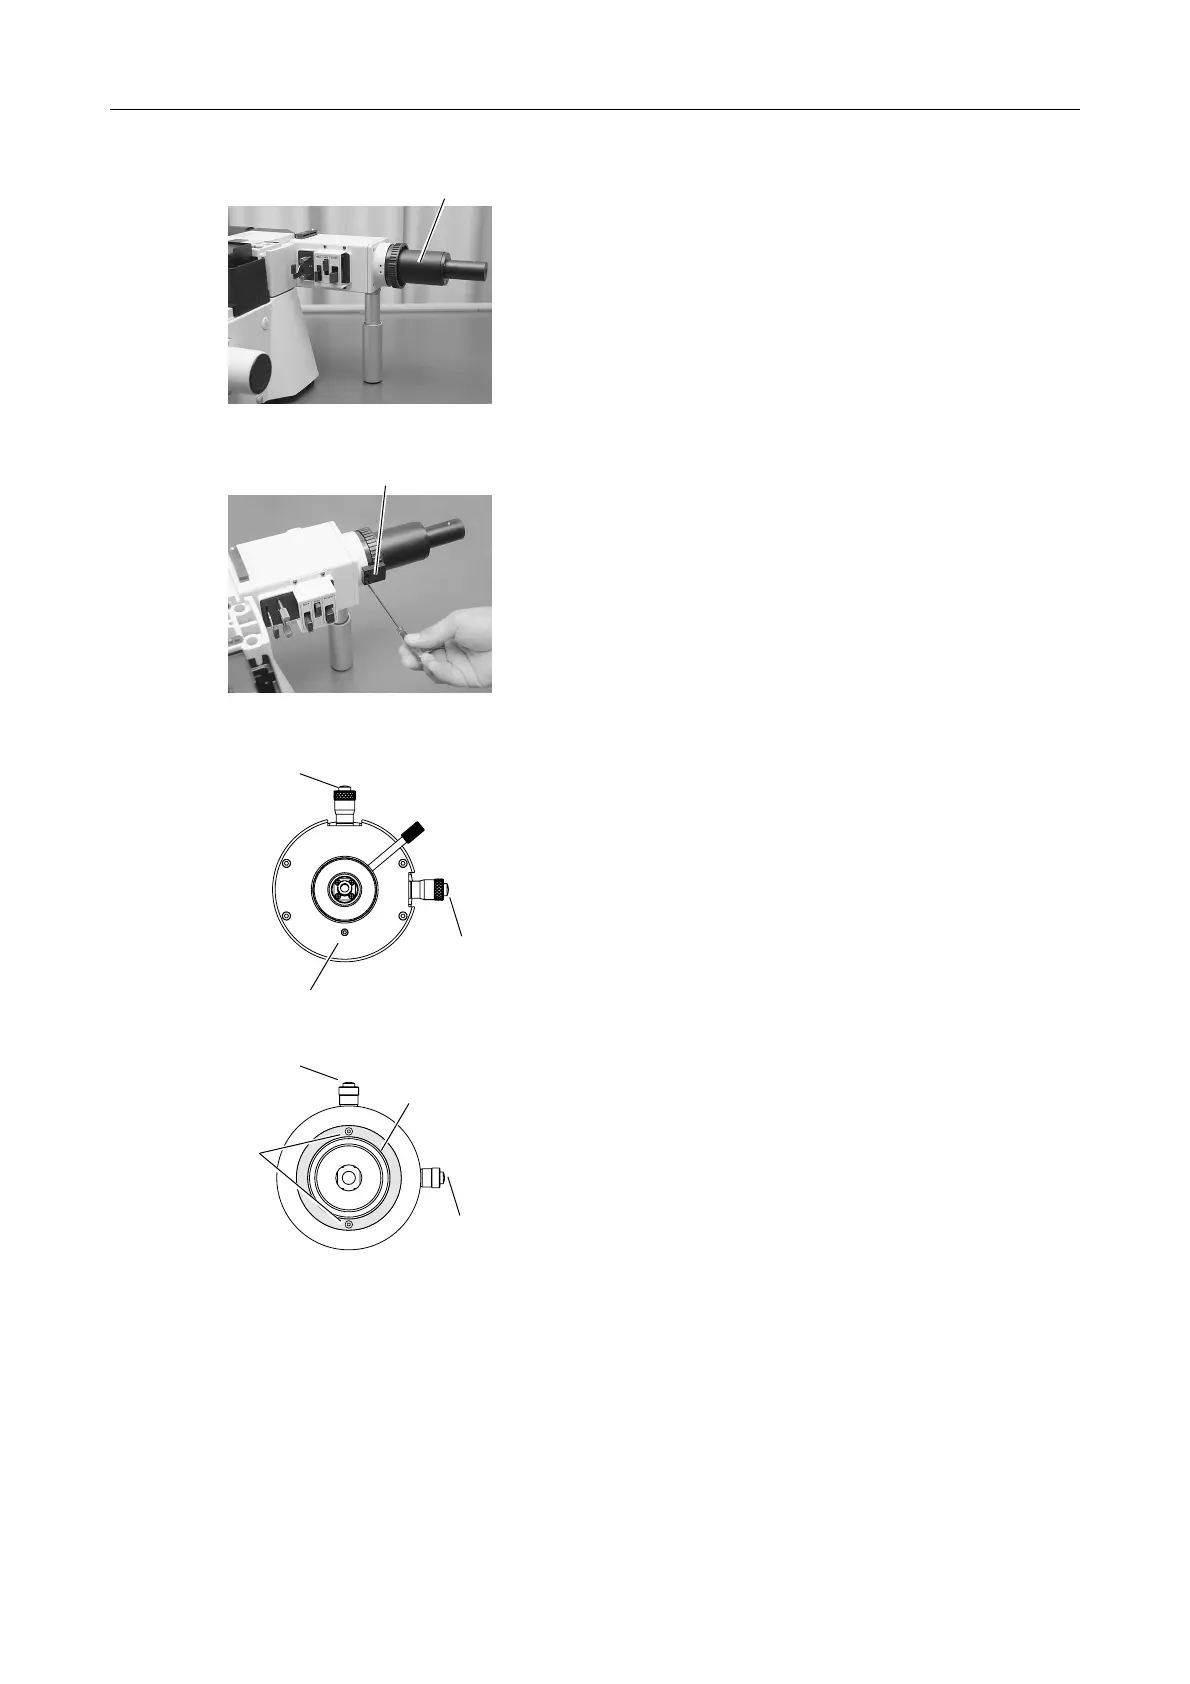
4. Connect the mercury episcopic light source
adapter (or mercury lamphouse) to the episcopic
light-source port (bayonet ring)
Connect the episcopic light source on the side
where you attached the support pillar in step 3.
For details about attaching the light source, see
the instructions of your mercury lamp power
supply or super-high pressure mercury lamp
power supply.
Figure 4.2-5
5. Attach the clamping hardware to the episcopic
light-source port.
Secure the clamping hardware by tightening the
two clamp screws using the Allen wrench.
The clamping hardware is provided to prevent the
PA-GFP irradiation attachment from being
removed by mistake. Be sure to attach the screw
for laser safety.
Laser connection port (TI-PAU)
Laser connection port (TI-TIRF)
Figure 4.2-6
6. Remove the anchor on the laser side.
The laser position adjusting mechanism comes
equipped with an anchor for transportation. Be
sure to remove the anchor before turning the
laser position adjustment knobs.
Attempting to turn either of the knobs without
first removing the anchor may cause the
mechanism to malfunction.
(1) For TI-PAU:
The two laser position adjustment knobs are
loosened before transportation. Turn both
knobs gently clockwise until you feel
resistance, and then remove the anchoring
bolt.
(2) For TI-TIRF/TI-TIRF-E
The two laser position adjustment knobs are
loosened before transportation. Tighten both
knobs by turning them gently clockwise until
you feel resistance. Then, extract the two
locking screws and remove the brass
anchor ring.
Clamping hardware
Laser position
adjustment knob
Laser position
adjustment knob
Anchoring bolt
Mercury episcopic light source adapter
Laser position
adjustment knob
Laser position
adjustment knob
nchoring ring
Two clamping
screws