175Menu Guide > C The Photo Shooting Menu
Choose how new photos will be processed. For more
information, see “Set Picture Control” (0 91).
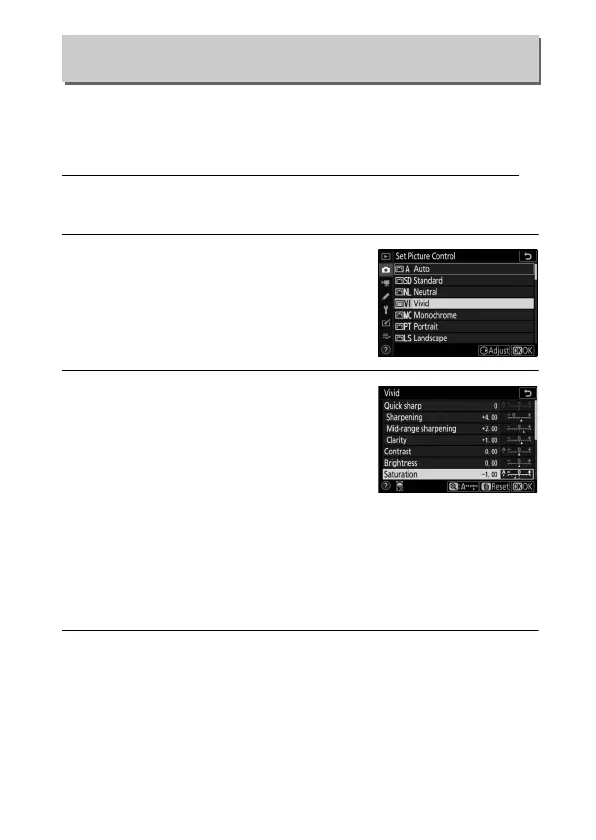
Set Picture Control: Modifying Picture Controls
Existing preset or custom Picture Controls can be modified to
suit the scene or the user’s creative intent.
1 Select a Picture Control.
Highlight the desired Picture Control
in the Picture Control list and press 2.
2 Adjust settings.
Press 1 or 3 to highlight the desired
setting and press 4 or 2 to choose a
value in increments of 1, or rotate the
sub-command dial to choose a value
in increments of 0.25 (the options
available vary with the Picture Control selected). To quickly
adjust levels for balanced Sharpening, Mid-range
sharpening, and Clarity, highlight Quick sharp and press 4
or 2. Repeat this step until all settings have been adjusted.
Default settings can be restored by pressing the O button.
3 Save changes and exit.
Press J to save changes and return to the Picture Control list.
Set Picture Control
G button ➜ C (photo shooting menu)